Upcoming cosplay builds
Vax (Legend of Vox Machina)
ETA: MegaCon January
Sam Vimes
ETA: MegaCon January
Aloy - Nora Protector Medium
ETA: MCM May
Aloy - Carja Behemoth Trapper
ETA: Late 2025 (hopefully!)
Upcoming events
MegaCon London (weekend) January 2025
MCM May (weekend) May 2025
Fantasy Forest (saturday) July 2025
MegaCon Manchester (weekend) July 2025

Completing the armour

TLDR; I’ve completed all the armour pieces! I’ve also made 3 of 4 pouches, taken a holiday and begun priming the armour.
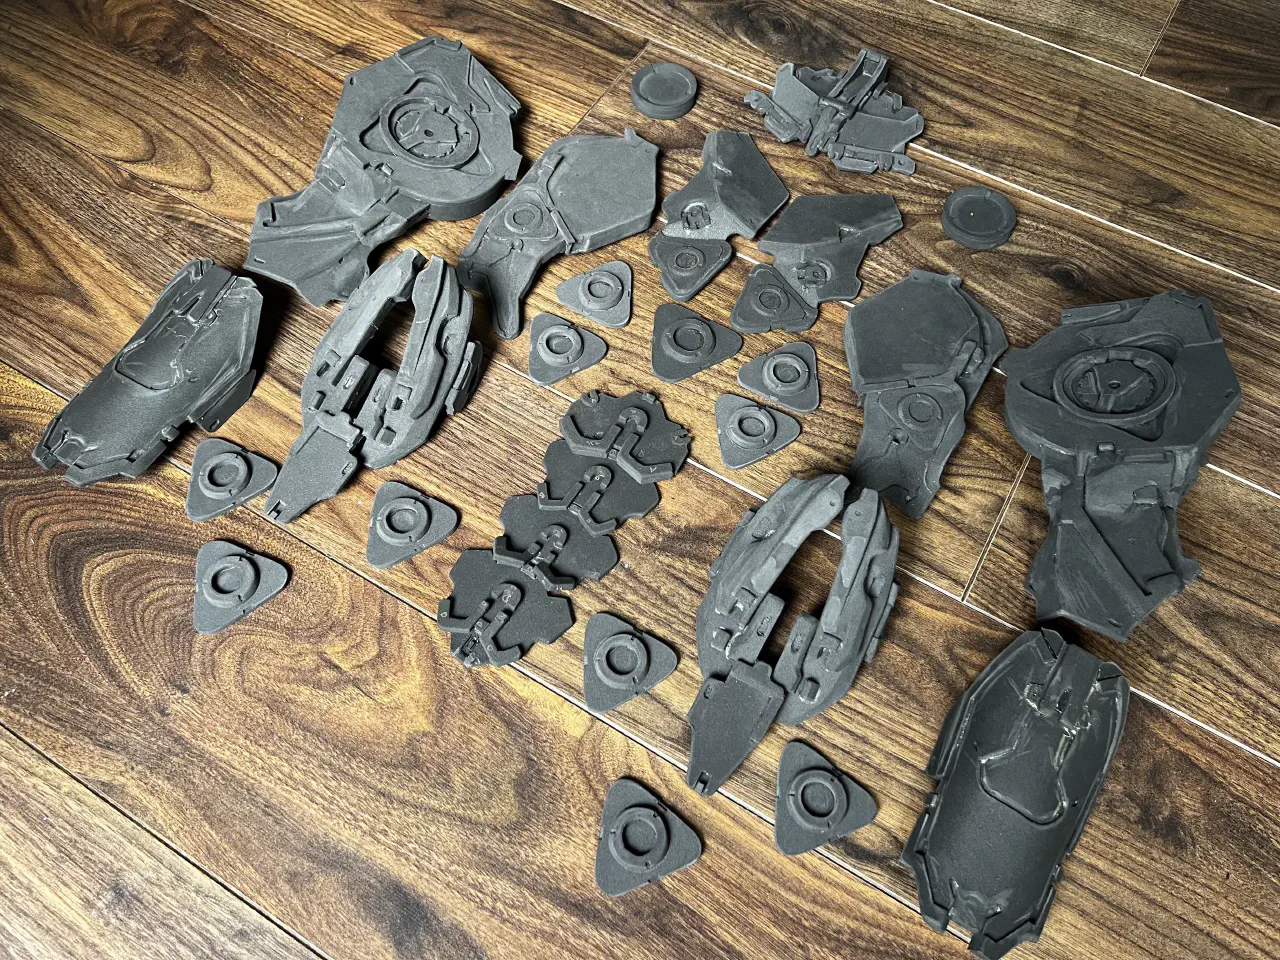
All of the pieces of armour placed together on a wooden floor.

All of the armour, completed!

Finishing off the headpiece!
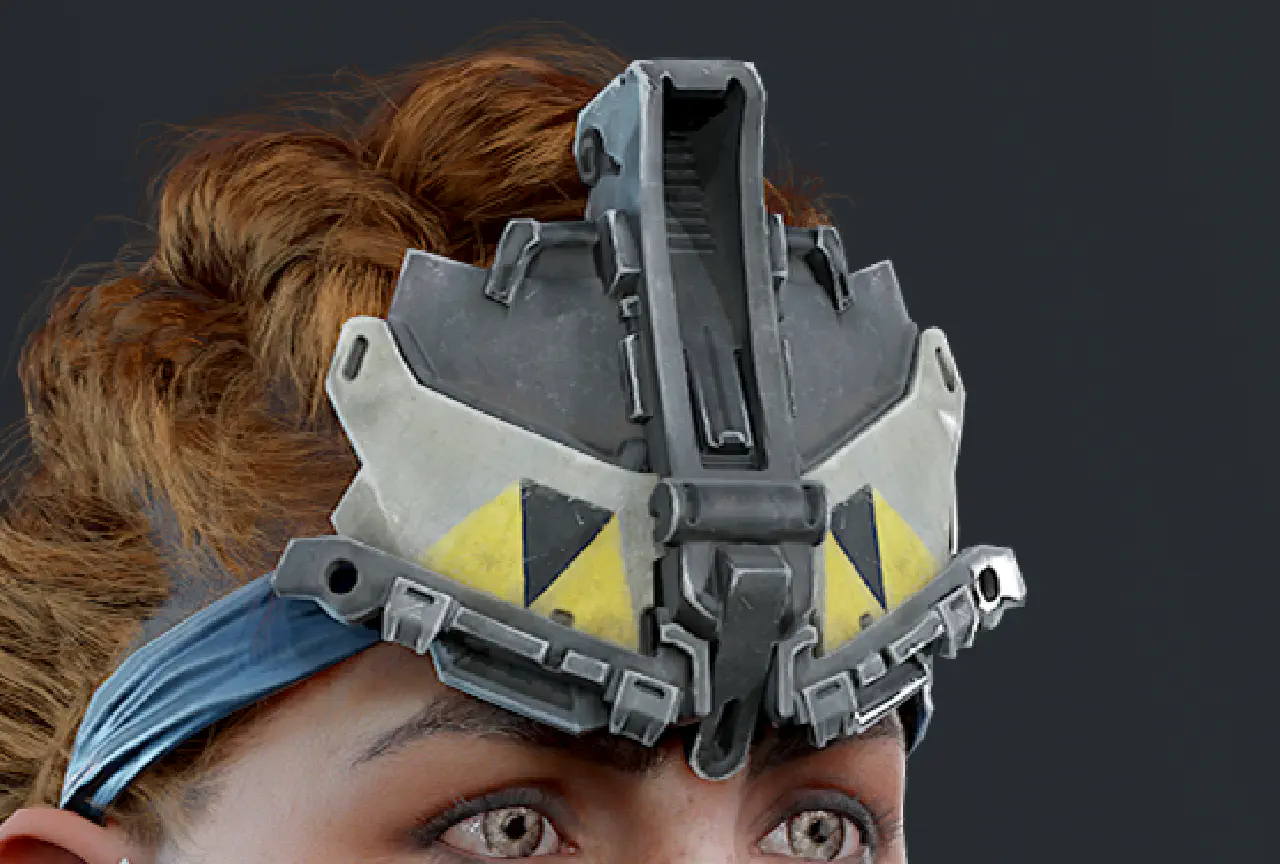
A rendering of the headpiece on Aloys head.

It’s finally done! I did rip it apart and re-glue it a few times but it looks pretty good - you can only notice how wonky it is if you really stare at it. I have a feeling this will be something I’ll remake later down the line when I’m not panicking about getting everything finished!

Finishing off the arm-our
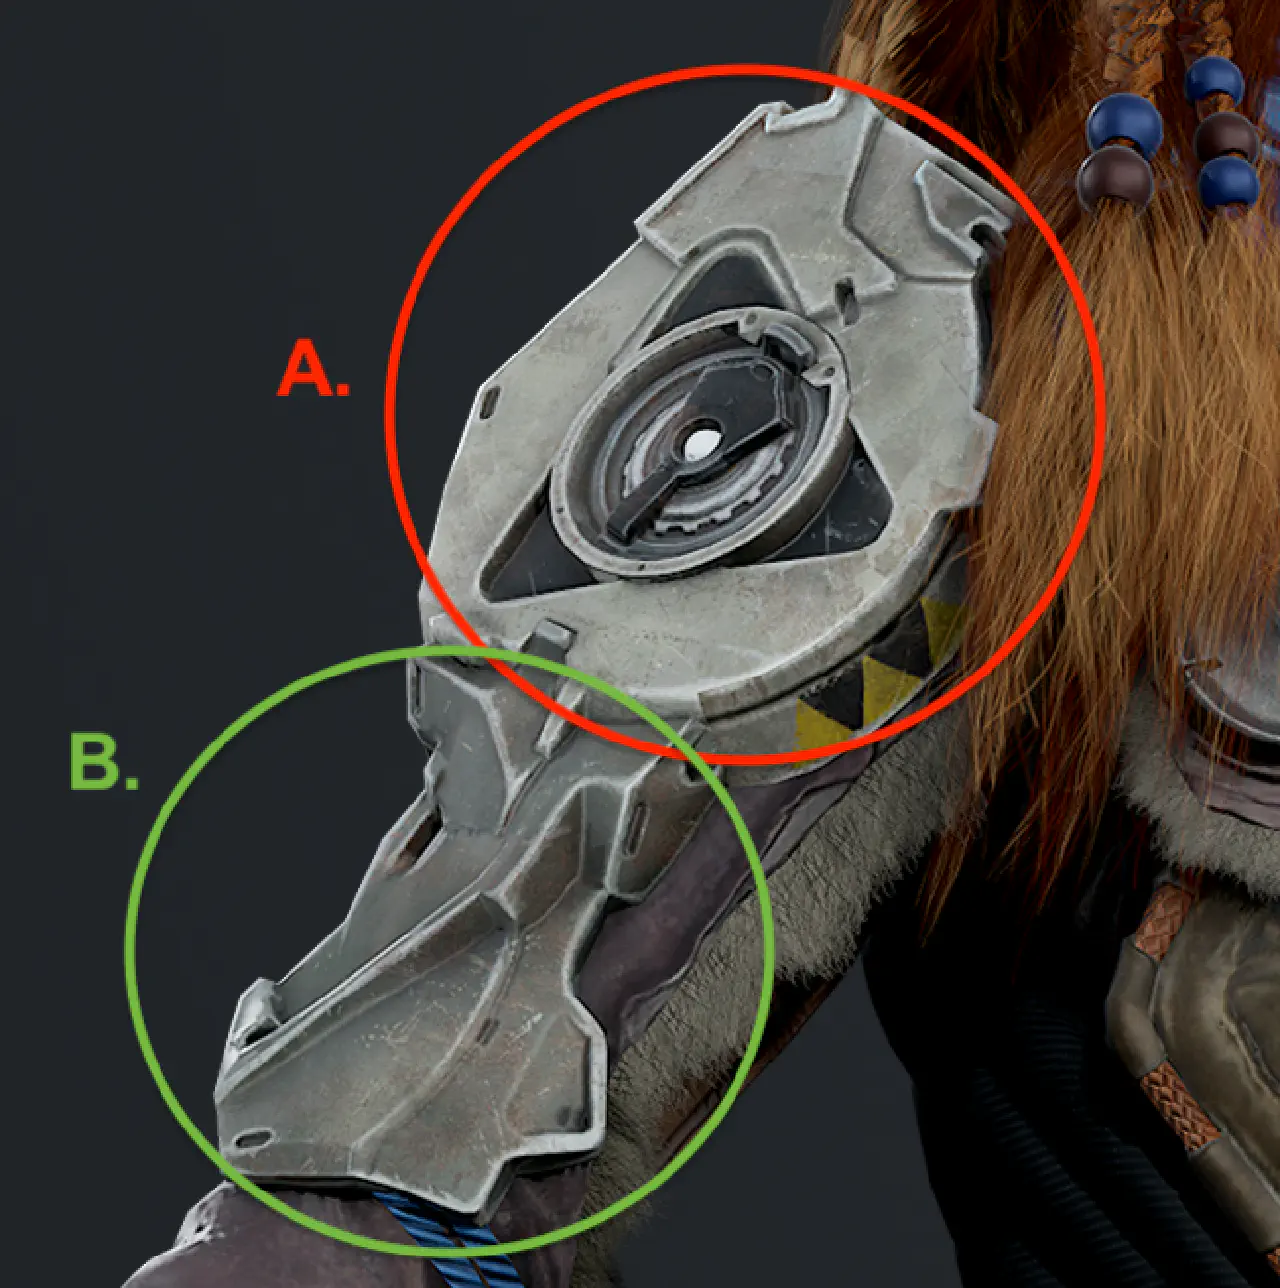
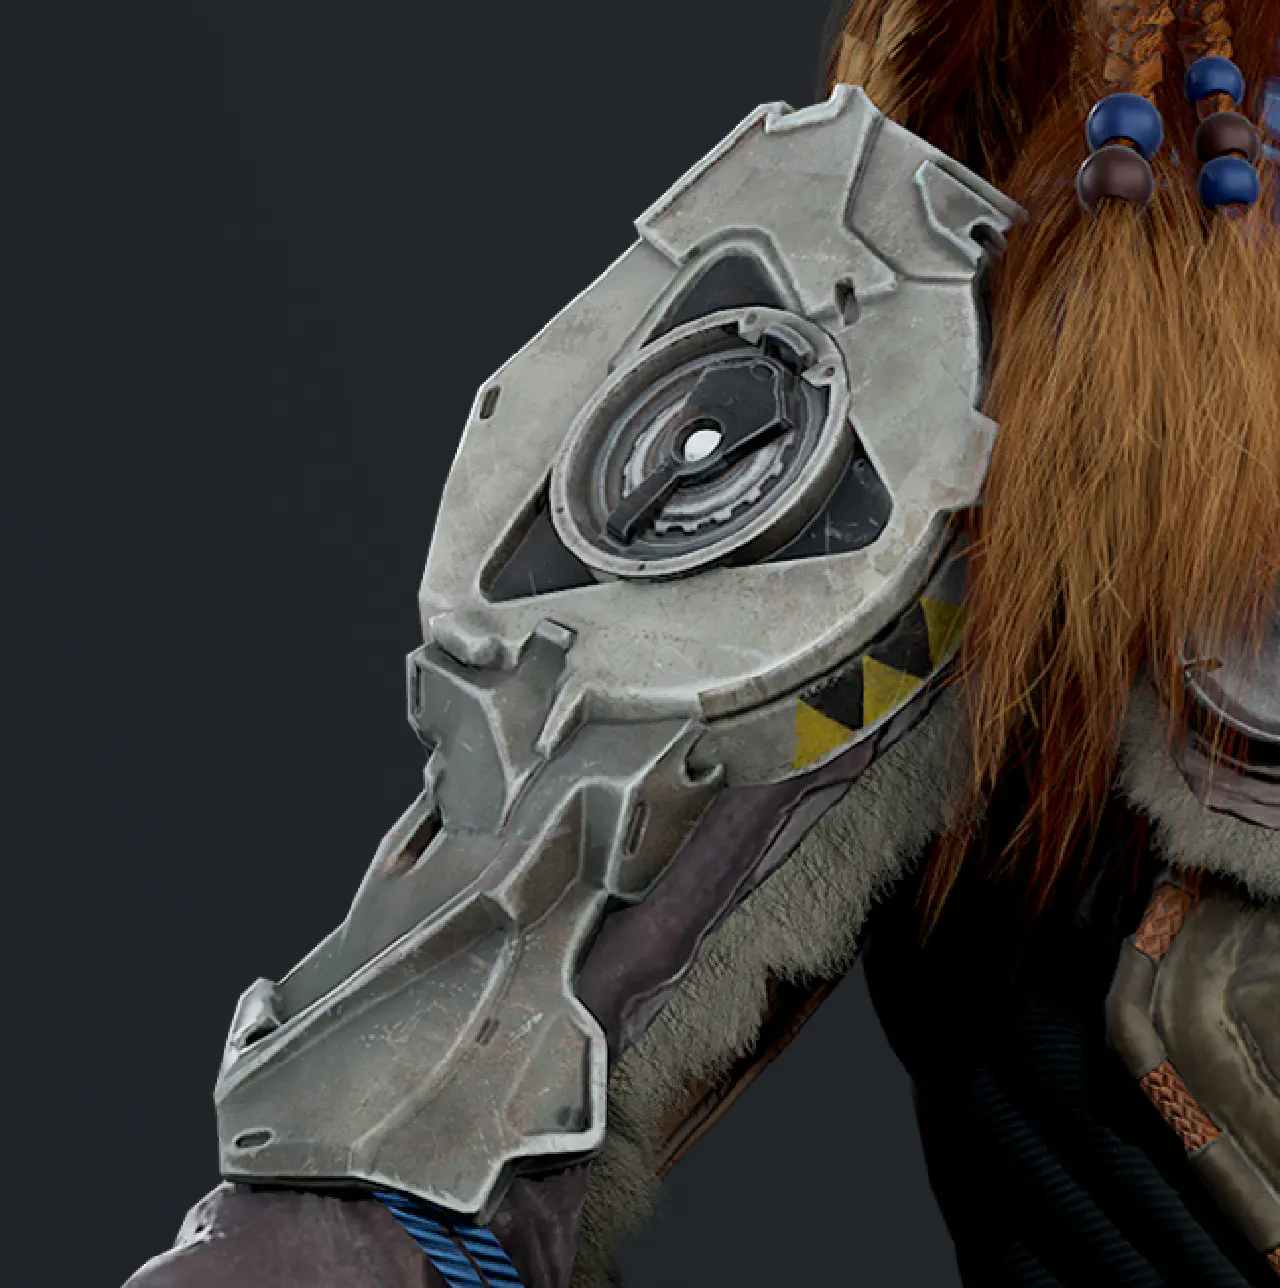
A rendering of Aloys right arm covered by a complex piece of machine. The top half is surrounded by a circle labelled A. with the bottom half surrounded by a circle labelled B.

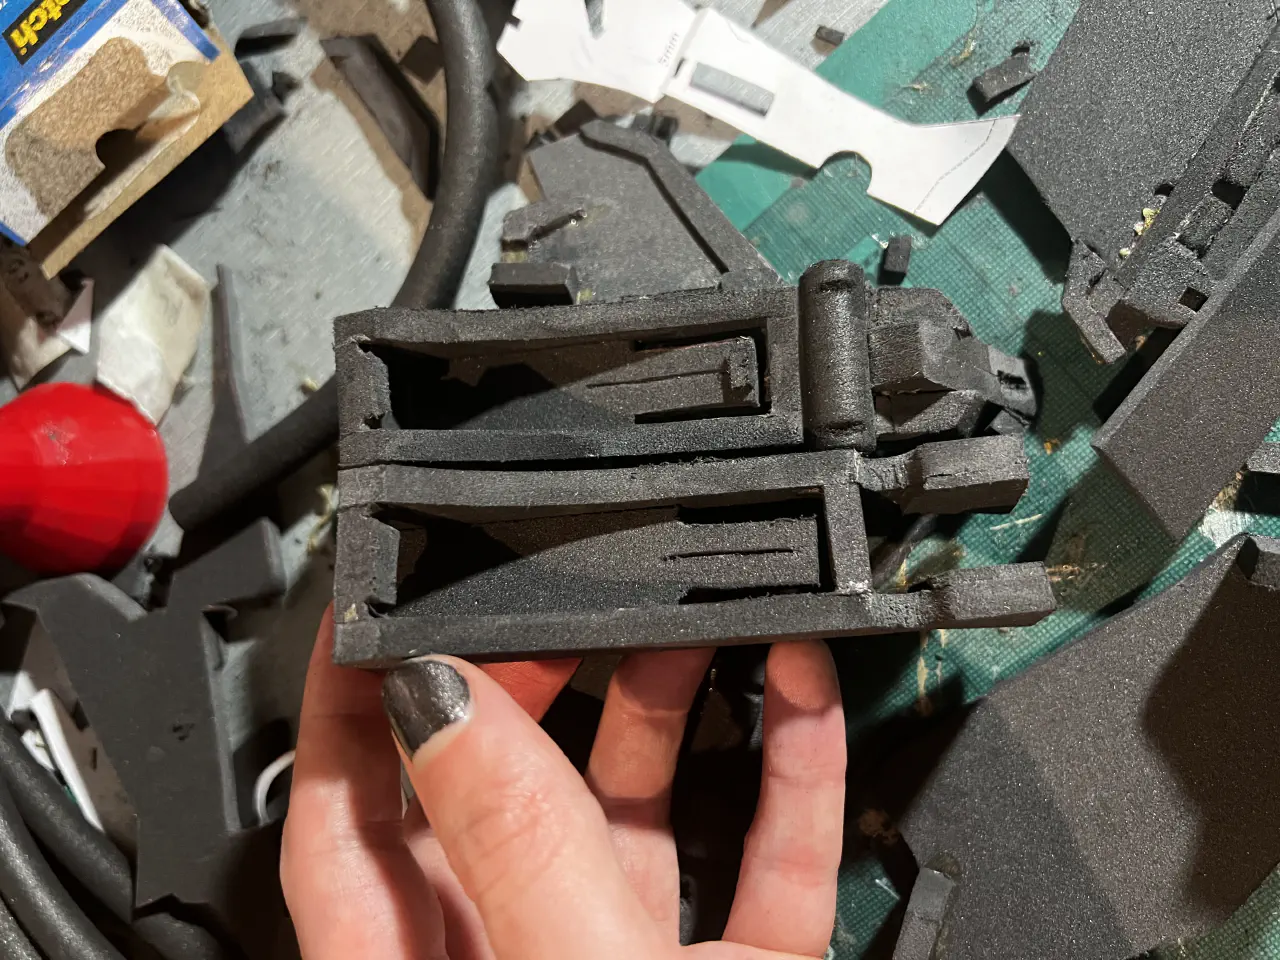
Part A of the armour wasn’t too difficult to put together, though after it was complete I noticed quite a few holes. This was solved in the most technical manner: getting foam off cuts, trimming to size and then stuffing them in the hole with some glue! Smaller gaps or things that I just didn’t like the look of were patched up using the ever useful foam clay.

The circular sections are a bit wonky, but again I run into the issue that cutting circles in foam is difficult to get right! Foam clay was used to clean up gaps from my less than perfect shaping with a dremmel to get a better fit.

Part B involved me going back and designing a whole new set of templates, this time with better measurements. I used more layers than my initial design, which meant I was able to get more complex shapes with less effort (but I now have layer lines). I was trying to avid this as it can introduce gaps between the layers, but given how well foam clay is working for patching up I decided to chance it. As expected lots of foam clay was used to patch things up, as well as acting as strengthening for the angled parts as I’d made the bevels too shallow.
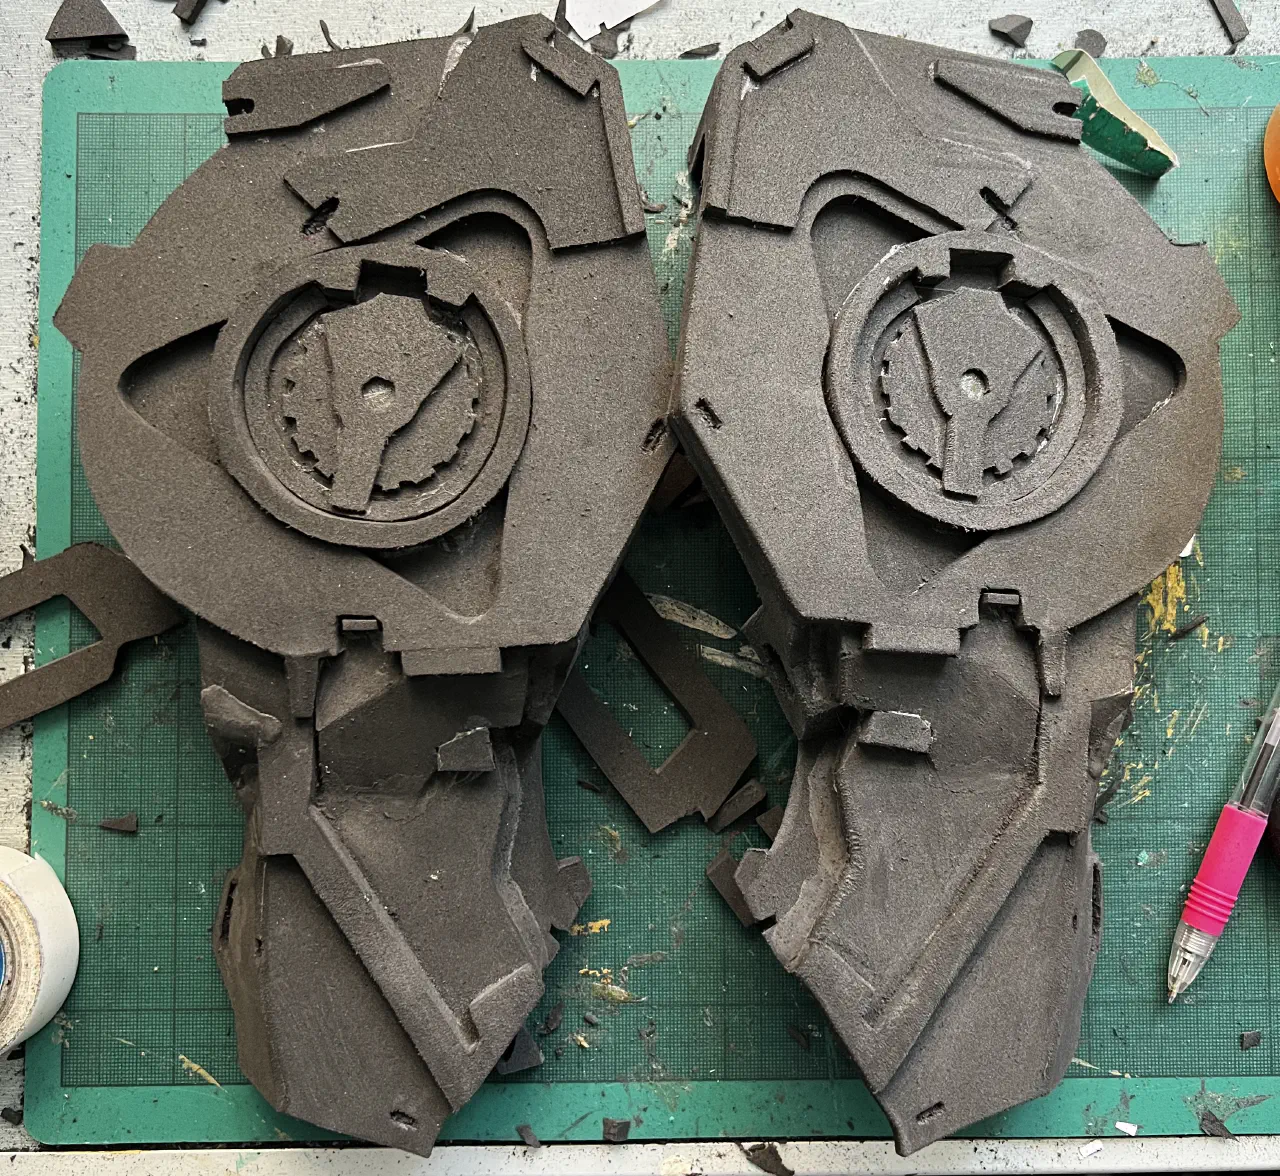
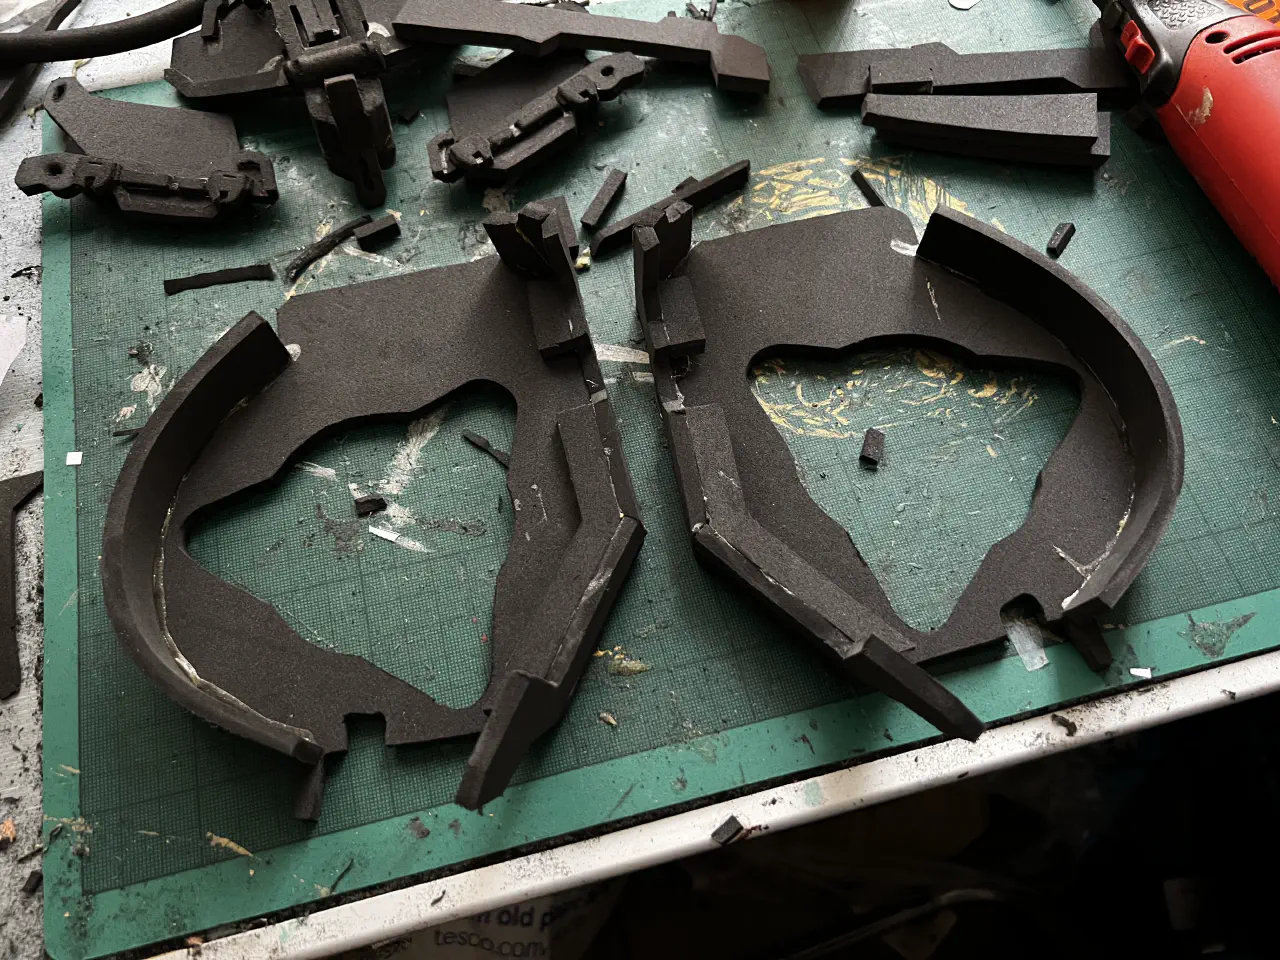
Two side-by side of arm armour, completed and resting on a tabletop.

The armour, pre-sanding for completion. I’ve actually missed a small bit out near where the notch is on the centre circle in this picture but I forgot to take pictured of the fixed one!

I’m so happy how these came out, they were the most complex thing to get right and whilst I can see some inaccuracies they’re close enough for cosplay purposes.

The bow

A picture of a Carja warbow.

I’ve made progress on the template but there’s still more to do. I’ve ordered some 10mm foam as from the meaurements there’s going to be a fair bit of layering needed (up to 40mm in some places, that’d be 8 layers(!) of 5mm foam). Whilst I can do that with 5mm, it get messy for anything beyond 15mm (3 layers).

Pouches and quiver

Aloy has a few pouches on her belt, and since I had time to spare before my holiday, I quickly worked up some templates and cut them out of some thick brown faux leather I had from another project. Apart from getting one pouch wrong twice (and in different ways too!) they came together well. I’ve also pressed the seems using an iron to given them more defined edges.
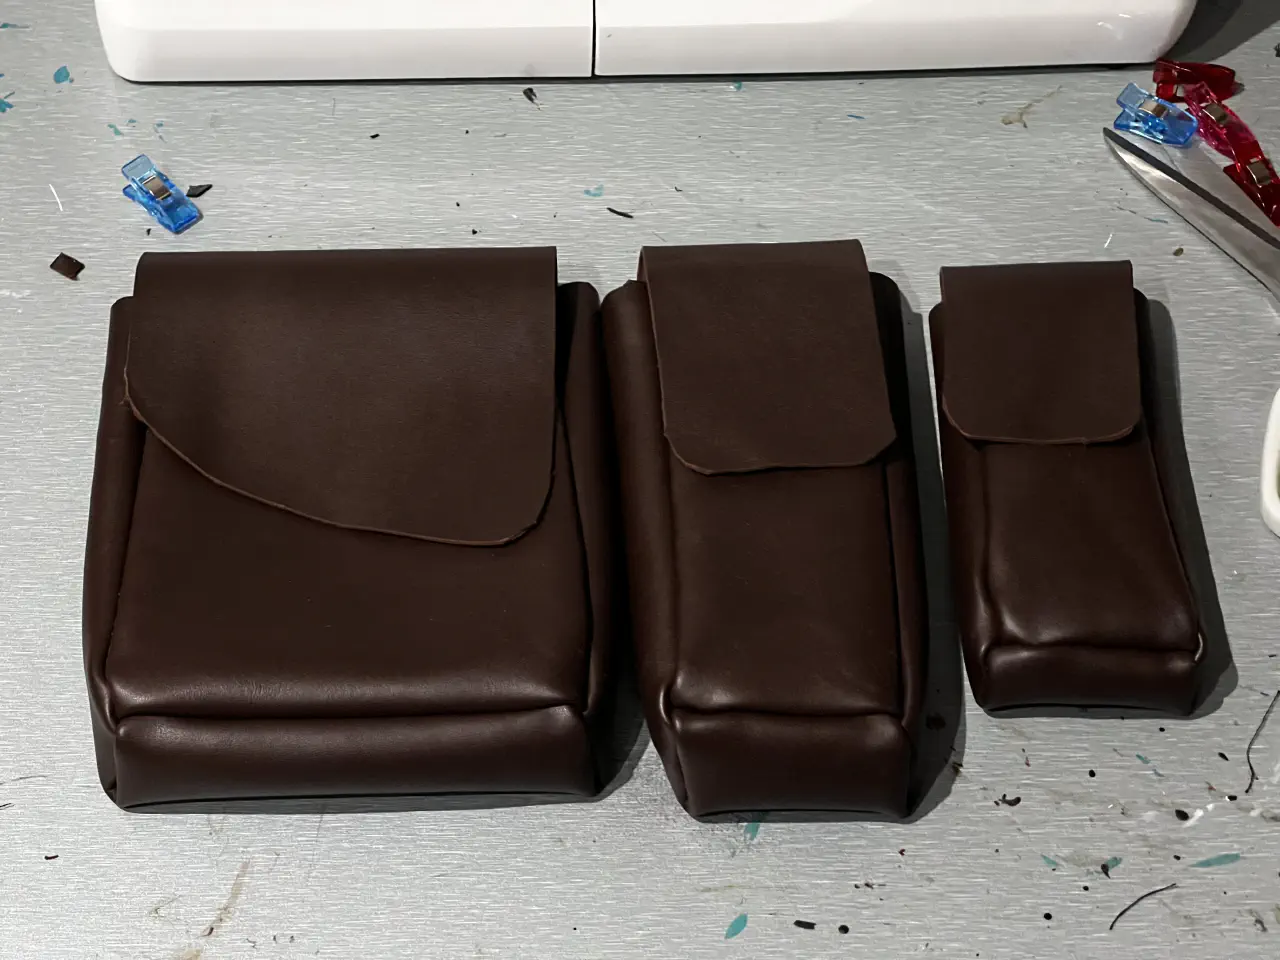
One thick and two thin pouches made of brown faux leather next to each other on a table.

With these, and the quiver I’ve also made, they just need detailing which is mostly stitching and a small bit of foam detailing for the larger of the two thin pouches.

Priming

Priming the various parts was the first major test of my airbrush and I absolutely love the thing! I’m using the HexFlex primer1 from Poly-props, watered down with some Liquitex Airbrush Medium. I flew through the armour pieces once I’d got the technique and consistency right2 and even managed to get the skirt flaps done in the evening.
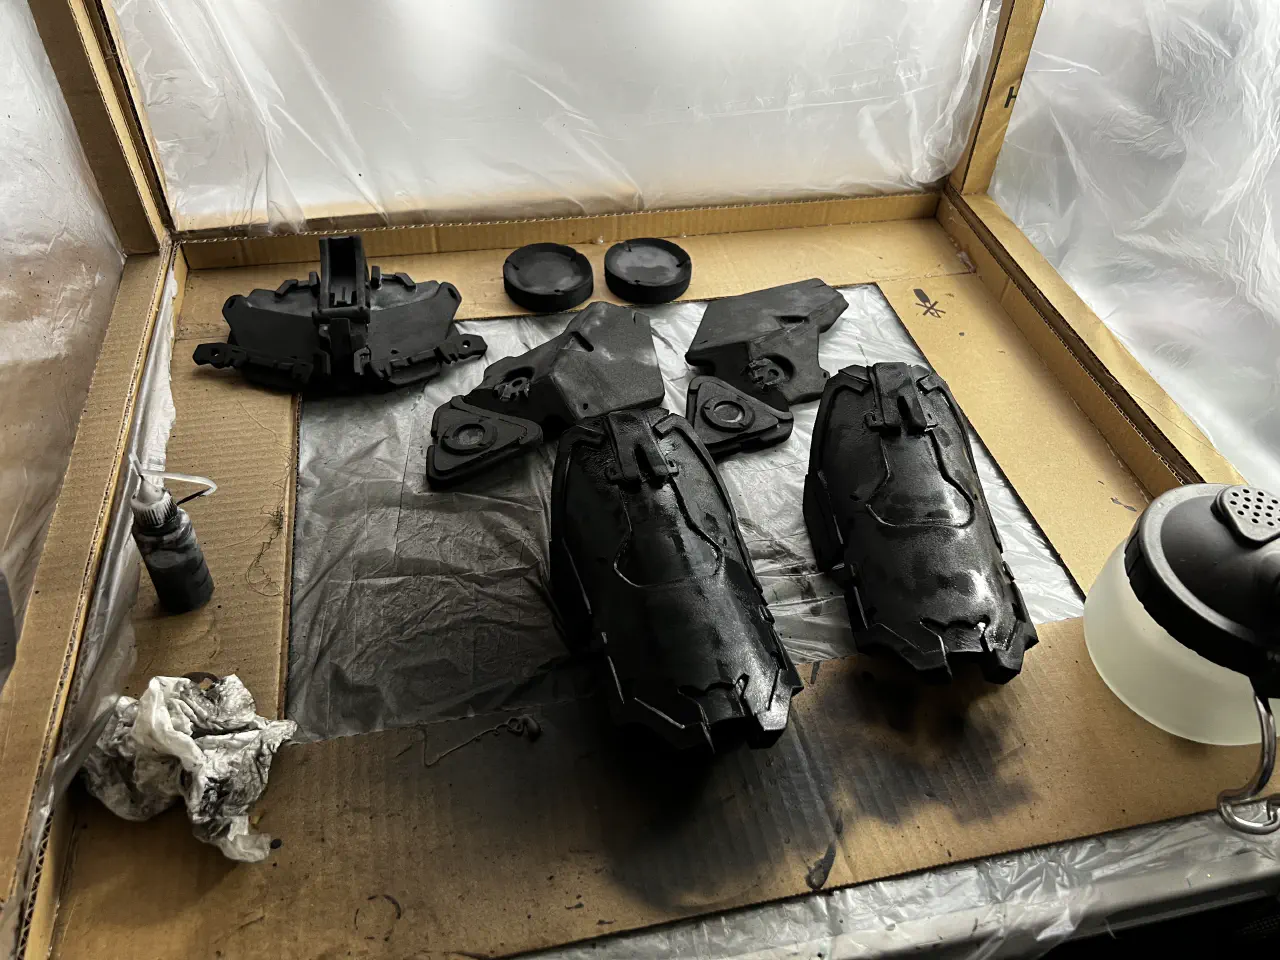
Seven primed pieces of armour sit in a cardboard framed box, the walls covered with plastic sheeting and splattered with black paint.

They’re all going to need at least two layers, possibly more, so I’m going to have to repeat this until they look right. Using an airbrush is much quicker than painting and is producing a much better surface (no brush strokes), and as an added bonus the thinner layer is drying much quicker for about the same coverage.

What’s next

My plan is to get the priming done as quickly as possible so I can move onto painting. I’m going to start with the skirt flaps for that as they have the most still to add afterwards. I’m also looking into the electronics side so I can start purchasing those bits too. Lastly, I’m going to get the basic templates for the bow printed so I can start getting that assembled - I’m hoping that since it’s mostly simple layering things should go pretty quick.

If you have an questions or ideas for posts you’d like to see, send me a tweet @tjomas

Time until MCM Comic Con London:
8 Weeks 2 Days

  1. https://www.poly-props.com/hexpaints/hexflex-1/hexflex ↩︎

  2. I’m using a tiny bottle bought originally for contact cement (and which didn’t work), so I can’t tell you the ratio, only that I fill hexflex to the 15mm mark and then medium to a 40mm mark. If someone can work out what ratio that is, be my guest. ↩︎

Useful tools and materials for cosplay

One of the things that really would have helped me when starting out was advice on what tools and materials cosplayers use. I also want to avoid any repeats of my first costume (the Rocketeer), which involved me using card, fibreglass and car body filler. Materials that are nasty thing to work with in an enclosed space. Like my flat living room for example!

A gif of Matt Mercer sitting behind a DM screen saying [as victor] Learn from my mistakes

(Source: caduceus-tealeaf.tumblr.com)

So, here’s that list that steers you clear of the mistakes I made and hopefully helps you to get started cosplaying!

Safety gear

Don’t make the mistakes I did and make sure when you start out you’ve got some PPE unless you want to be coughing up foam dust or feeling dizzy from fumes.

  • A mask/respirator - If you’re just working lightly with foam a dust mask is fine enough. However if you’re working over long periods get yourself a respirator with decent filters. I’ve got a JSP half face with replaceable P2R filters which covers dust and light chemical fumes (e.g. contact cement!). These aren’t especially cheap but your health is worth it.
  • Safety glasses - Keep the dust out of your eyes and fumes away. They cost a few quid at most DIY stores and your eyes will thank you for your kindness.
  • Crafting clothes - If you’re messy like me make sure you’ve got overalls or old clothes you don’t mind getting covered in the results of crafting flavour of the month.

Tools

For construction

Most of this is available from art shops. I tend to use Cass Art as they’re nearby and have a good selection. For power tools check you local DIY store - there’s a B&Q and Screwfix nearby I tend to use.

  • Craft knife & spare blades - Looks vaguely like a scalpel with interchangeable blades. If you’re cutting foam always invest in a set of spare blades as foam blunts them quickly (You’ll be able to tell when you need to change!). Good for precision cutting, I’ve found them not so great for longer lengths as they’re less stable in the hand.
  • Retractable knife - Used for longer cuts, they’re must stable than the craft knife but less precise because of the chunky blade. You can just use a craft knife if you’re saving money, I did for years.
  • Cutting board - Sharp object will mark surfaces so these are a lifesaver. An A3 mat like I have lasts a while so it’s a good investment. You can find them in most art shops (I got mine from Cass Art).
  • Contact Cement - Incredibly useful. A strong bond and flexible. Gives off fumes so make sure you’ve got a respirator and some safety glasses. Leave it for a good 5+ minutes until it’s dry for a solid instant stick, even with curves. Make sure you close the tin up otherwise you risk it all setting before you use it.
  • Sandpaper - The kind of stuff you can get from a DIY place, you want some 120+ fine grain for cleaning edges and simple shaping.
  • Heat gun - If you want to shape your foam (and trust me, you will) you’ll need this or a hairdryer (the hairdryer might not be as effective though). Use this to heat shape foam, clean up after sanding and close up foam bubbles for a smoother finish. You can get them from most DIY shops.
  • Flexible filler - To fill in all those gaps in the foam. You can use foam clay for this as well, but filler is cheaper. Make sure it’s flexible! Some fillers are inflexible and will flake and break away.
  • Squeezy bottles - The kinds you’d put sauces in! These are so useful for controlled application of contact cement. Just fill them up and you can limit how much comes out (most of the time), as well as not having to keep the tin open and shorten the lifespan of the cement. You can look on the internet for these, and as much as I hate to send business their way, Amazon is the easiest to buy from.

Once you’ve got into cosplay, these are helpful:

  • Dremmel/Rotary tool - This is the most important power tool you’ll need if you plan on doing any kind of complex foam work. You can sand, cut and score foam, shape into complex objects and clean up mistakes. It’s also worth investing in some different heads too as it’ll make life easier. DIY stores will have these.
  • Soldering Iron - You can’t solder foam but you can use it to burn marks into the surface for various effects (like wood grain). Make sure you get a decent wattage electric one - I started out with a 20W and while it works, a 40W one is far more effective (both for foam and soldering!). You can get these from DIY stores and aren’t that expensive.
  • Airbrush - This makes painting so much easier! You can control the amount of paint you use and create far more subtle effects. Definitely an investment, but a good one if you’re going to be doing a lot of prop painting. I’m just starting out with mines so all my knowledge is coming from this video by Benny from KamuiCosplay.

For costume

  • Needle & Thread - You can get away with a simple needle and thread for basic costumes, but be prepared to put in the time. You’ll also need them for those fiddly bits even when you have a proper sewing machine.
  • Pins & Clips - You’ll need these for holding things in place. If you’re working with faux leather you’ll need clips as the pins will damage the fabric. Pins do blunt after a while, so make sure you replace them regularly for your own sake (It’s ok, you’ll loose half of them before they need replacing).
  • Tailors chalk - You can use a pen for tracing templates, but tailors chalk allows you to draw on fabric and know you can wipe it off later. Very useful for areas that might be seen.
  • Fabric Scissors - Get a pair of these rather than butchering your fabric with normal scissors! Only use them for fabric though or you’ll blunt their effectiveness substantially.
  • Fabric dye - This is great for repurposing old clothes that are the right style and wrong colour. You can get dyes you just throw in the washing machine and boom, different colour! Remember you can’t brighten a fabric, so dying a black pair of jeans is maybe going to tint it, but a white t-shirt is going to colour well. Fully synthetic clothes are much harder to dye, so while it is possible it’s worth just sticking to natural fabrics (cotton, linen etc.)/polycotton blends.

Once you’ve got into cosplay, these are helpful:

  • Rotary cutter - Definitely needed if you’re using faux leather as it cuts way more cleanly. Optional if you’re just using normal fabric, but it will make things much easier to cut as you don’t need to pick any of the fabric up and potentially crease or move.
  • Sewing machine - If you’re getting into making garments for your cosplay, a sewing machine will save you hours of time and effort. If you’re just doing simple stuff you can get tiny machines for like £30. However, if you’re doing anything more than a simple stitch you’ll need a bigger machine. Look around, I got my Janome as ex-demo for a good discount. If you can’t buy, maybe someone has one you can borrow.

Materials

  • Foam - What you want to look for is high-density EVA foam. There are two things to look out for when buying: thickness and density. Density is how packed together it is and the higher the density the tougher and less squishy the foam is. It’s measured in kg/m3. At the least dense there’s craft foam (45kg/m3), super squishy but cheap, all the way up to CF200 (200kg/m3) which can apparently take the place of leather it’s that strong. I tend to use 5mm CF150 from Poly-Props as it’s a good all rounder, and detail using 2mm CF150. If you’re starting out and have a small budget, the lower density foams are also much cheaper.
  • Wigs : Unless you’ve got versatile hair you’re probably going to need a wig at some point. Coscraft have a great selection, CosplayBuzz do a lot of character themed ones and if you need something more natural Lush Wigs have a great selection.
  • Fabric - This is very much a “what’s available near you” kinda deal as it’s much easier to assess a fabric’s suitability in person. If you can order a sample before you buy. A couple of places I frequent are Abakhan (because there’s one near me!) and Minerva because they have a great search function and selection. Ebay is also a good place to look for more specific needs, such as coloured faux leather or specific textured materials. You’ll find quickly that polycotton is dirt cheap, but it also lacks texture and weight so it tends to make costumes look cheaper. Great to start out with but worth investing in better textures and weights later.
  • PVC pipe - I’m adding this here as it’s an absolutely fantastic way of adding strength to a prop without adding too much weight. However, as I discovered there’s a lot of types of PVC pipe around! What you want is PVC waste pipe as it’s inflexible, rather than standard plumbing pipe.

Once you’ve got into cosplay, these are helpful:

  • Foam Clay - I’ve only just started using it but I love it’s versatility. You can mold details, clean up mistakes and best of all it blends in perfectly with your existing foam! You can again get it from Poly-Props.

Paints

  • Primer - Paint doesn’t stick well to foam so you need to prime it first. I’m a fan of Hexflex as it’s water based and doesn’t stink up the room (unlike Seal Prime which I used to use and required a lot of ventilation). Make sure whatever you buy is flexible! If it’s not (as with a lot of car paints) it will crack and break when the foam shifts.
  • Paints - You can use acrylic paint for most of your painting needs, though having oil paints in browns is good for weathering. You can get these from arts stores and they vary in price for how fancy a colour they are.
  • Surface sealer - Something I really should have used and didn’t and it shows in my older costumes! A matt or glossy spray varnish, the same stuff used to protect paintings, will do as it’s flexible enough. There are purpose made sealers as well, but I’ve never used them so can’t comment on their effectiveness. You’ll see people say you can do this with watered down PVA glue and why yes, you can, it will peel off.

Things to avoid

Not completely, there’s always time and a place for materials but these are best avoided unless you’ve got the right setup and experience.

  • Fibreglass - It’s strong, sure, but it’s really nasty to work with and weighs a lot more than you’d expect.

I want to hear what you think!

This list may seem overwhelming but to put it in context: needle, thread and some fabric and you can sew yourself a basic costume garment. Craft knife, cutting board, contact cement and foam and you’ve got the basics of a foam prop. Throw in some primer and paint and you’re done!

Has this been helpful for you? Do you think there’s something missing or needs a bit more detail? Let me know, you can tweet me on twitter @tjomas or message my on instagram at @smojcosplay.

Crafting in 32 degree heat is a struggle

TLDR; I complain about the heat, start on the last bit of armour and take a foray into making pouches.

I’ve not made as much progress as I’d like this week and I’m going to blame that on the ludicrous temperatures. It’s been up to 32 degrees celsius this weekend and that is gross to wear a respirator in. I’m looking forward to going back to sensible mid-20s temperatures, a hot a can cope with.

Continuing with the headpiece

A rendering of the headpiece on Aloys head.

First up, after completing the construction of the central part of the headpiece I wasn’t entirely happy with it. I decided to have a go remaking it, this time without as much messing around. However, about half an hour in I realised I’d managed to make this one even worse than the previous one.

Two foam center headpiece parts, side by side.

Even with better templates and more care taken the newer (bottom) is so much more wonky than the first attempt.

Rather than starting over for a third time, I decided to take a look at the old one again. A few bits of sanding here and there to straighten things out and I was much happier with it. It’s still not perfect, but I think it’s going to be difficult to get much better with my current materials. I finished it off by adding the last bits of detail, using the template as a guide to mark out where they needed to be placed (and it turns out missing one bit of detail which I only discovered when writing this!).

Happy with how it looked, I then started assembling the two sets of side panels. They’re made of two parts, layered on top of each other, so I thought sticking them together then attaching to the central piece was the best strategy. I will now dispense the advice I should have taken: consult with your reference images.

When I went to attach what I’d just spent time carefully glueing together I realised they didn’t fit. This is because, if I’d checked the reference image, I would have seen they were a) at slightly different angles on the central piece and b) also angled backwards. Oops!

It was clear at this point in the day the heat was not helping me think, so I called it quits on the headpiece and put it aside for cooler times.

Starting to assemble the arm-our

A rendering of Aloys right arm covered by a complex piece of machine. The top half is surrounded by a circle labelled A. with the bottom half surrounded by a circle labelled B.

The arm armour I’ve left to last as it’s the complex and I wasn’t sure how to go about making it. I attempted to make a template in Inkscape, as I had done the other armour pieces, but I knew it was only going to be a rough guide.

Once I’d cut out the foam and done a basic arrangement, I was able to assess just what was missing and what needed re-working. Luckily, the top of the armour (labelled A. in the diagram above) seems to be mostly correct so I could make a start on that, whilst then going back and figuring out the changes needed for the bottom part (labelled B.).

Two side-by side of arm armour with only the edges complete.

Rather than layers sanded into shape, these are made of flat shapes cut from foam to give the depth required.

The assembly of the main body is going as expected, with plenty of “Ah, going to need to trim that” and “Hmm, missed that bit off” remarks. There’s a couple of bits I’ve missed off my templates, and some that a are going to need a bit of re-working but nothing that’s a show stopper.

The bow

A picture of a Carja warbow.

If you’ve played Horizon Zero Dawn you might be wondering why I picked the Carja war bow bow rather than say the Nora war bow or the much better Shadow War Bow. The answer is that the Shadow War Bow, preferred option as it is, is just a little too complicated to make out of foam. I really wanted to make the sharpshooter bow as I used that the most (the machines are big and I am small, so having the most distance is preferred 😂) but again, it’s not an ideal shape for foam construction. The Carja bow still looks great, and I imagine most people won’t notice the differences.

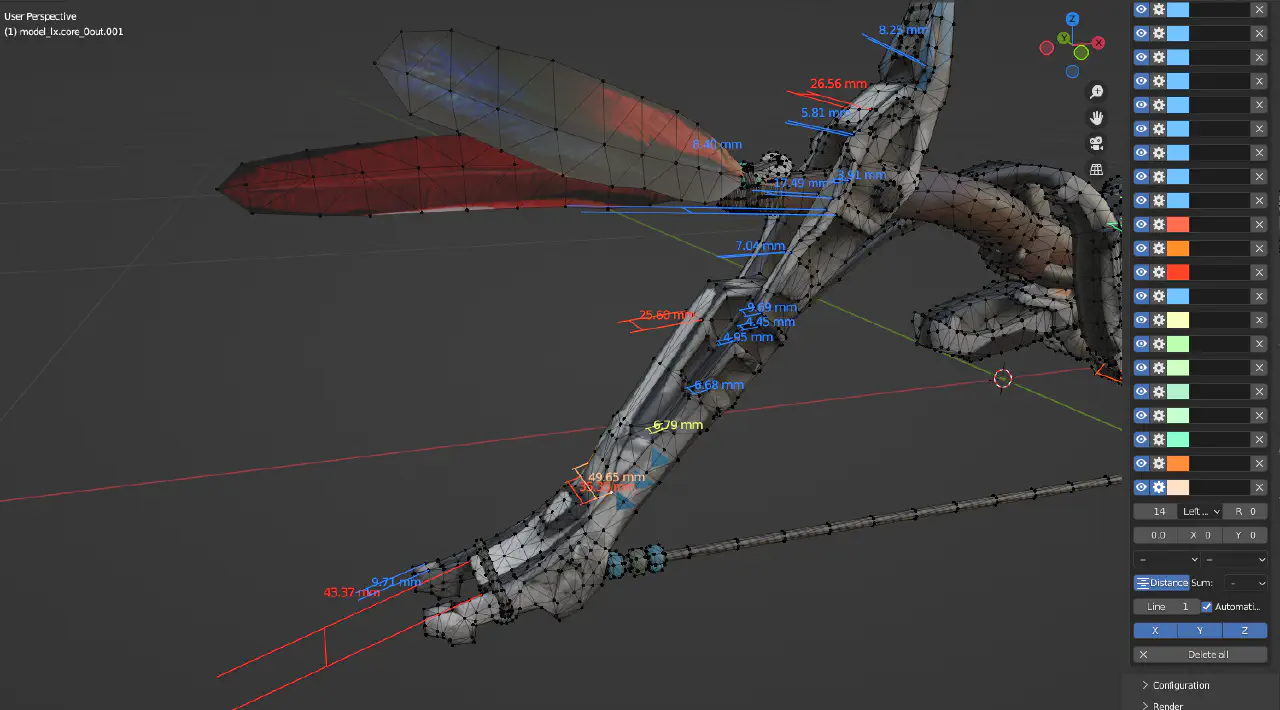
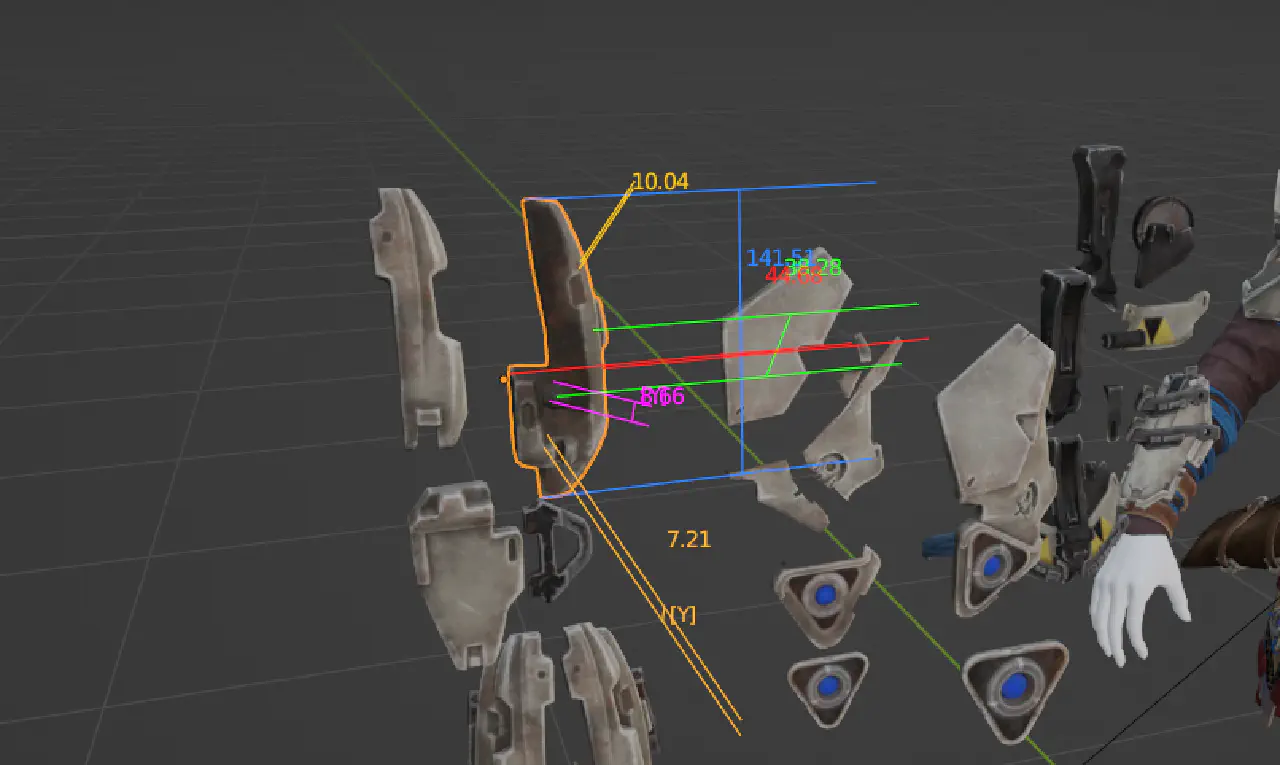
Since then I’ve been tearing bits of it apart to make it easier to trace shapes, along with taking many, many measurements. Shout out to the MeasureIt tools addon for Blender, it’s incredibly useful if you’ve got the item at the right size.

A screenshot showing the blender interface with the warbow and multiple measurements as different coloured lines all over the model.

I suspect that I’ll need to purchase some 10mm foam to avoid a lot of layering of 5mm, but I won’t know how likely that’s needed until I’ve finished the template. That should hopefully be in the next few days, I can’t delay it any longer or it’s not going to be done in time.

The quiver and pouches

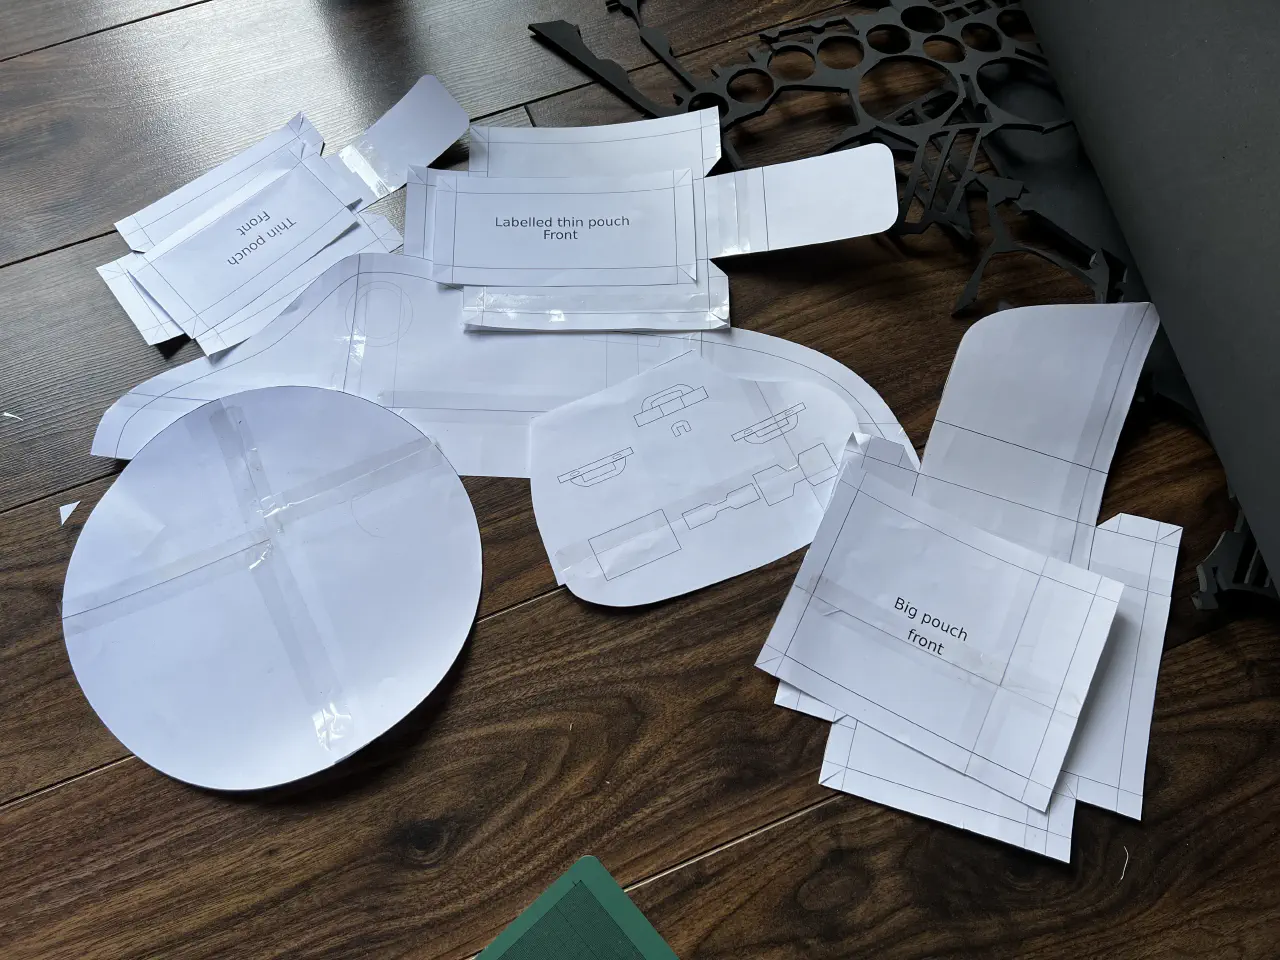
I didn’t want to loose a day or so to the heat so I started working on things that requires less sweaty safety gear. I knew I had the materials already in, so I decided to complete the quiver template and get the pouch ones done too. I’d taken some rough measurements of the pouch sizes from the model a few weeks back so it was easy to draw out some templates in Inkscape and print them out.

A pile of printed paper templates, some taped together.

I ran into my usual issues of not being entirely sure where to cut or tape down to assemble the templates, it’s making my want to either adapt PosteRazor or make my own template tool for cosplay. Having marks on where to cut would substantially speed things up!

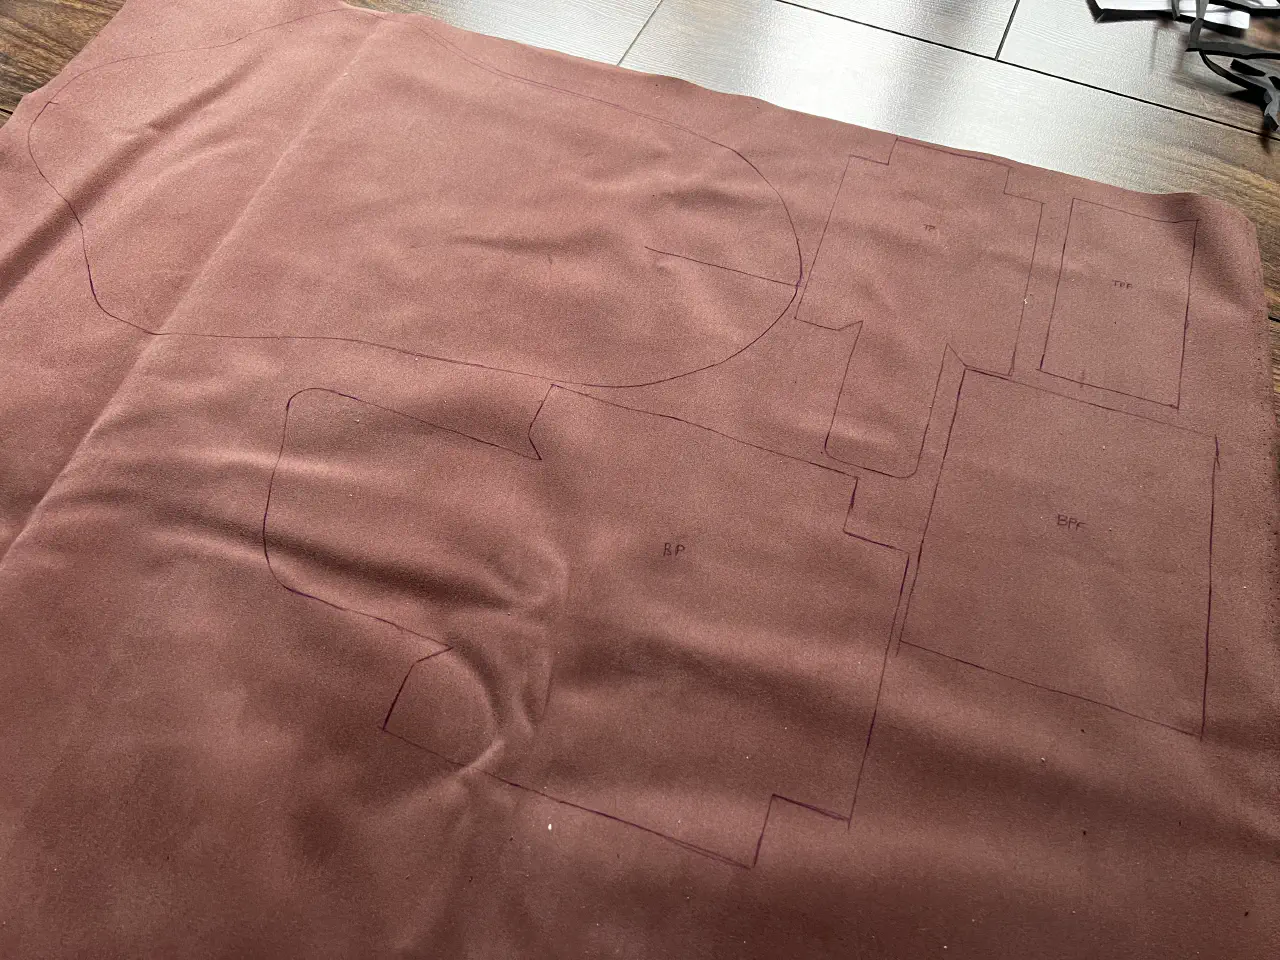
The material for most of the pouches and the quiver is some nice brown faux leather I got for my Flynn Rider cosplay. I traced and cut them out, but they’ll have to wait to be sewn together until I’ve finished up with the armour building. The downside of having only one craft table and limited space is that you can’t fully multitask.

The back side of a piece of faux leather with the outlines of what needs to be cut out drawn on with pen.

The circular pouch (the really basic circle template) didn’t actually work. I think the material might be too thick, or the circle not big enough. There’s bound to be information online, so I’m adding “research pouch templates” to my todo list.

What’s next

The weather looks much cooler next week and with no D&D until the end of the week I’ve got plenty of time to work on things. My aim is to have all armour pieces completed before the weekend, along with a draft of the bow template so I can figure out if I need to purchase any extra supplies.

If you have an questions or ideas for posts you’d like to see, send me a tweet @tjomas

Time until MCM Comic Con London:
10 Weeks 2 Days

So much dust! Armour making continues

TLDR; This week I continue work on the headpiece, create the shield emitters and start to trace the upper arm armour onto foam.

Headpiece

A rendering of the headpiece on Aloys head.

The work continues, albeit slowly as it’s fiddly, with lots of small parts that need to be carefully trimmed and sanded down to ensure that they actually fit. This has previously been less of a problem with the larger armour pieces, as a tiny bit extra of material will go unnoticed. Remember to hold the piece tight enough when dremmeling or they will vanish off to the plane of foam, never to be seen again.

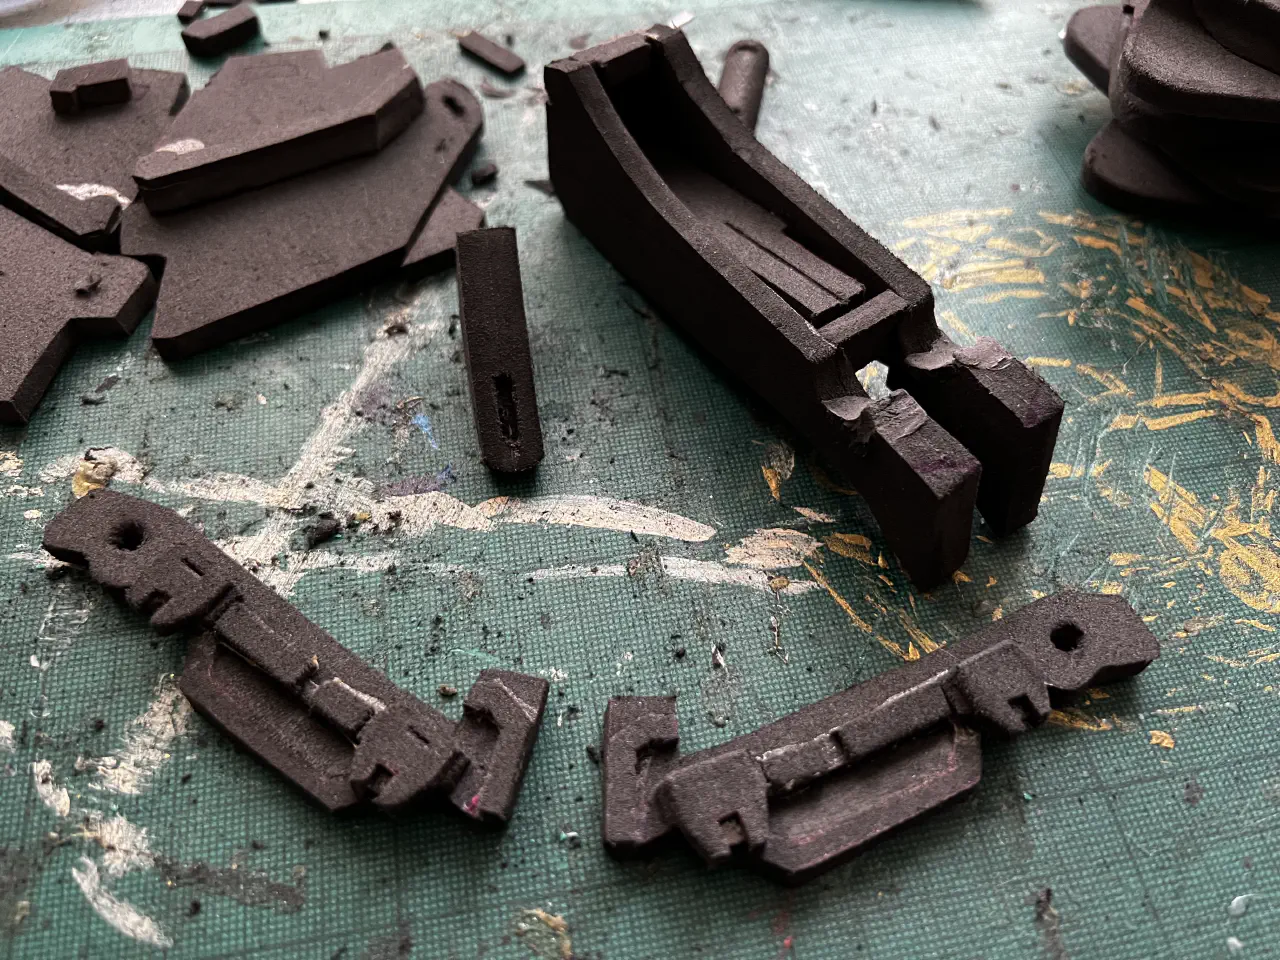
A collection of foam pieces from Aloy's head piece arranged on a dusty cutting board. The closest items have a lot of small, detailed parts on them.

Progress on the head piece, the smallest pieces are now in place.

I broke the headpiece down into 5 main parts - the central piece, two sets of plates and two detailed bars at the front. Each was intended to get assembled separately, and then stuck together. So far only the bars have been completed, with the rest running into some minor issues.

The central piece had a few issues: Some missing parts not included in the templates, and the slots for the cylinder element (made from a foam dowel) were misshaped. The first was easy to fix with some new foam pieces being measured and cut.

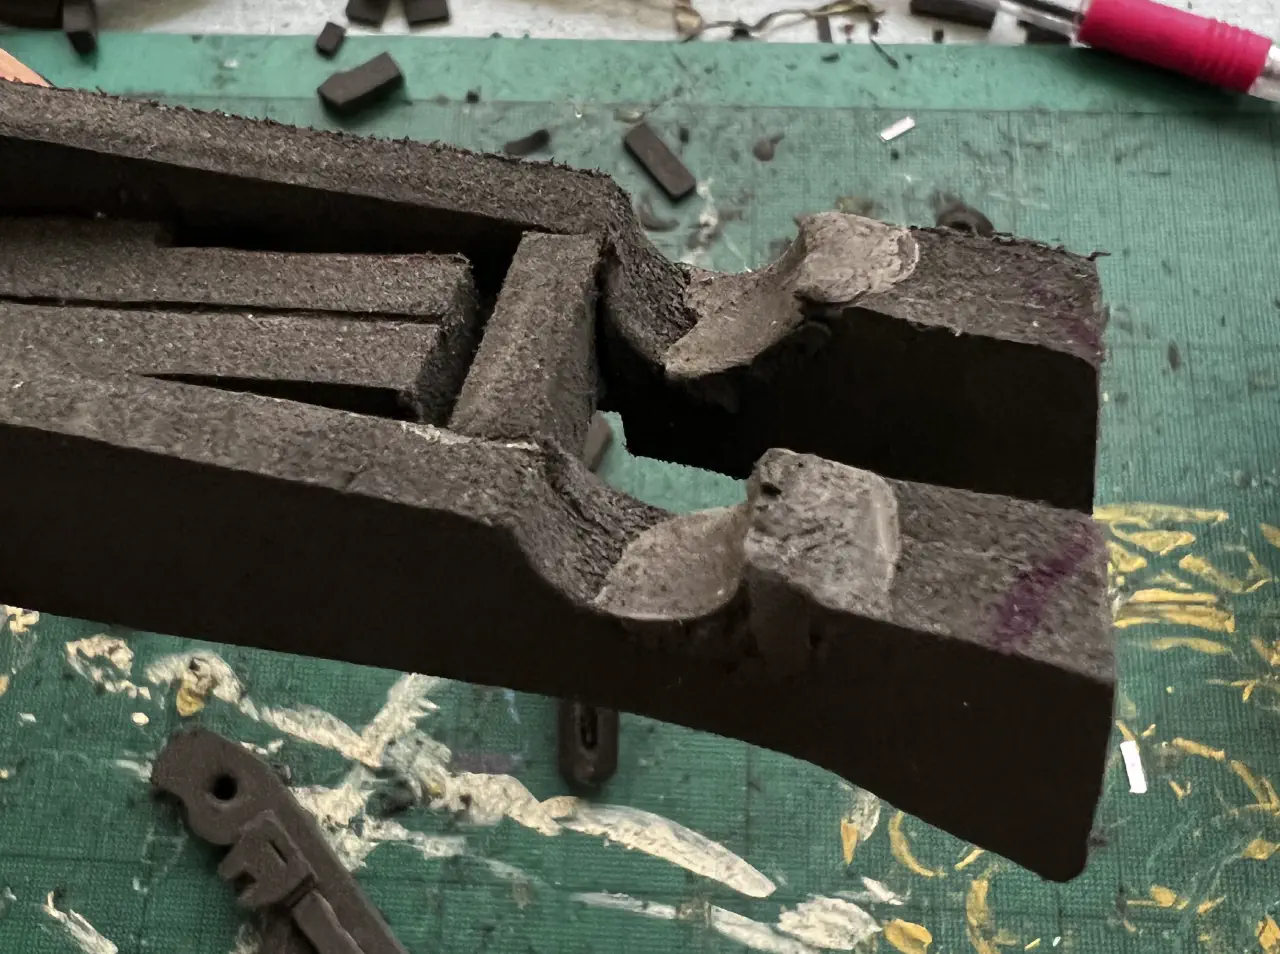
For the second I used foam clay, a fantastic material that can be shaped as clay using water (including easily sticking it to existing foam with no glue) but will dry into a nice dense foam that can be sanded and primed just like foam sheets. It does take a bit to dry though (24-48hrs depending on the thickness of the clay), so that got put to one side whilst I worked on something else.

A close up of the central element of the headpiece showing where foam clay has been used to make two semi-circular gaps smaller

While the bar element fitted it didn’t fit tightly, so foam clay was used to bulk up one side.

Shield emitters

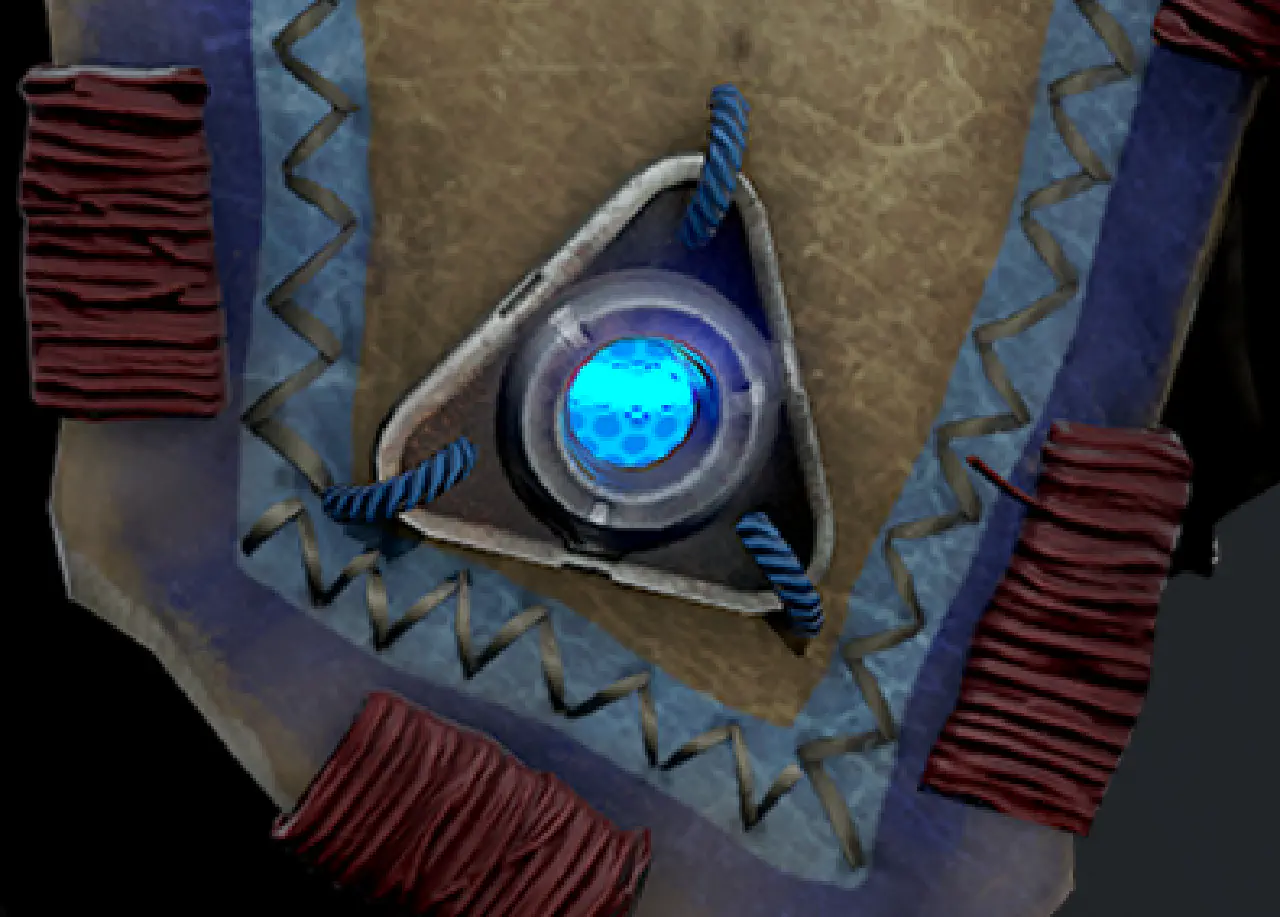
A rendering of a shield emitter on one of the skirt flaps.

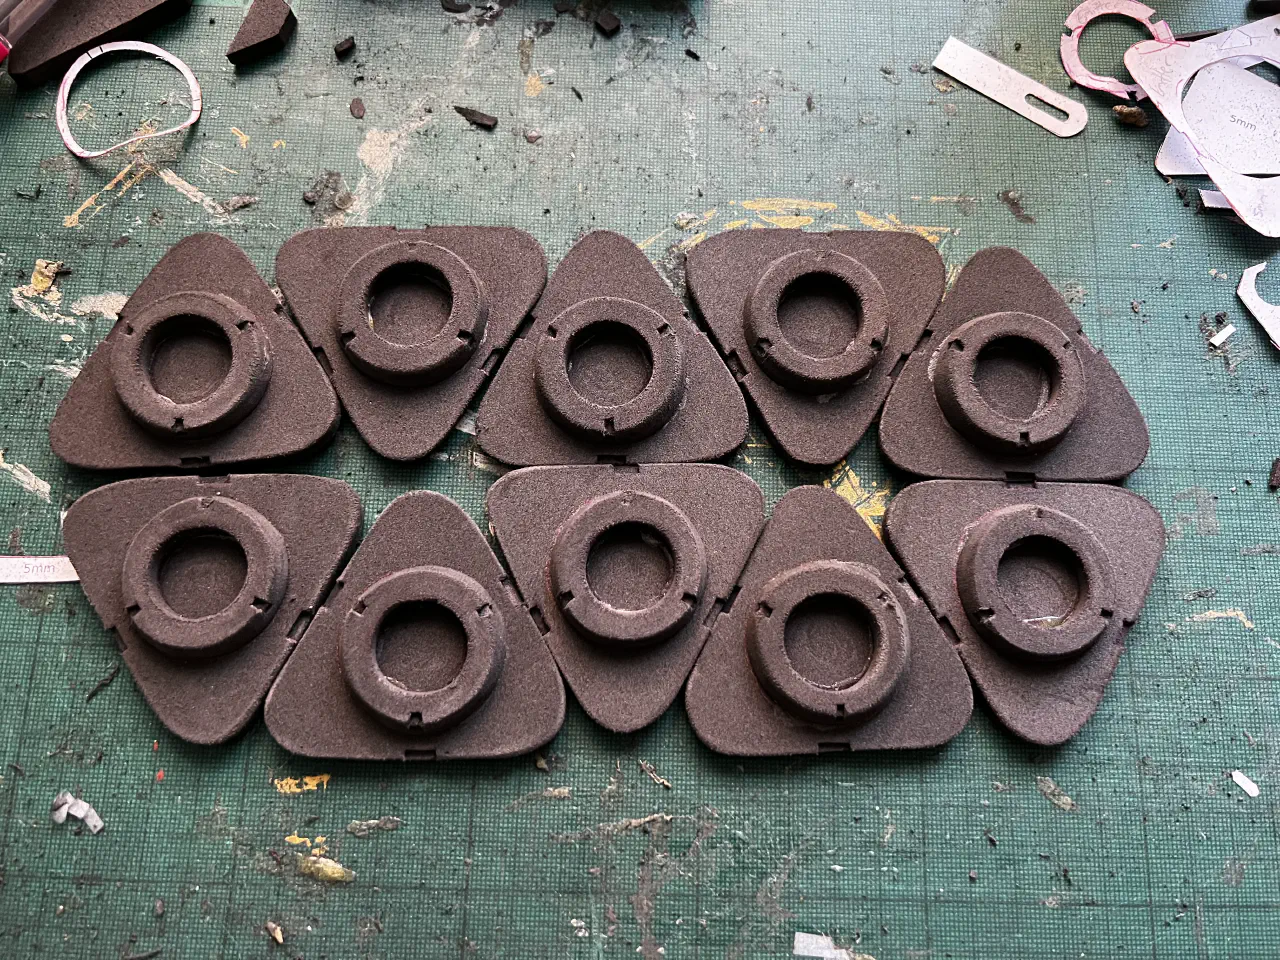
Aloy has a ten shield emitters that are found on the skirt piece (or flaps as the 3D model calls them. Not sure I like them being called that 😅).

From trial and error of the other emitters I’d made previously I found that small, careful cuts minimise the inevitable misshapen nature of the curve, and carefully dremmeling the outside gives them clean enough edges to the casual eye. Close up you can still see the imperfections, but that shouldn’t matter as I can hide the worst offenders on the back and on the bottom layers.

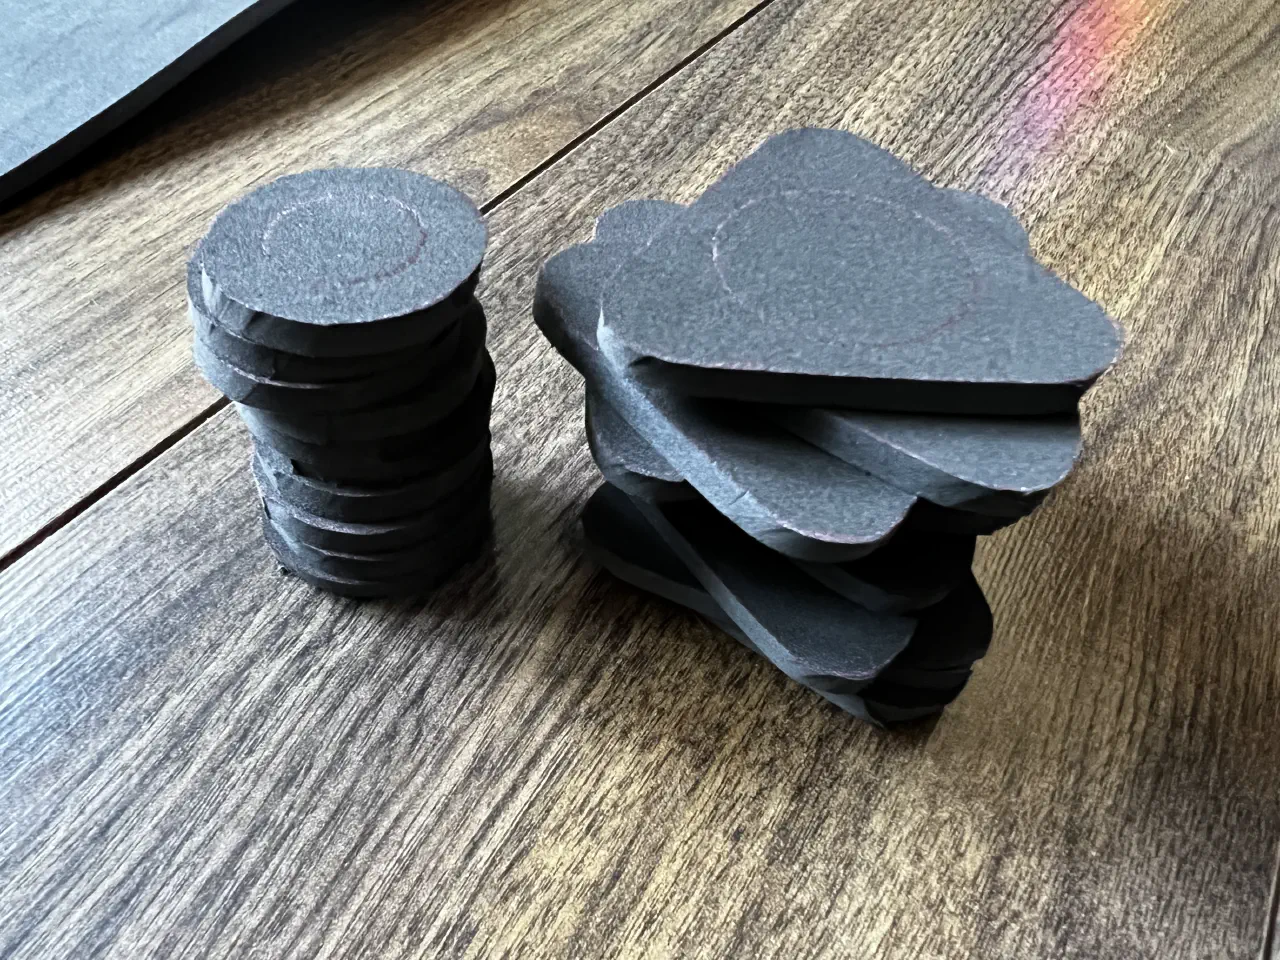
A pile or circular and rounded triangular pieces of foam stacked on top of each other

Cutting these was very repetitive. You always need to smooth the edges to get a clean look, but with circular elements you need to be extra careful when cutting as you can easily end up with a misshapen mess.

I had plans to have them finished the evening they had been cut and sanded, but unfortunately for cosplay construction I decided to watch one episode of the new new Netflix Sandman and that turned very quickly into me watching most of the series. It’s just that good! I highly recommend watching.

Instead I completed the final details and assembly in the morning (still watching the Sandman, it was too good not to finish). It was an excellent accompaniment to cutting 30 small notches into the circular parts.

Ten triangular shaped emitters with a bevelled circular shaped aperture on top arranged in an interlocking pattern

The finished emitters, ready for placement on the skirt flaps.

Tracing templates

A rendering of Aloys right arm covered by a complex piece of machine.

With the emitters now glued and edges blunted (You’re not going to get sharp edges on worn down equipment) and the headpiece foam still curing I moved onto getting the last bit of armour transferred to foam - the upper arm pieces. These are by far the most complex pieces, and I expect a lot of trial and error is needed. Further details on this will come in the next update, as there’s little to say now.

Next steps

Once the foam clay is cured I’ll be able to sand and finish assembling the headpiece. I’ll also be cutting out the foam pieces for the upper arm armour and attempting to fit them together into the correct shape. Pretty sure it’s going to need a lot of rework compared to the others!

Time until Comic Con: 11 weeks 2 days!

Retrospective: Planning Aloy

Reference images

When it comes to costume planning my first step is to go online and try to find as many reference images as possible. For Aloy that was especially easy as it didn’t take long to find that various designers had posted a treasure trove of images of the various outfits on their Artstation accounts1,2 and from there discover that someone on Deviantart had extracted out and rendered the exact outfit I wanted to make3. The biggest bonus here was that the artists who had created the render it had posted the files used to create the render!

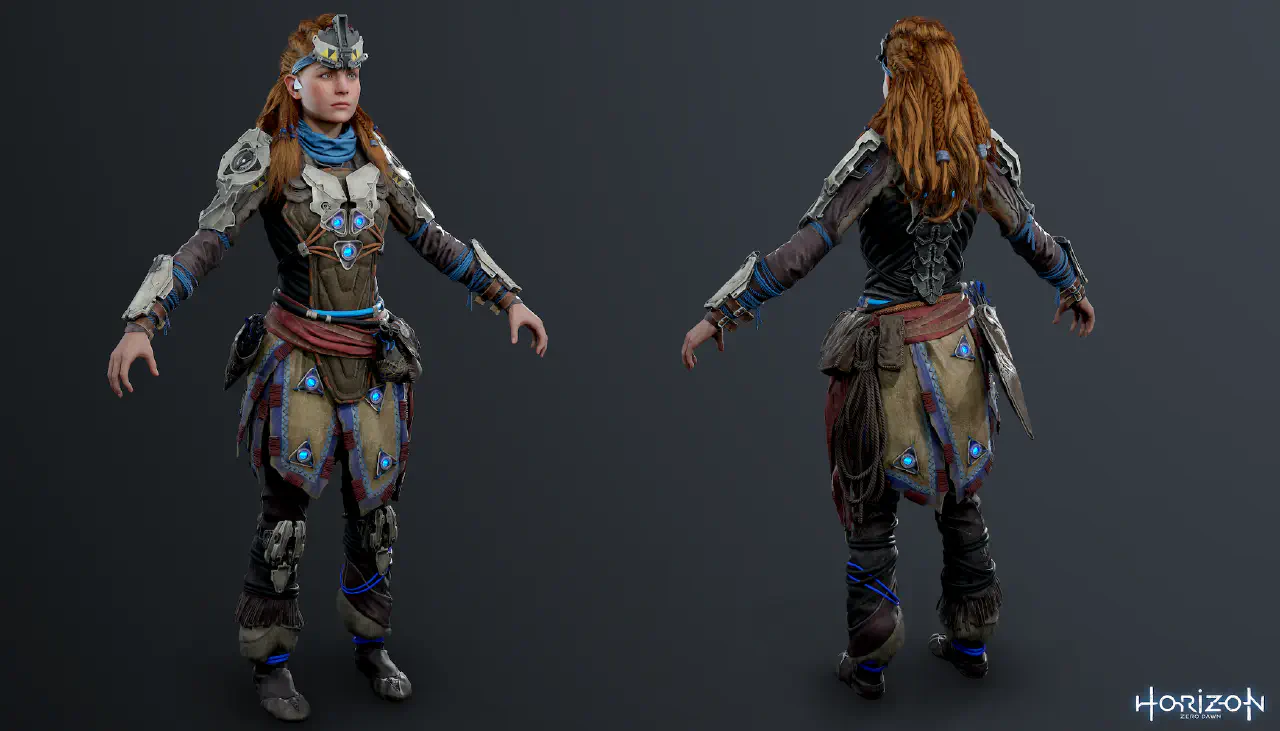
Aloy in the shield weaver outfit

The rendered image of the shield weaver outfit I’ve used as a key source (Source: Crazy31139)

After some messing around to get textures to load I had my very own version of the Shield Weaver outfit loaded into Blender. Now I could check from all angles and zoom in when I wasn’t sure of things. As I’d imported the model to real world dimensions (this took a bit of trial and error) I could also measure things which will come in useful for ensuring the templates I’d make where to the right scale. Luckily Aloy is only very slightly shorter in height than I am so I didn’t need to re-scale anything.

The Aloy model in Blender with various components arranged next to it having been disassembled from the main model.

With the model imported I could start tearing it apart, extracting individual elements and manipulating them so they where flat on a plane. I started breaking components down even further, reducing them to shapes I could more easily make by layering foam. Having dimensions here was incredibly helpful as it allowed me to figure out what thicknesses of foam I’d need.

A close up of the knee armour of the model with various coloured lines and numbers radiating from it indicating the dimensions in mm

I settled on 5mm and 2mm foam with the view that no one is going to notice the tiny millimetre differences caused by rounding up or down. 3D printing would be more precise, but I don’t have a 3D printer and commercial prices are still much more than it costs for a couple of rolls of foam (especially if you have vouchers for Poly-Props).

Making templates for fabric

For the various pieces of clothing for the outfit I relied on the measurements from the model to give me a rough idea, and then iterated through templates to get the right sizing.

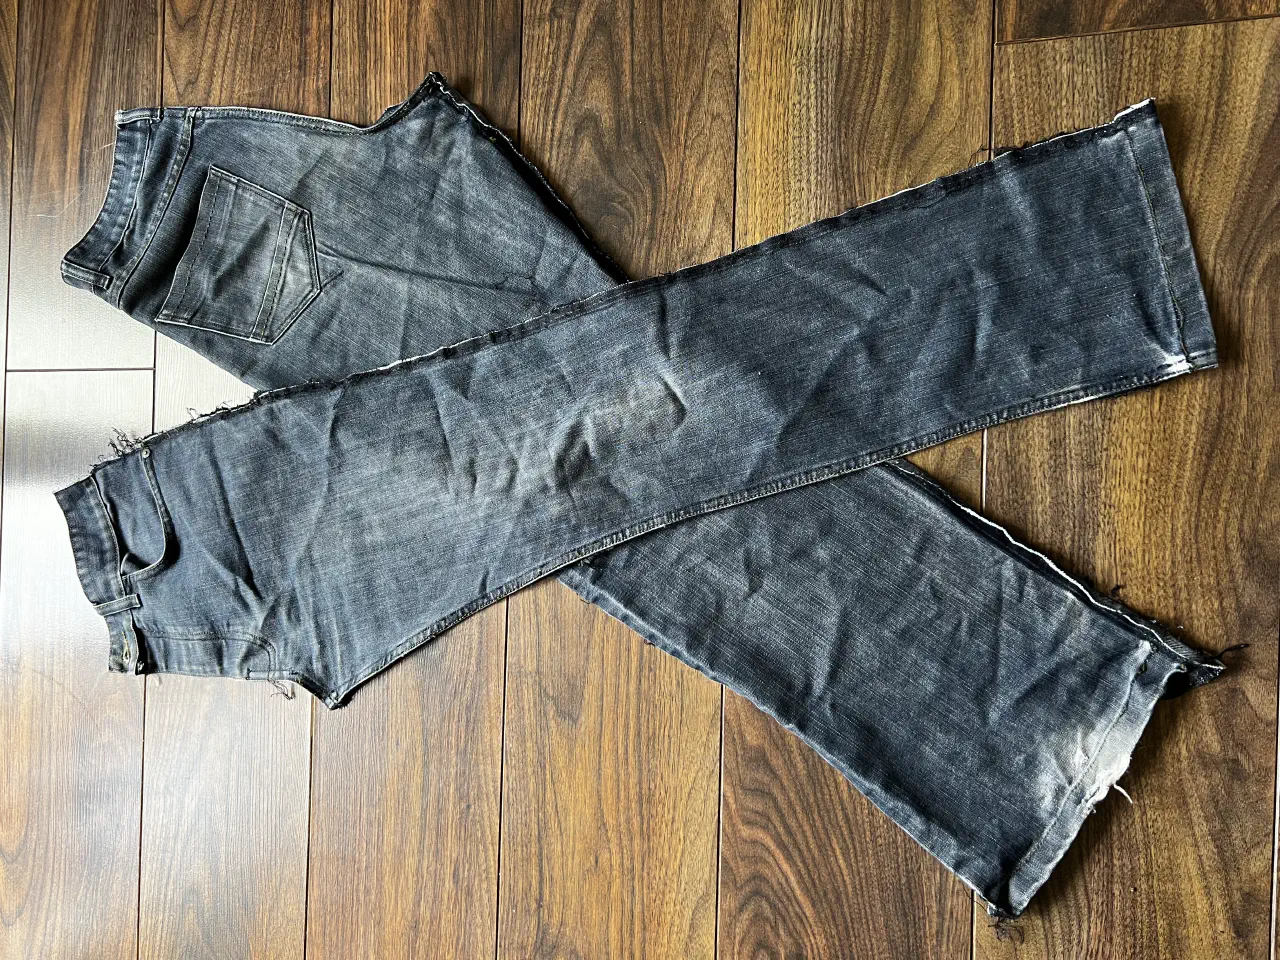
For the trousers I took apart a pair of old jeans, since I knew they fit well, and used them as the base. Using the reference images I had, I drew on the template where I’d need to cut it into sections to make the stitched together look. On all the templates I added 1.5cm extra allowance for sewing (though in some cases I did this as I was tracing onto fabric. Don’t do this, it’s far more work!).

The front an back of an old pair of jeans, taken apart an overlapped on each other

I seam ripped the jeans and used them to create paper templates, which I then drew lines on to separate into pieces.

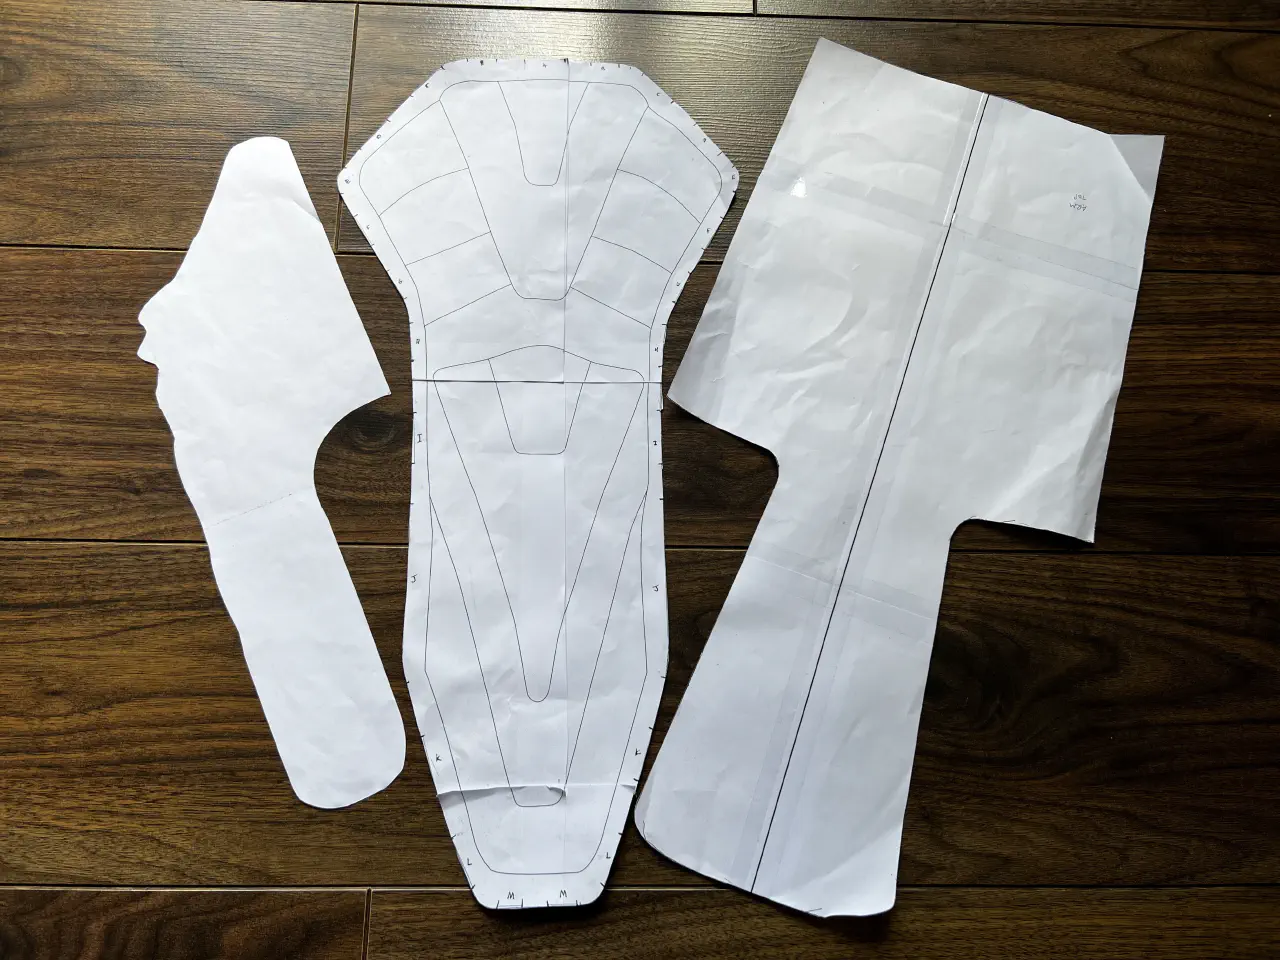
For the arm covers I took the extra step of making a mockup as I wasn’t convinced that the measurements I had would work. I was correct, the dimensions where too small, so with that in mind I was able to go back and alter them so that they fit better.

Three paper templates arranged next to each other, taped together from multiple pieces

These are the templates (from left to right) for the furred neck piece, front padded bit and arm covers.

Making templates for armour

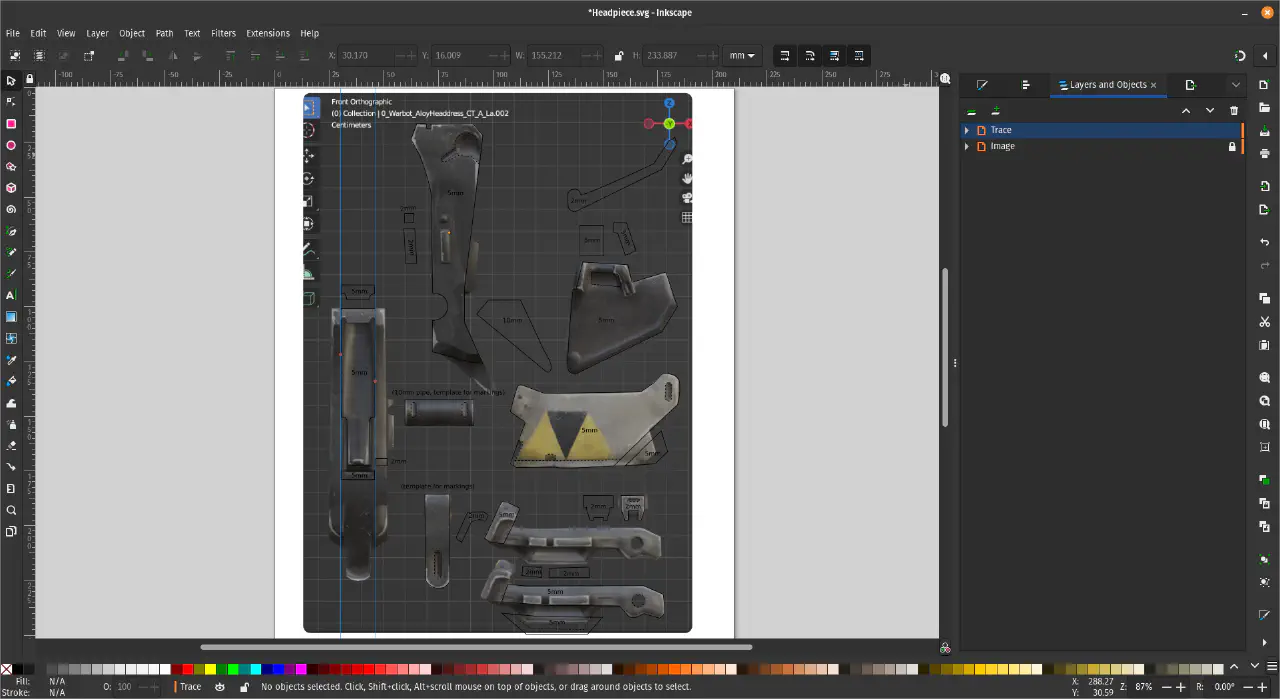
I took screenshots of the front, top and left or right (which ever had more detail) in blender from an orthographic view and imported them into Inkscape.

A screenshot from Inkscape showing screenshots of the headpiece with lines drawn over the top to form outlines

This is the headpiece in Inkscape with the images shown. I simply traced over it, marking indents and cut outs with dotted lines, then separating the parts to cut them out easily.

Then came the tedious tracing and tweaking of lines to make up a template. I learnt from my early template versions that separating the pieces made it much easier to cut out, though next time I’m going to keep an outline in light grey with a number to make assembling later much easier!

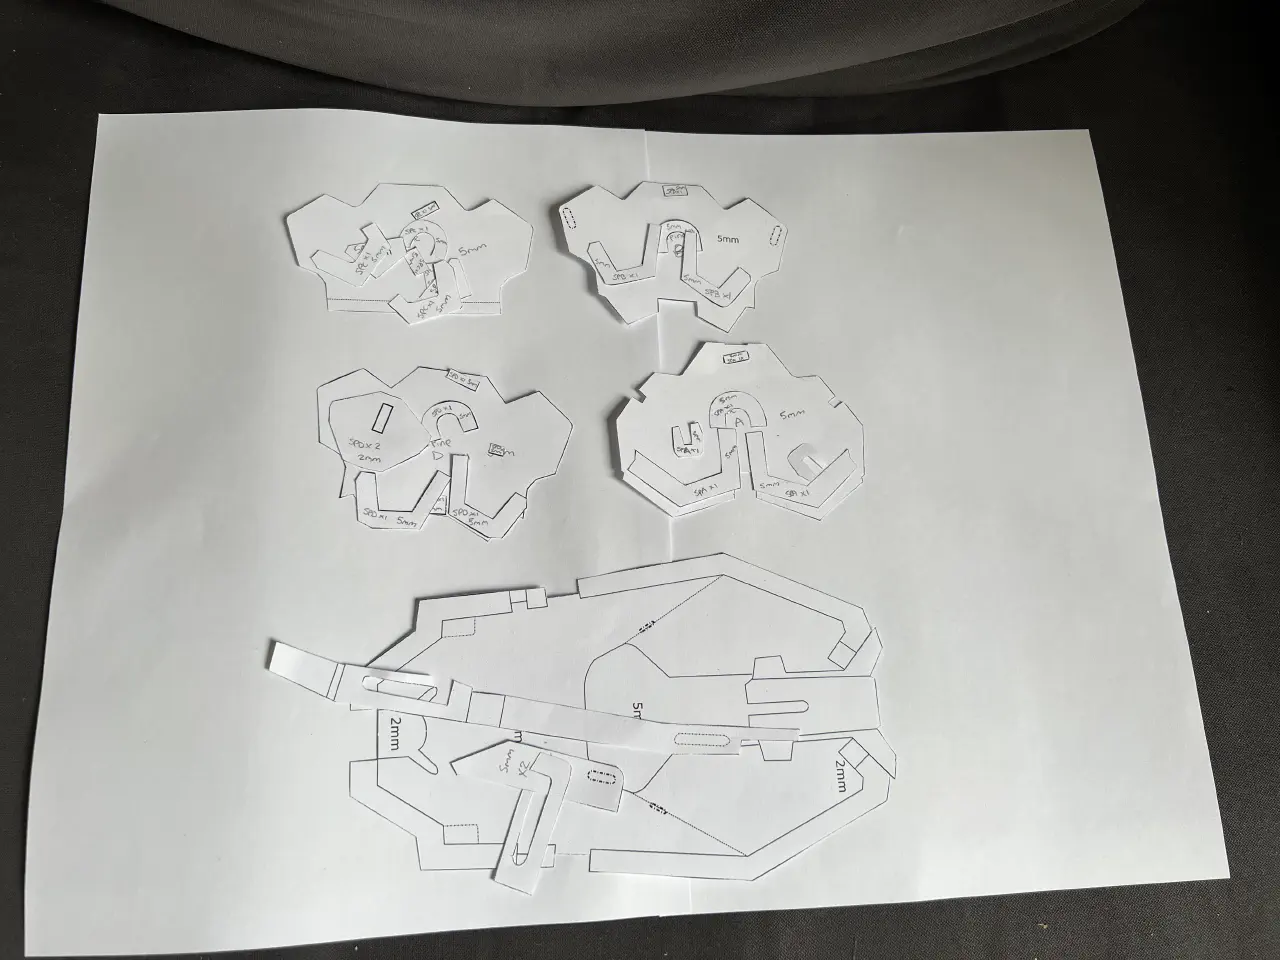
A collection of much smaller paper templates arranged on a blank piece of paper

These are the armour templates for the gauntlets (first attempt - I redesigned it to better separate the pieces) and the spine plates.

A few of the templates were much bigger than an A4 piece of paper, so these needed to be printed across multiple sheets and assembled. This is much more of a pain than you’d think, with little support in most applications. Luckily a program called PosteRazor4 exists that can take an image and split it into multiple overlapping pages. You can then print the resulting PDF and assemble using tape and a lot of patience!

I recommend labelling your template pieces with the foam thickness, name of piece and how many you need as it will save so much time later.

Next steps

I actually started making some aspects as soon as I had the templates for them, rather than waiting to completely them all. This approach allows me to actually be doing something productive if I get stuck on a step, rather than going “oh well, guess I won’t do anything”. I’ve had that on cosplay’s before and it really slows down the process.

The next retrospective is going to cover the creation of the trousers and other fabric based items, then I’ll move onto the initial armour!

Time until Comic Con: 11 weeks 4 days!


  1. https://www.artstation.com/dc_gg ↩︎

  2. https://www.artstation.com/artwork/ylAGQ ↩︎

  3. https://www.deviantart.com/crazy31139/art/Horizon-Zero-Dawn-Aloy-Shield-Weaver-857963820 ↩︎

  4. https://posterazor.sourceforge.io/, or install via package manager if you’re on Linux. I had to update various libraries and code then recompile myself to get it to work on the latest version of MacOS. I should my version online at some point! ↩︎