Aloy: Shield Weaver to Forbidden West’s Nora Anointed
Why make the changes?
When I started playing Horizon: Forbidden West I was happy to see that the armour that I’d had inspired me to make a cosplay of it was still in the game, attmiedly under under a new name1. Curious, I took a good look over to see what changes they’d made. Most were small, but there was one change that immediately caught my eye.
See, the Zero Dawn version of the outfit has a bunch of pipes that wrap around the torso . It looks great in the game, but in real life it does not work quite as well. They were an nightmare to build2, wearing them was uncomfortable, and they took up a ton of space in my case when brining it to a con. Ah ha, I thought, this is an opportunity to get rid of those pipes, free up some case space and hopefully make it more comfortable to wear.
Figuring out what I needed to alter
I used the photo mode in the game to take some screenshots so I could get a look at multiple angles. The changes were largely cosmetic, with the biggest changes to the torso, quiver and headpiece. I was planning to re-use/modify as much as I could.
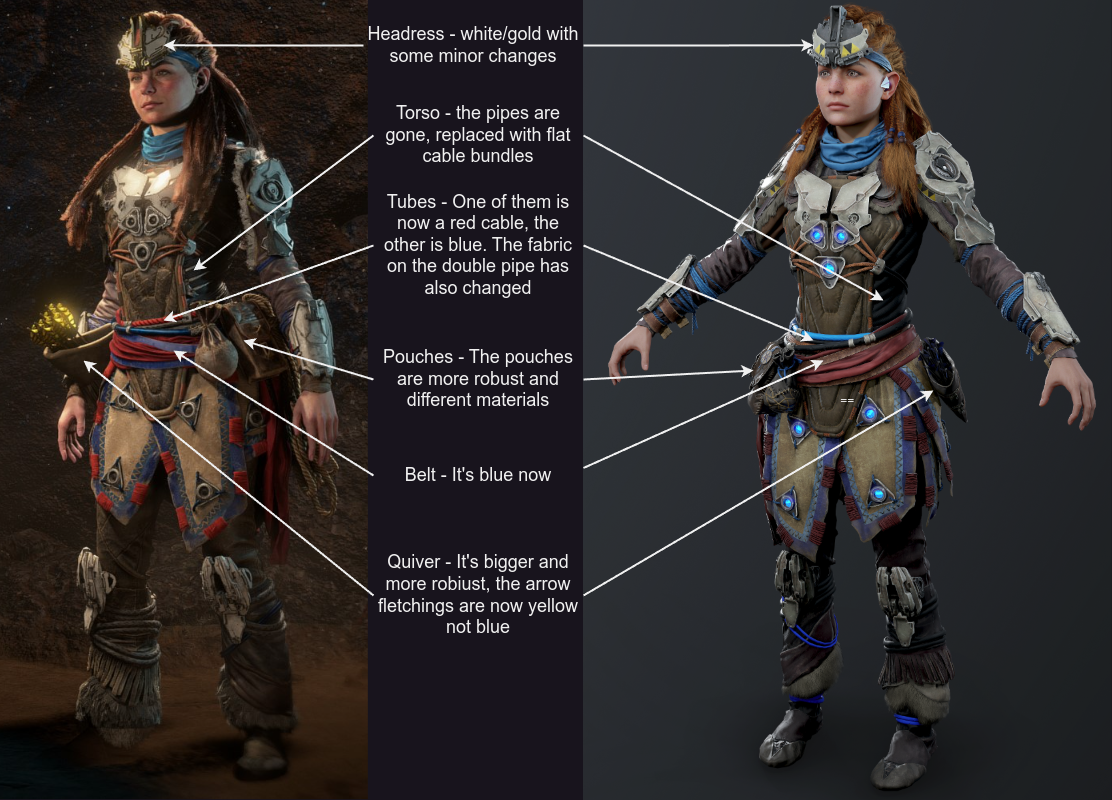
I’ve highlighted in this picture the differences. Nothing huge - some colour changes, a new quiver, the torso is now pipe-less and there’s a new colour scheme/design for the head piece.
Given these are mostly minor changes and I now have a 3D printer at my disposal I thought I’d try and get it updated for MegaCon in Manchester.
Breakdown of changes
The Headpiece
Rather than model the headpiece from scratch myself3 I bought an exiting STL from Etsy. I was working on this alongside my Fantasy Forest costume so time was not on my side (foreshadowing for later!).
It was printed in the PLA that came with the printer as at the time that’s all I had. Settings were simple, 0.2mm with 4 walls to give it some extra strength.
I was really impressed about how good it looked. It’s PLA so I couldn’t sand it, but I could slap on some flexible filler and sand that to hide the worst of the print lines. Later prints will be in PETG that’s more robust and can be sanded better, with the goal to maybe use ASA if I can get a craft room with sufficient ventilation.
Priming involved the same stuff I used for foam as I had it in, that worked well enough even when brushing. I used canned spray paint (for speed) for doing most of the block colours. The white layer worked well, but the gold came out super thick and never really dried. There’s fingerprints and squished bits all over the place! One blackwash and drybrush later it looked significantly more worn. I re-used the strap from my old head piece and it was ready to wear.
I wished I’d tested it though as I may have noticed in advance that the front prong dug into my forehead. After a day of wearing it I had a headache and a dint in my forehead that took three days to fade.
Piping, belt and pouches
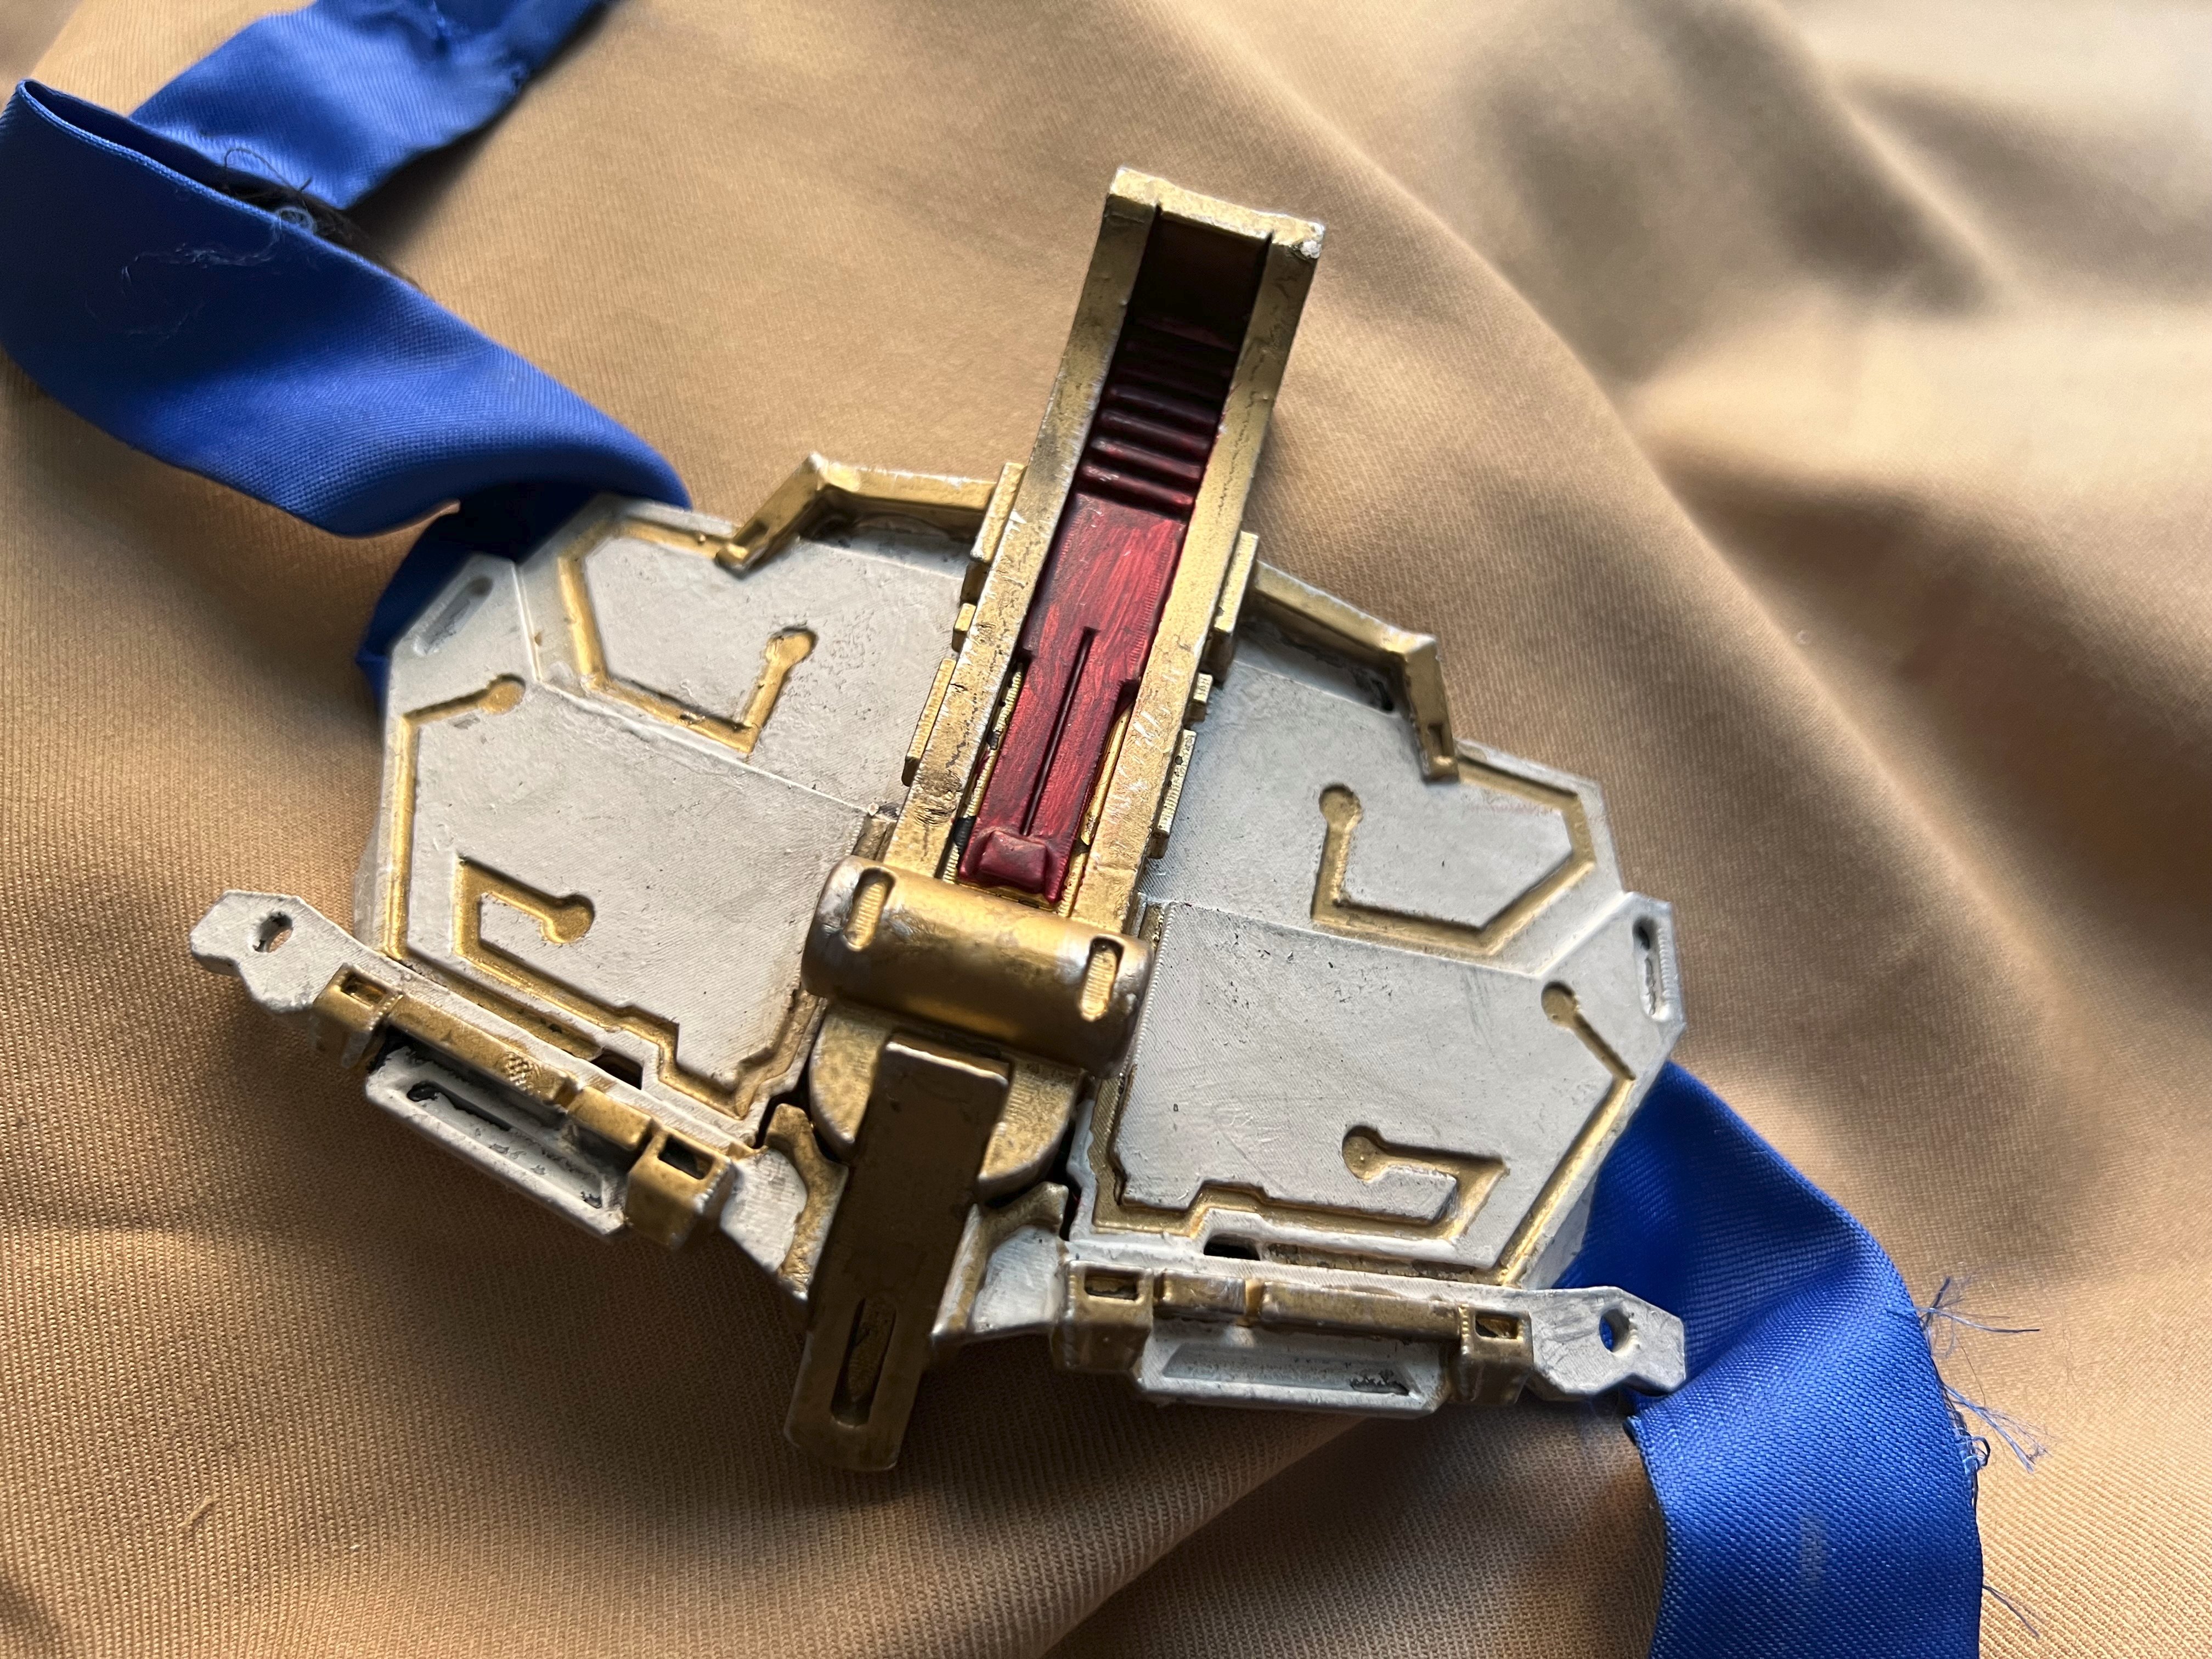
I’ve lumped these together as there’s not much to talk about. The piping layout was similar, with a colour change to metallic blue for one and a replacement of the top bit of another with a rope-like cable. Rather than remake these, I simply repainted and in the case of the rope-cable, add diagonal lines with a dremmel to fake the texture.
The belt colouring is now blue, so I re-used the same spray paint I used for my Master Sword on the existing belt, wiping off the edges to give it a worn look.
Lastly, I reused the pouches from the older version. They weren’t in great shape as I’d also stolen them for my Fantasy Forest outfit but they’d do for one more outing. They’re unfortunately victims of the material I made them out of, a faux leather that I initially had high hopes for and now realise is the wirst I’ve ever worked with. The plastic layer that gives the “leather” look is incredibly thin and things like bending it, holding it or even just heat cause it to degrade and peel off the fabric backing.
Torso
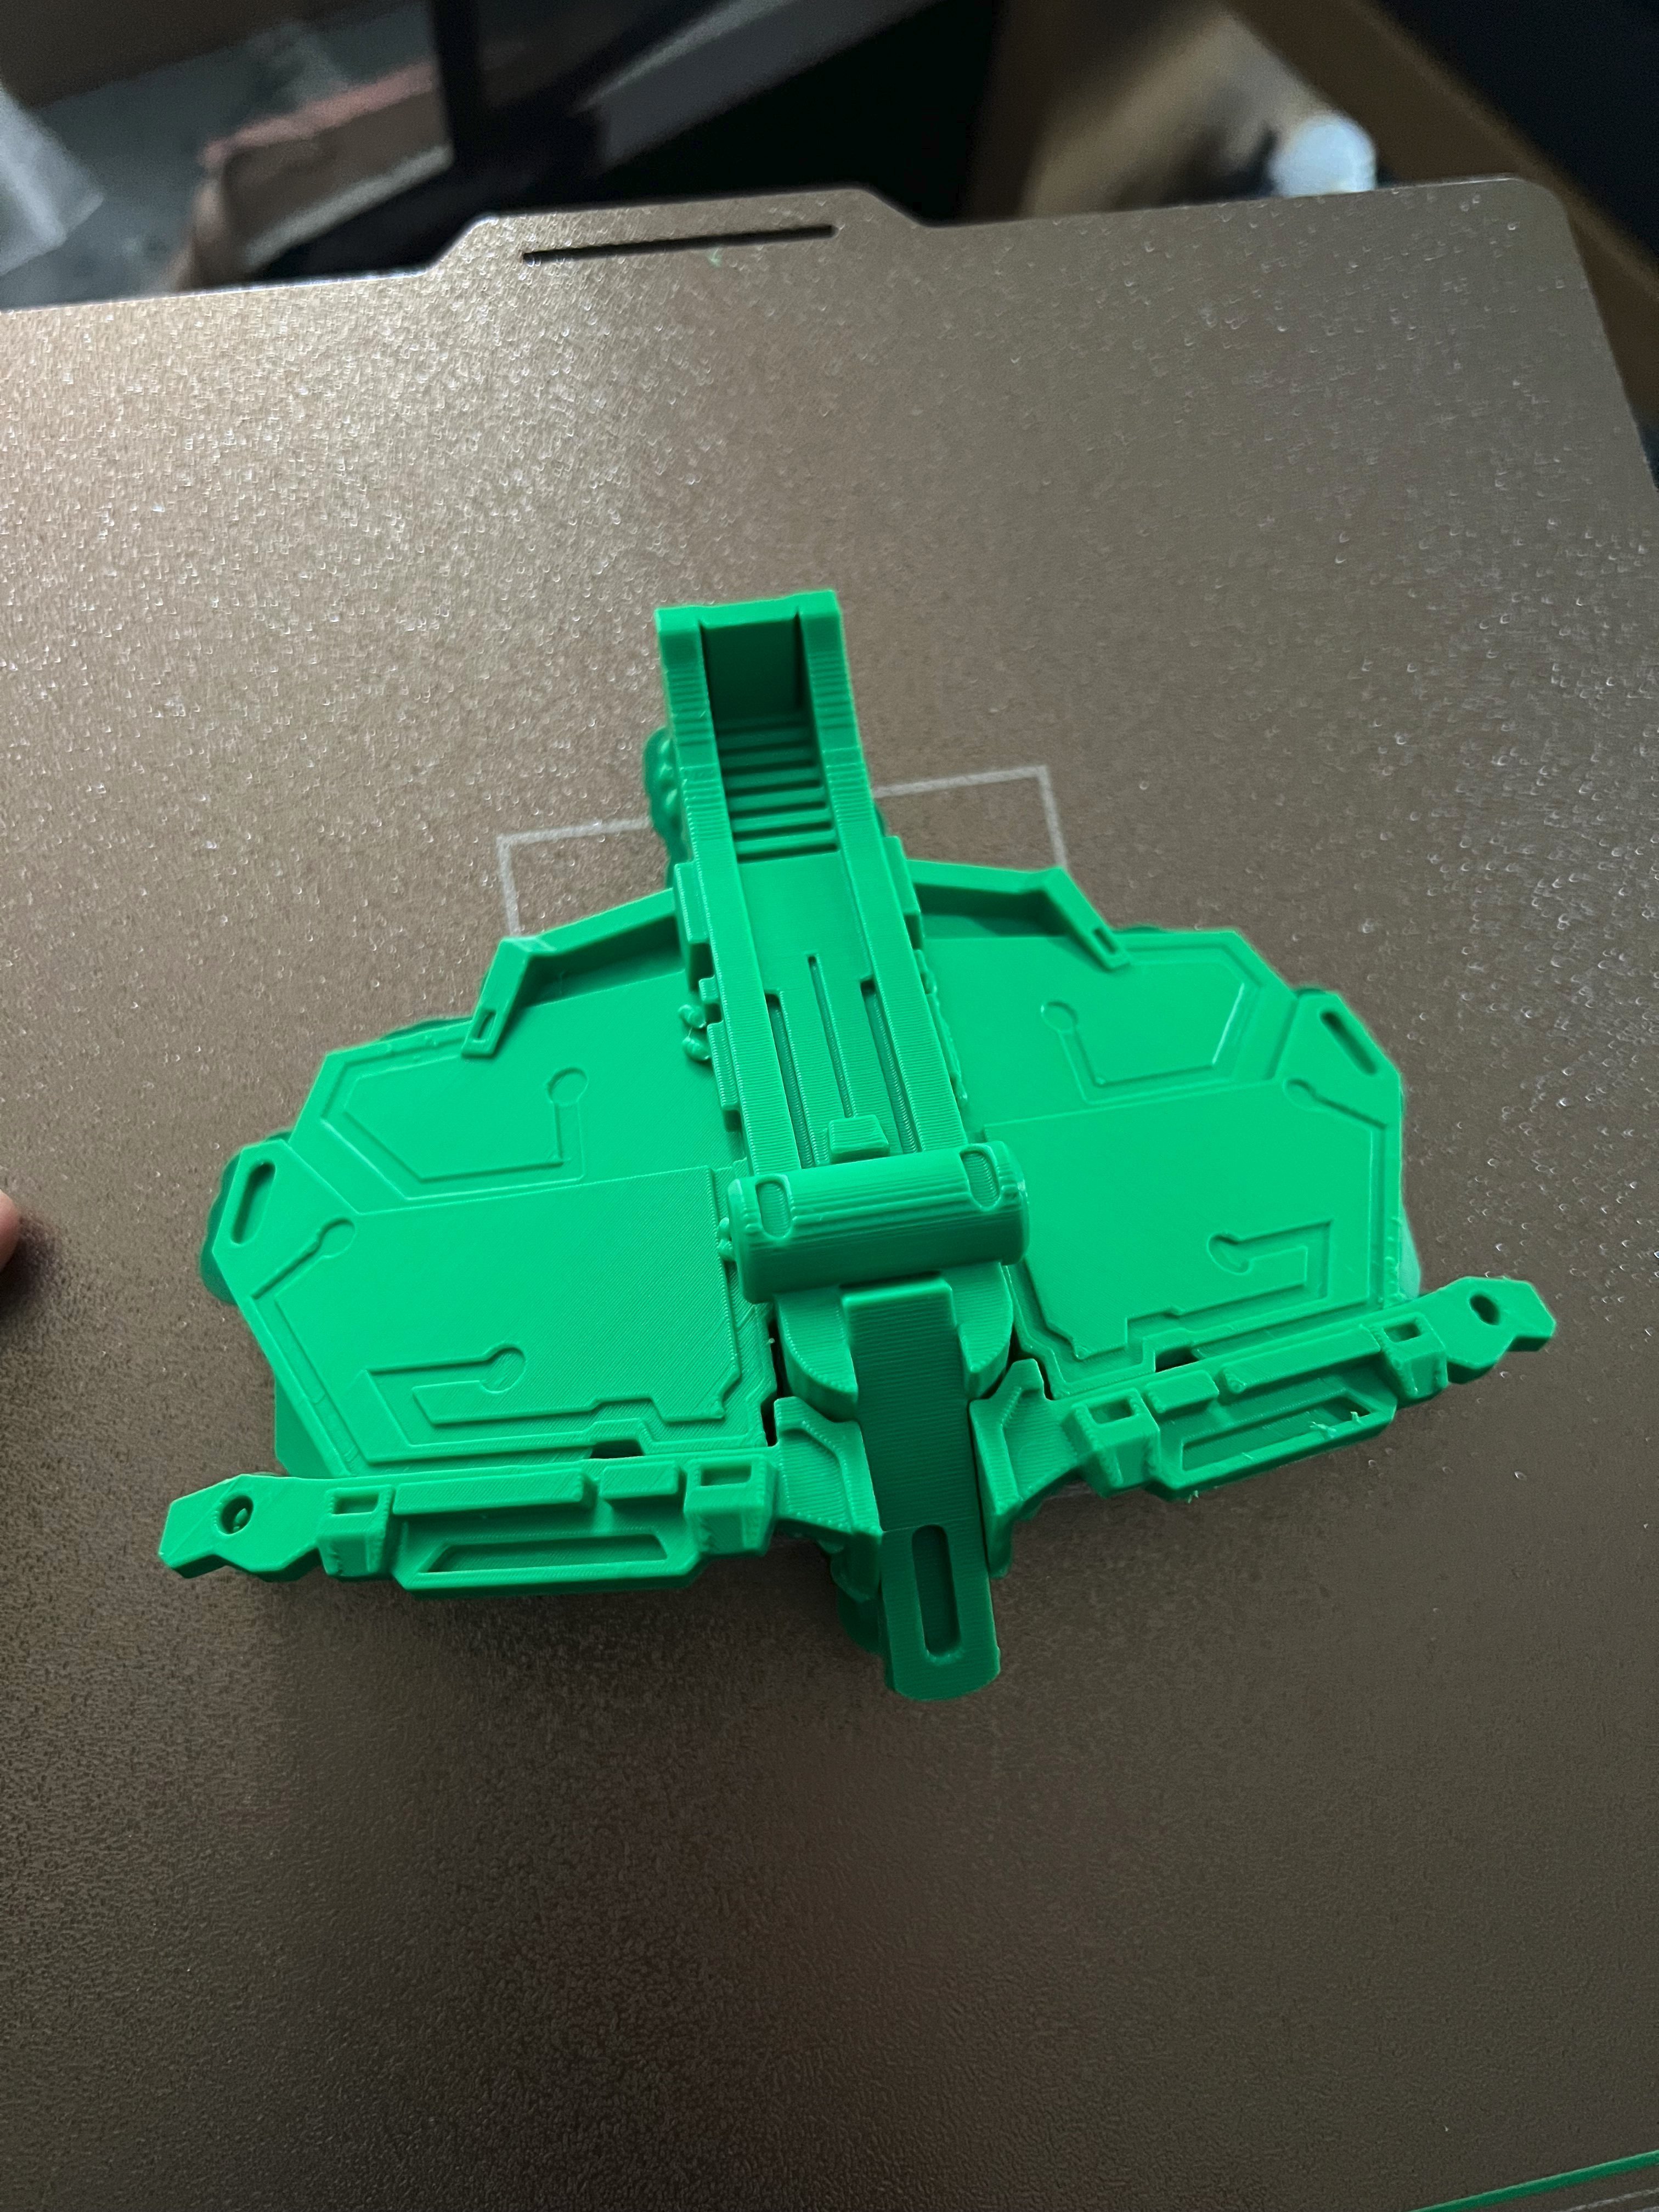
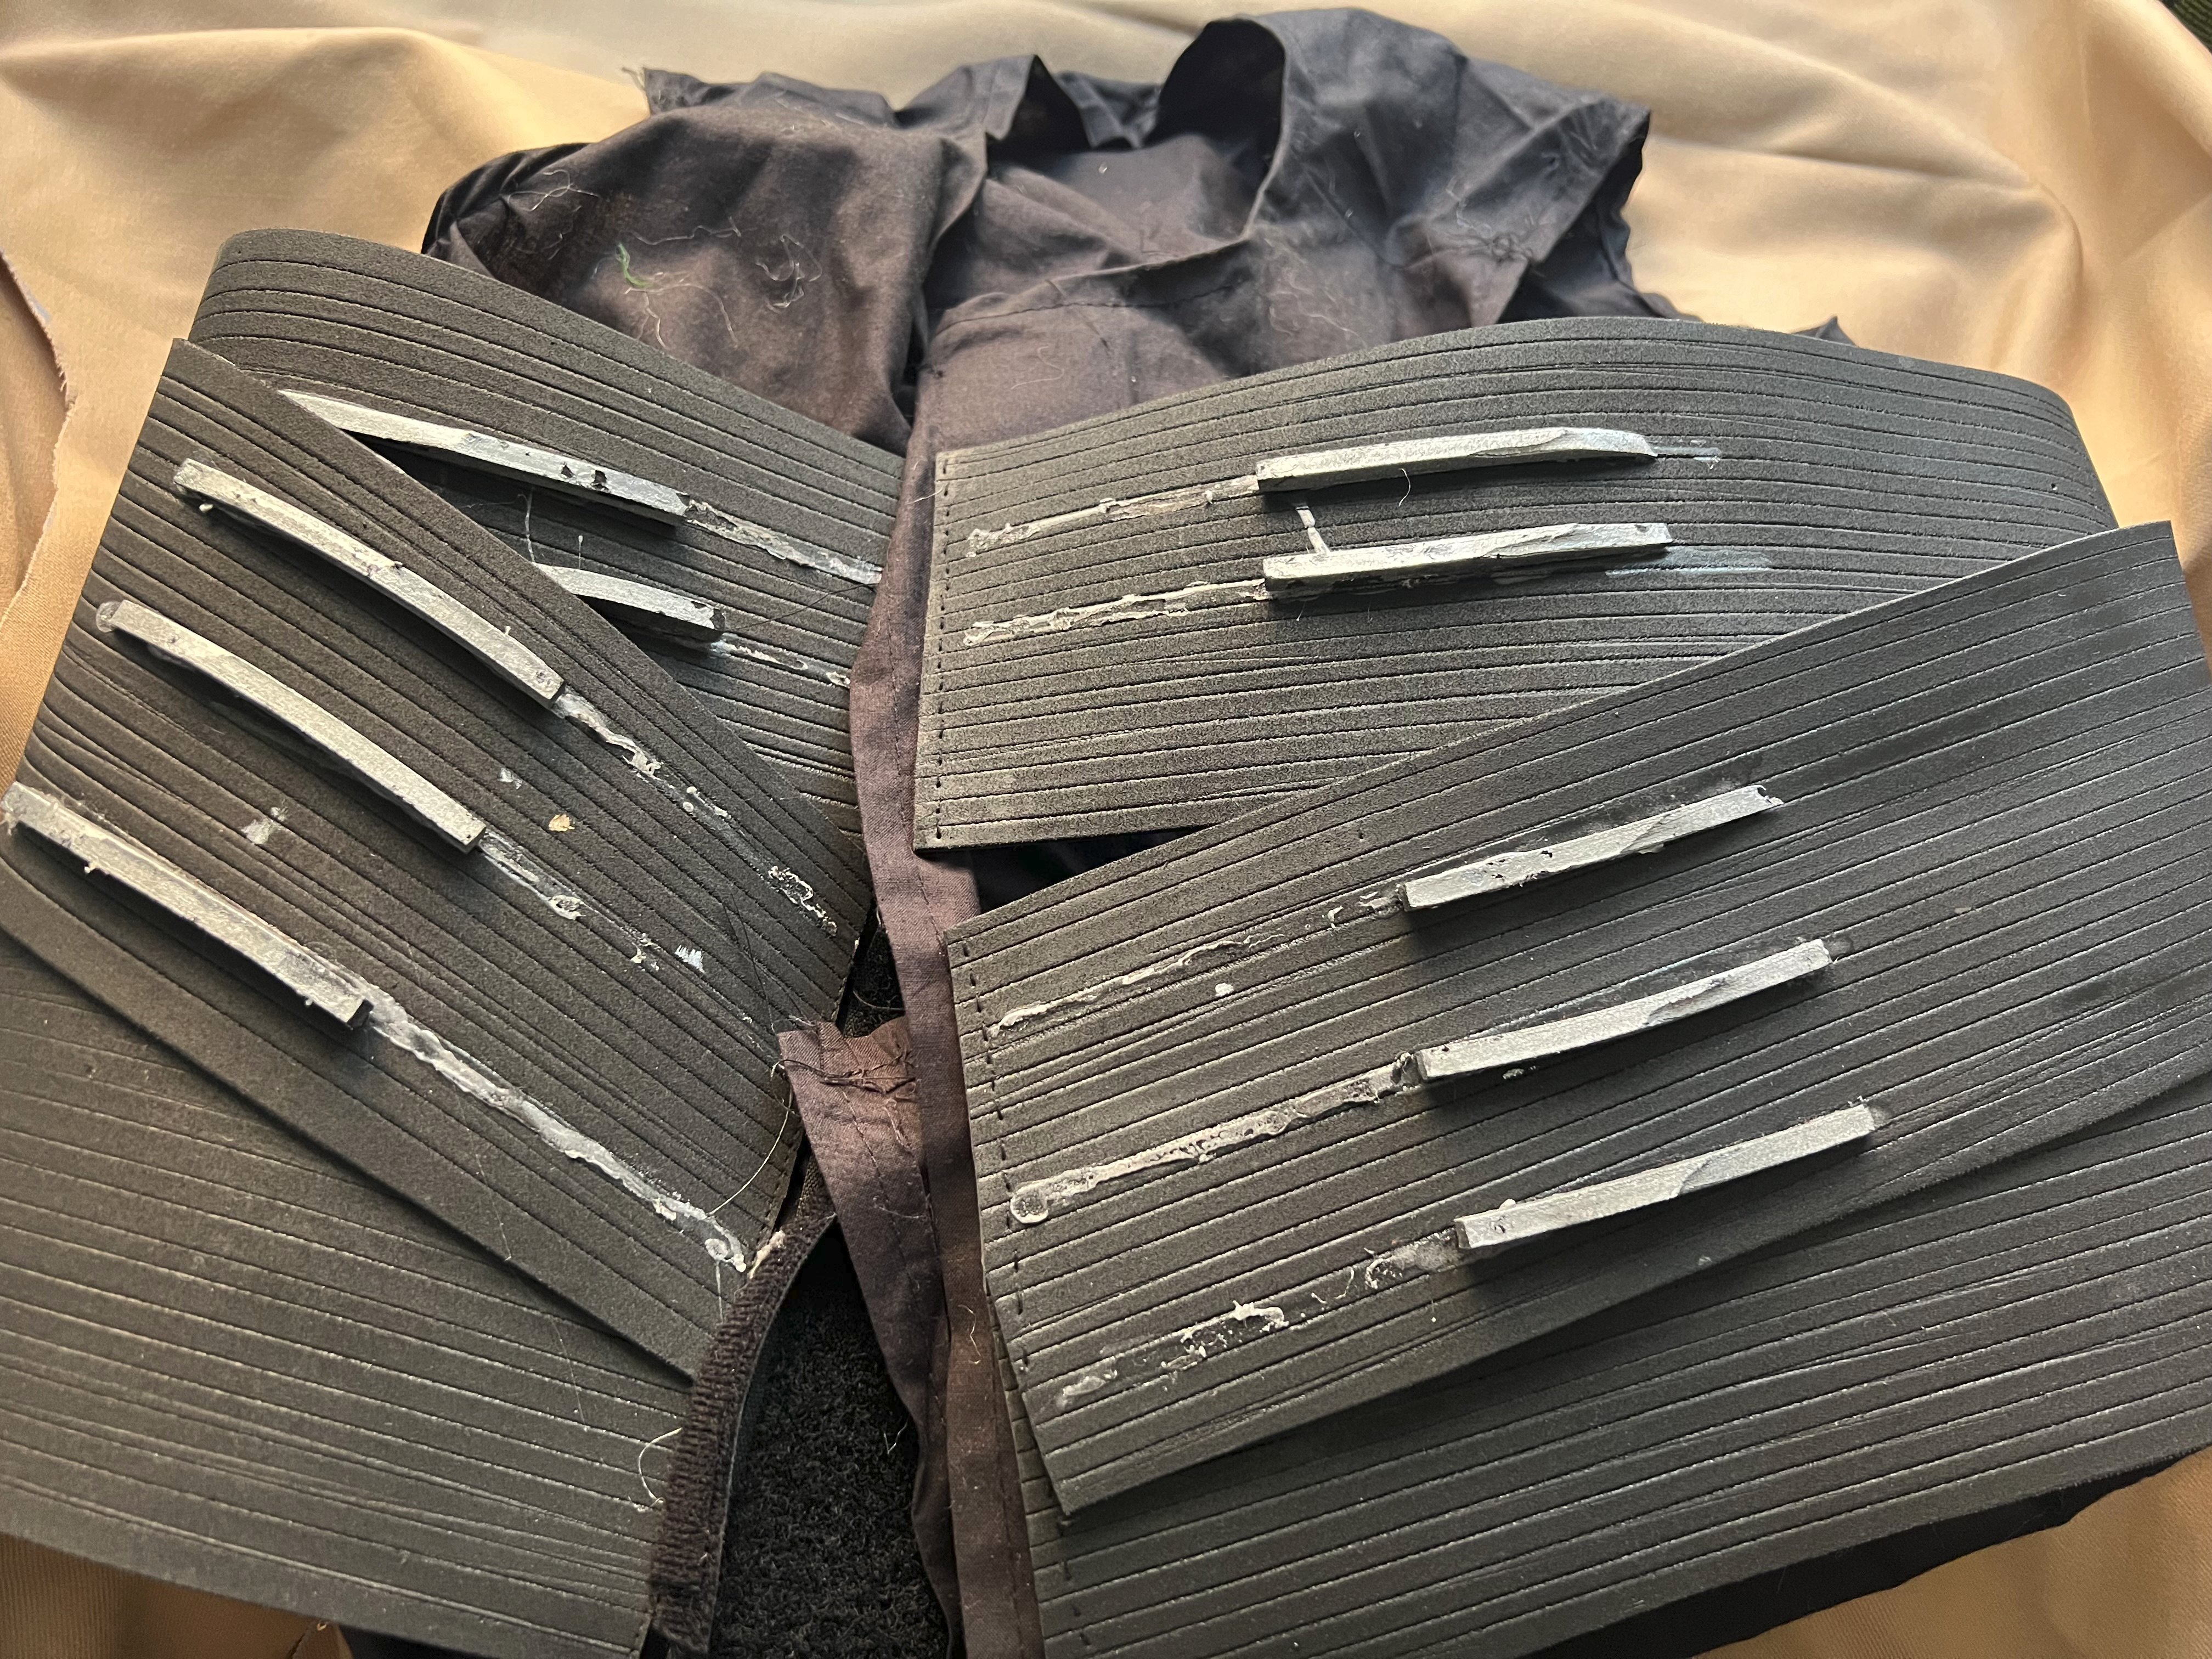
I took apart the older torso piece and used the vest the pipes where attached to as a template for its replacement. I had to add more length to the vest on as the cable bundles took up much more space than the pipes did4, and meant I’d not need to thsirt I used to wear under them. The flat cable bundles were 2mm EVA foam I scored lines into and painted black, then sewed into place. The metal bits where again EVA foam, but 5mm cut to shape and sprayed silver.
I had to rush making this and it shows. The cable bundles are too short, something that only became obvious once attached and left big gaps. I also painted the metal bits at about 10pm the night before the con, which is obvious when you see at the missing paint and finger marks. I’m probably going to redo the foam aspects of the torso before I wear the costume again.
You can see where I had to move the silver elements further out because I got my measurements wrong. In my defence it was about 11:30pm by this point!
Quiver and arrows
I didn’t get around to doing these so I just reused the existing ones from the Shield Weaver. The quiver is in real bad shape now though and barely lasted through to end of day at the con. I think it was held on only by friction at the end!
Final thoughts
Do I think that the changes I made improved the costume? I’d say yes, but it still needs more work. The torso is much easier to move around in and did substantially improve the silhouette.
It’s unfortunately going to need another overhaul before I next wear it to fix the issues caused by me rushing it, as well as to fix a bunch of minor issues that have crept in due to general wear and tear. I’m also going to limit wearing it to the cooler parts of the year - it does not breath well and on a sunny summer day I felt myself being slowly cooked!
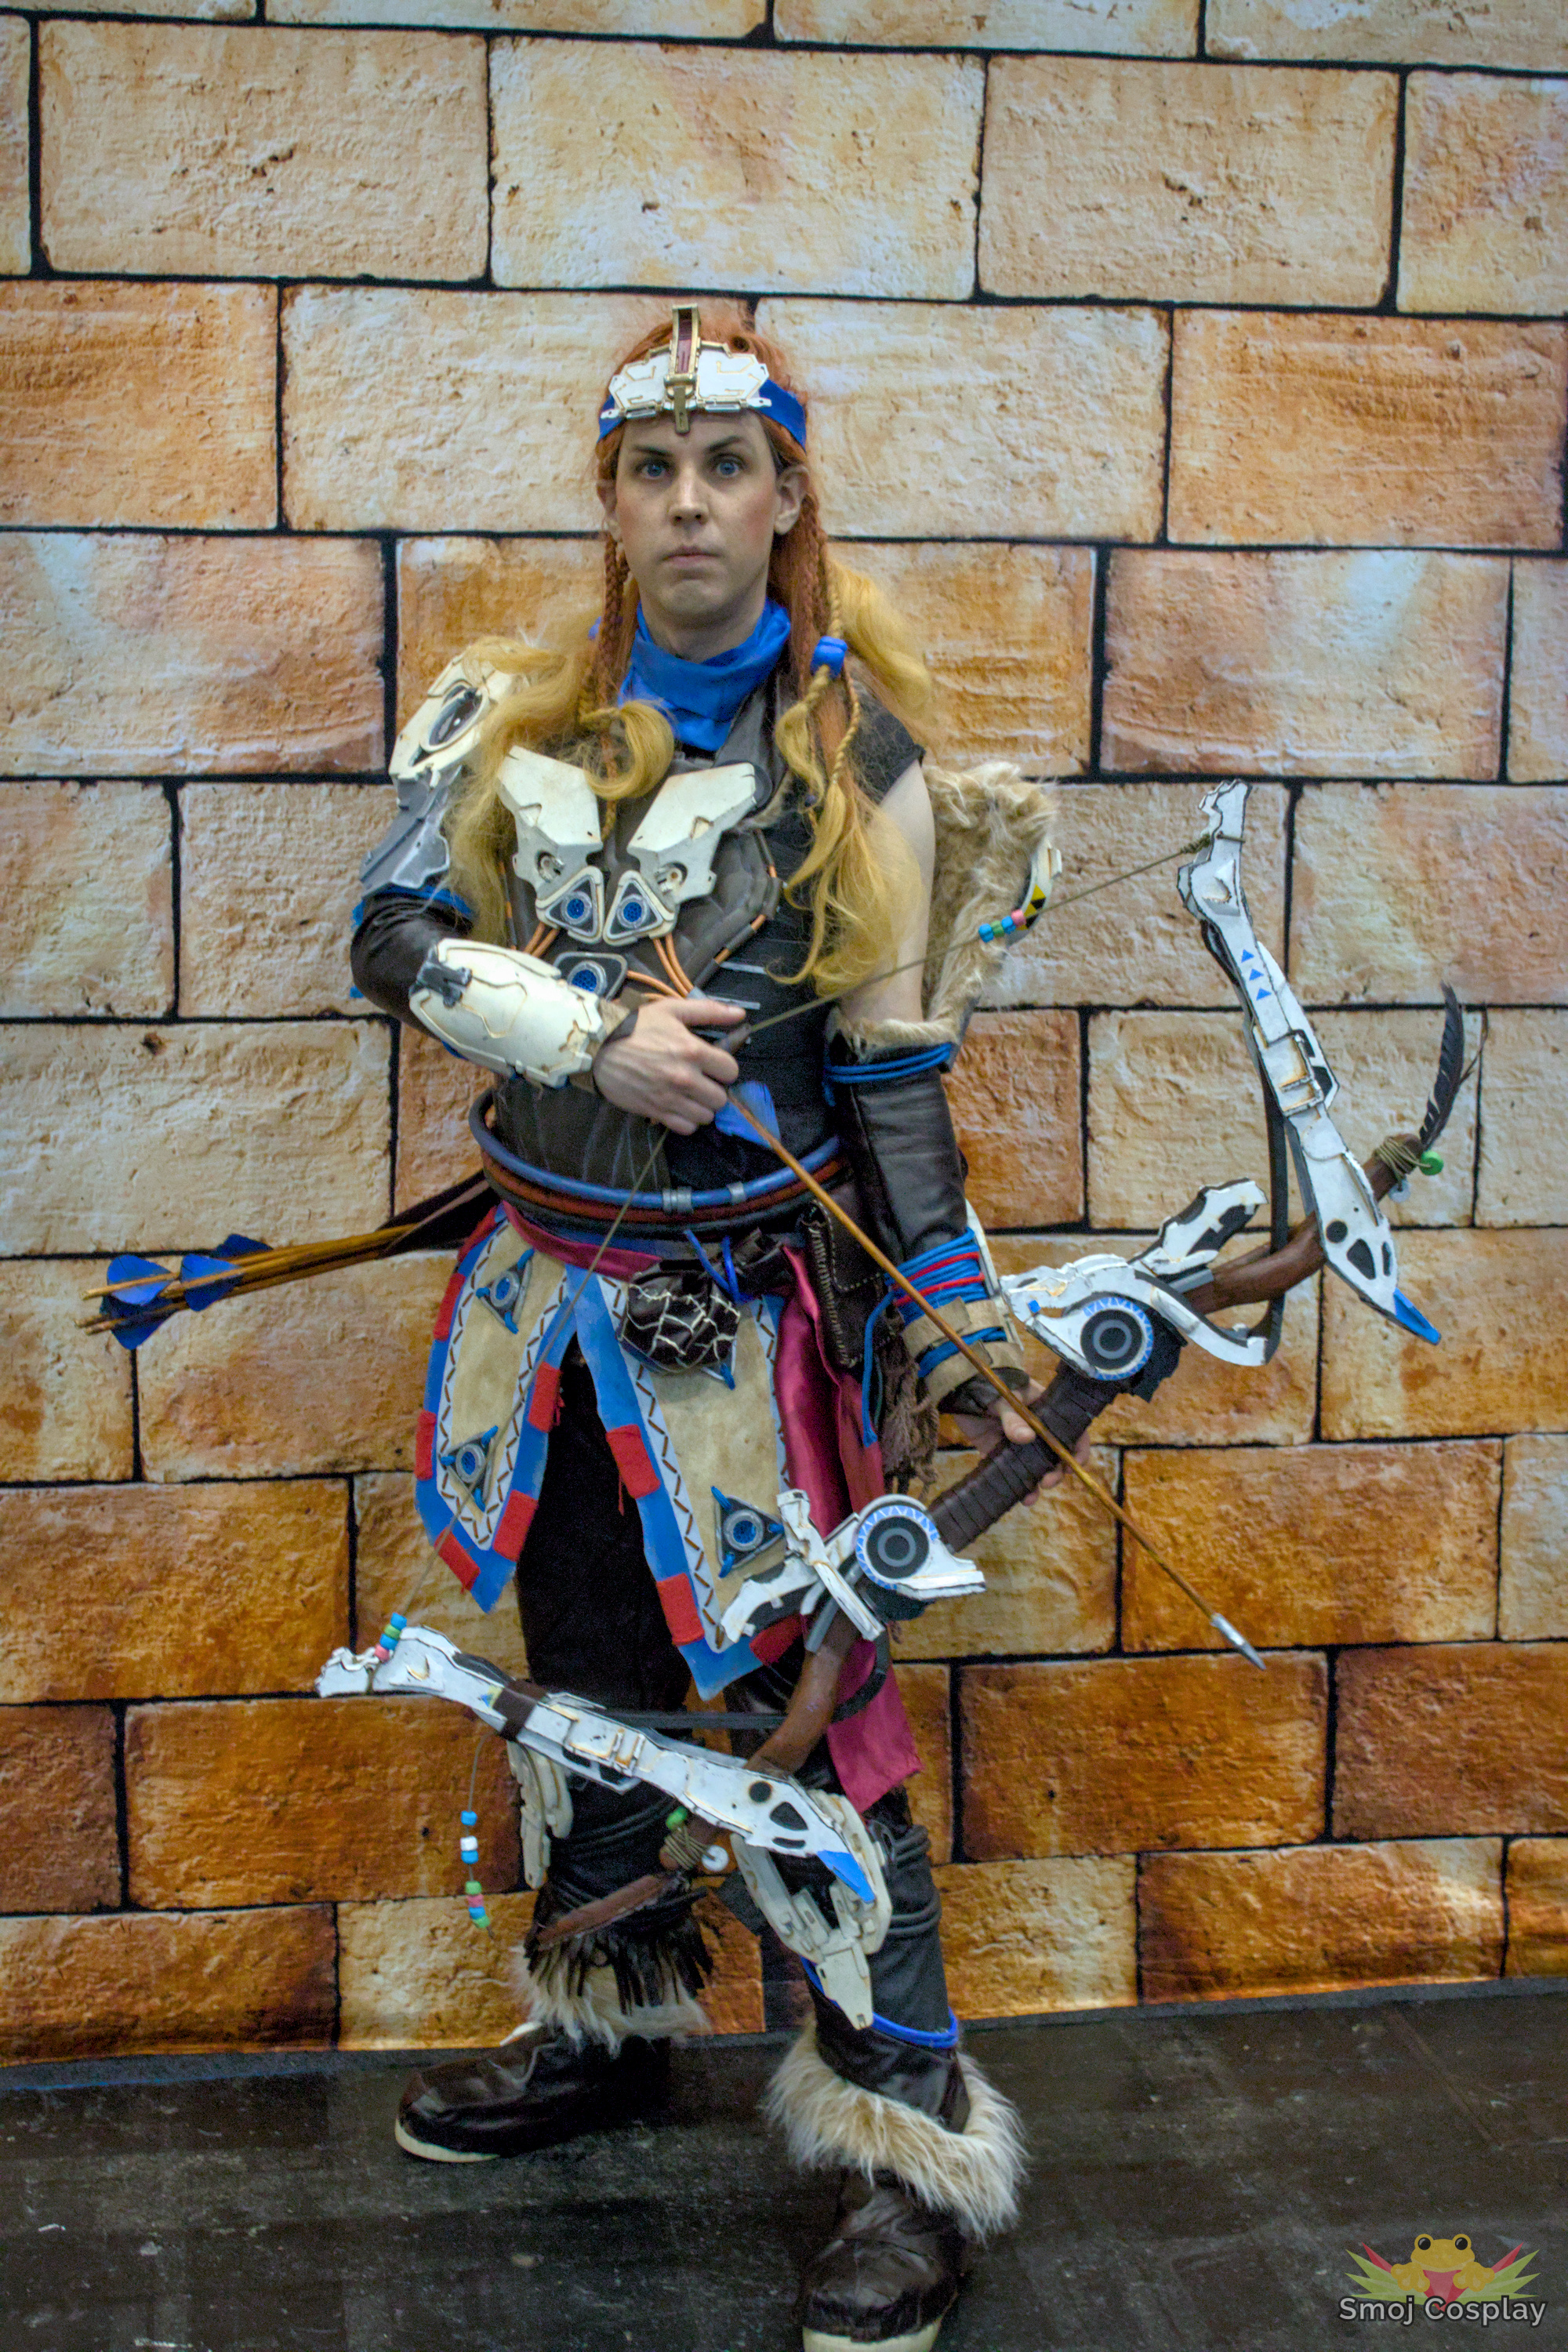
Here it is in all its updated glory!
-
Minus the admittedly overpowered shield system. RIP to me, now I have to learn to dodge 😂. ↩︎
-
I had to re-work the entire thing multiple times and I remember being only days away from the con desperately trying to get it finished. What I wore had un-hemmed edges and loads of messy glue visible! ↩︎
-
I debated re-working my old one but I’m too proud of the painting I did to get rid of it. ↩︎
-
Though this is more because the pipes where not positioned correctly on the original, they where always too high up. ↩︎
-
 Instagram:
@smojcosplay
Instagram:
@smojcosplay
-
 Tumblr:
smojcosplay
Tumblr:
smojcosplay