A bumper roundup!
TLDR; I was so busy I forgot to post so I’ve crammed it all into one. Including: painting, re-painting and building a bow!
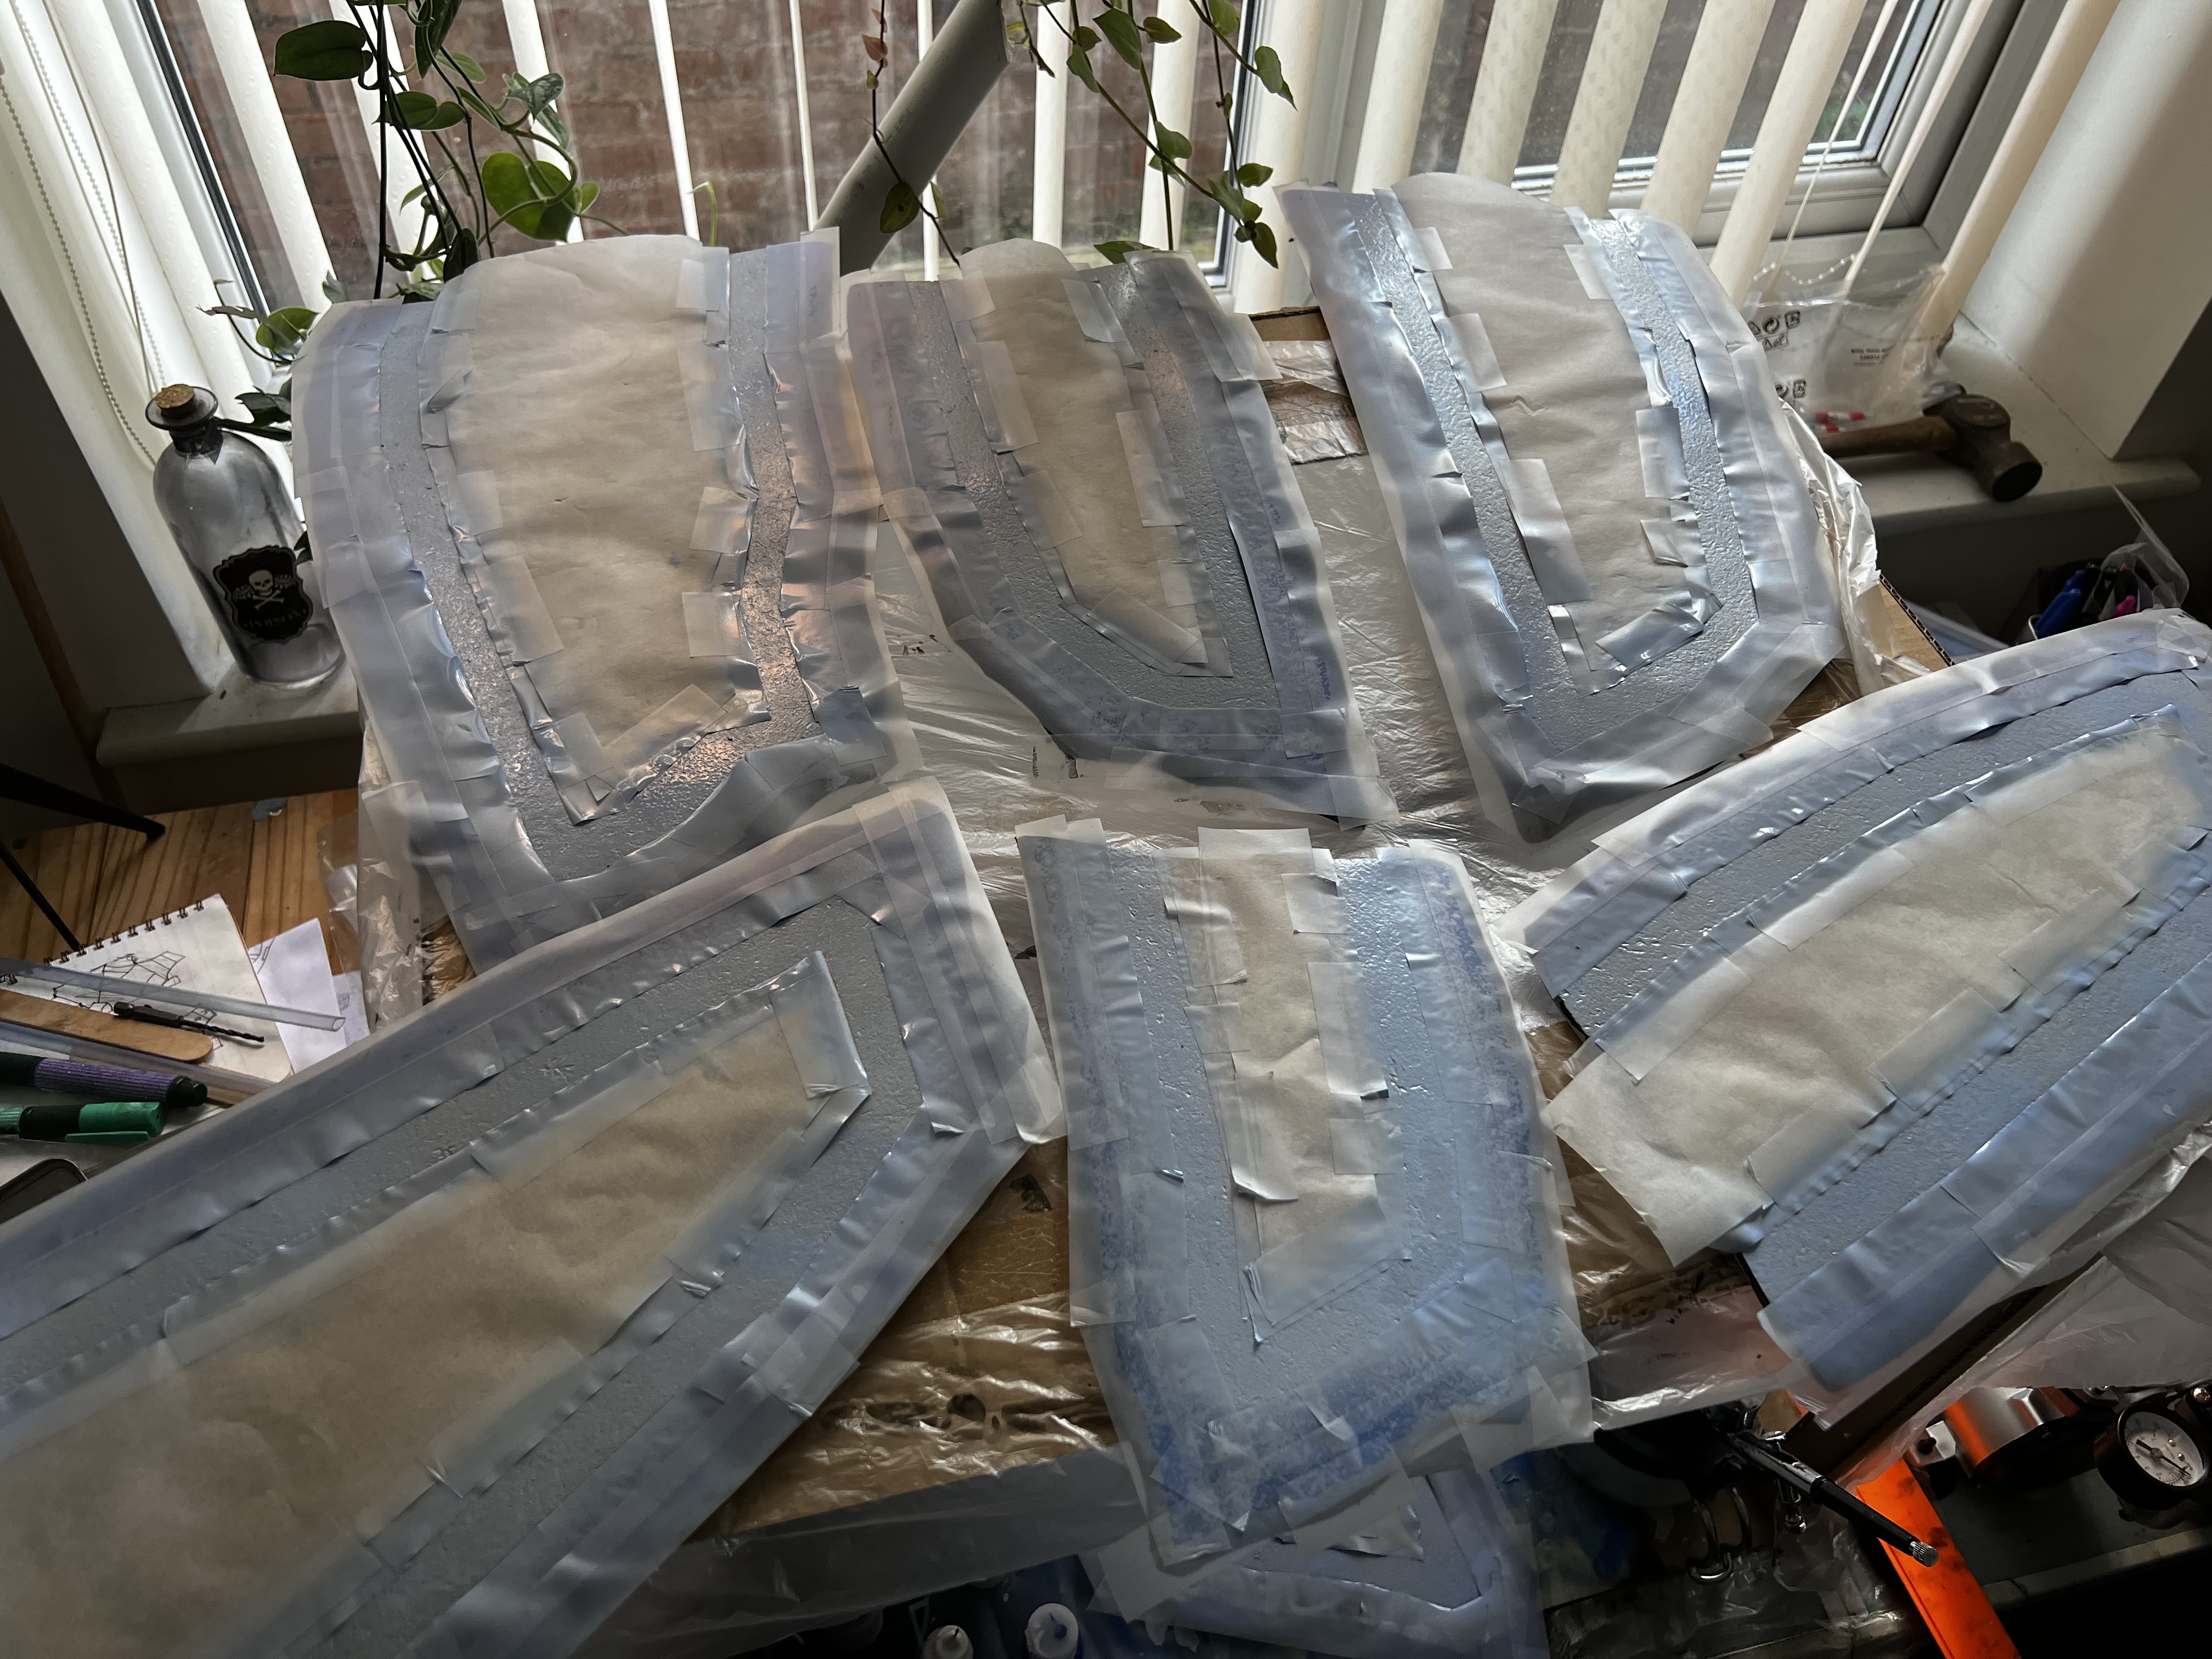
Getting in a flap
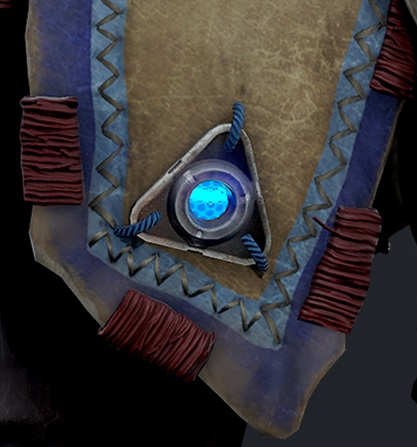
Painting the flaps did not go entirely to plan and I hit a few setbacks. Number one was that I did not adequately mask off the area, thinking a line of tape would be enough. It was only after I removed the tape I realised that the airbrush gives off a lot of vapour and that makes a very noticeable difference if one area has been taped and one hasn’t!
The second mistake I made was to do with the colour, I’d tested a small area and thought it looked good but when I compared it to references it was well off the shade I needed. Oop’s! That involved a complete repaint back to how it was before I started with the blue. Luckily it was the two smallest ones!

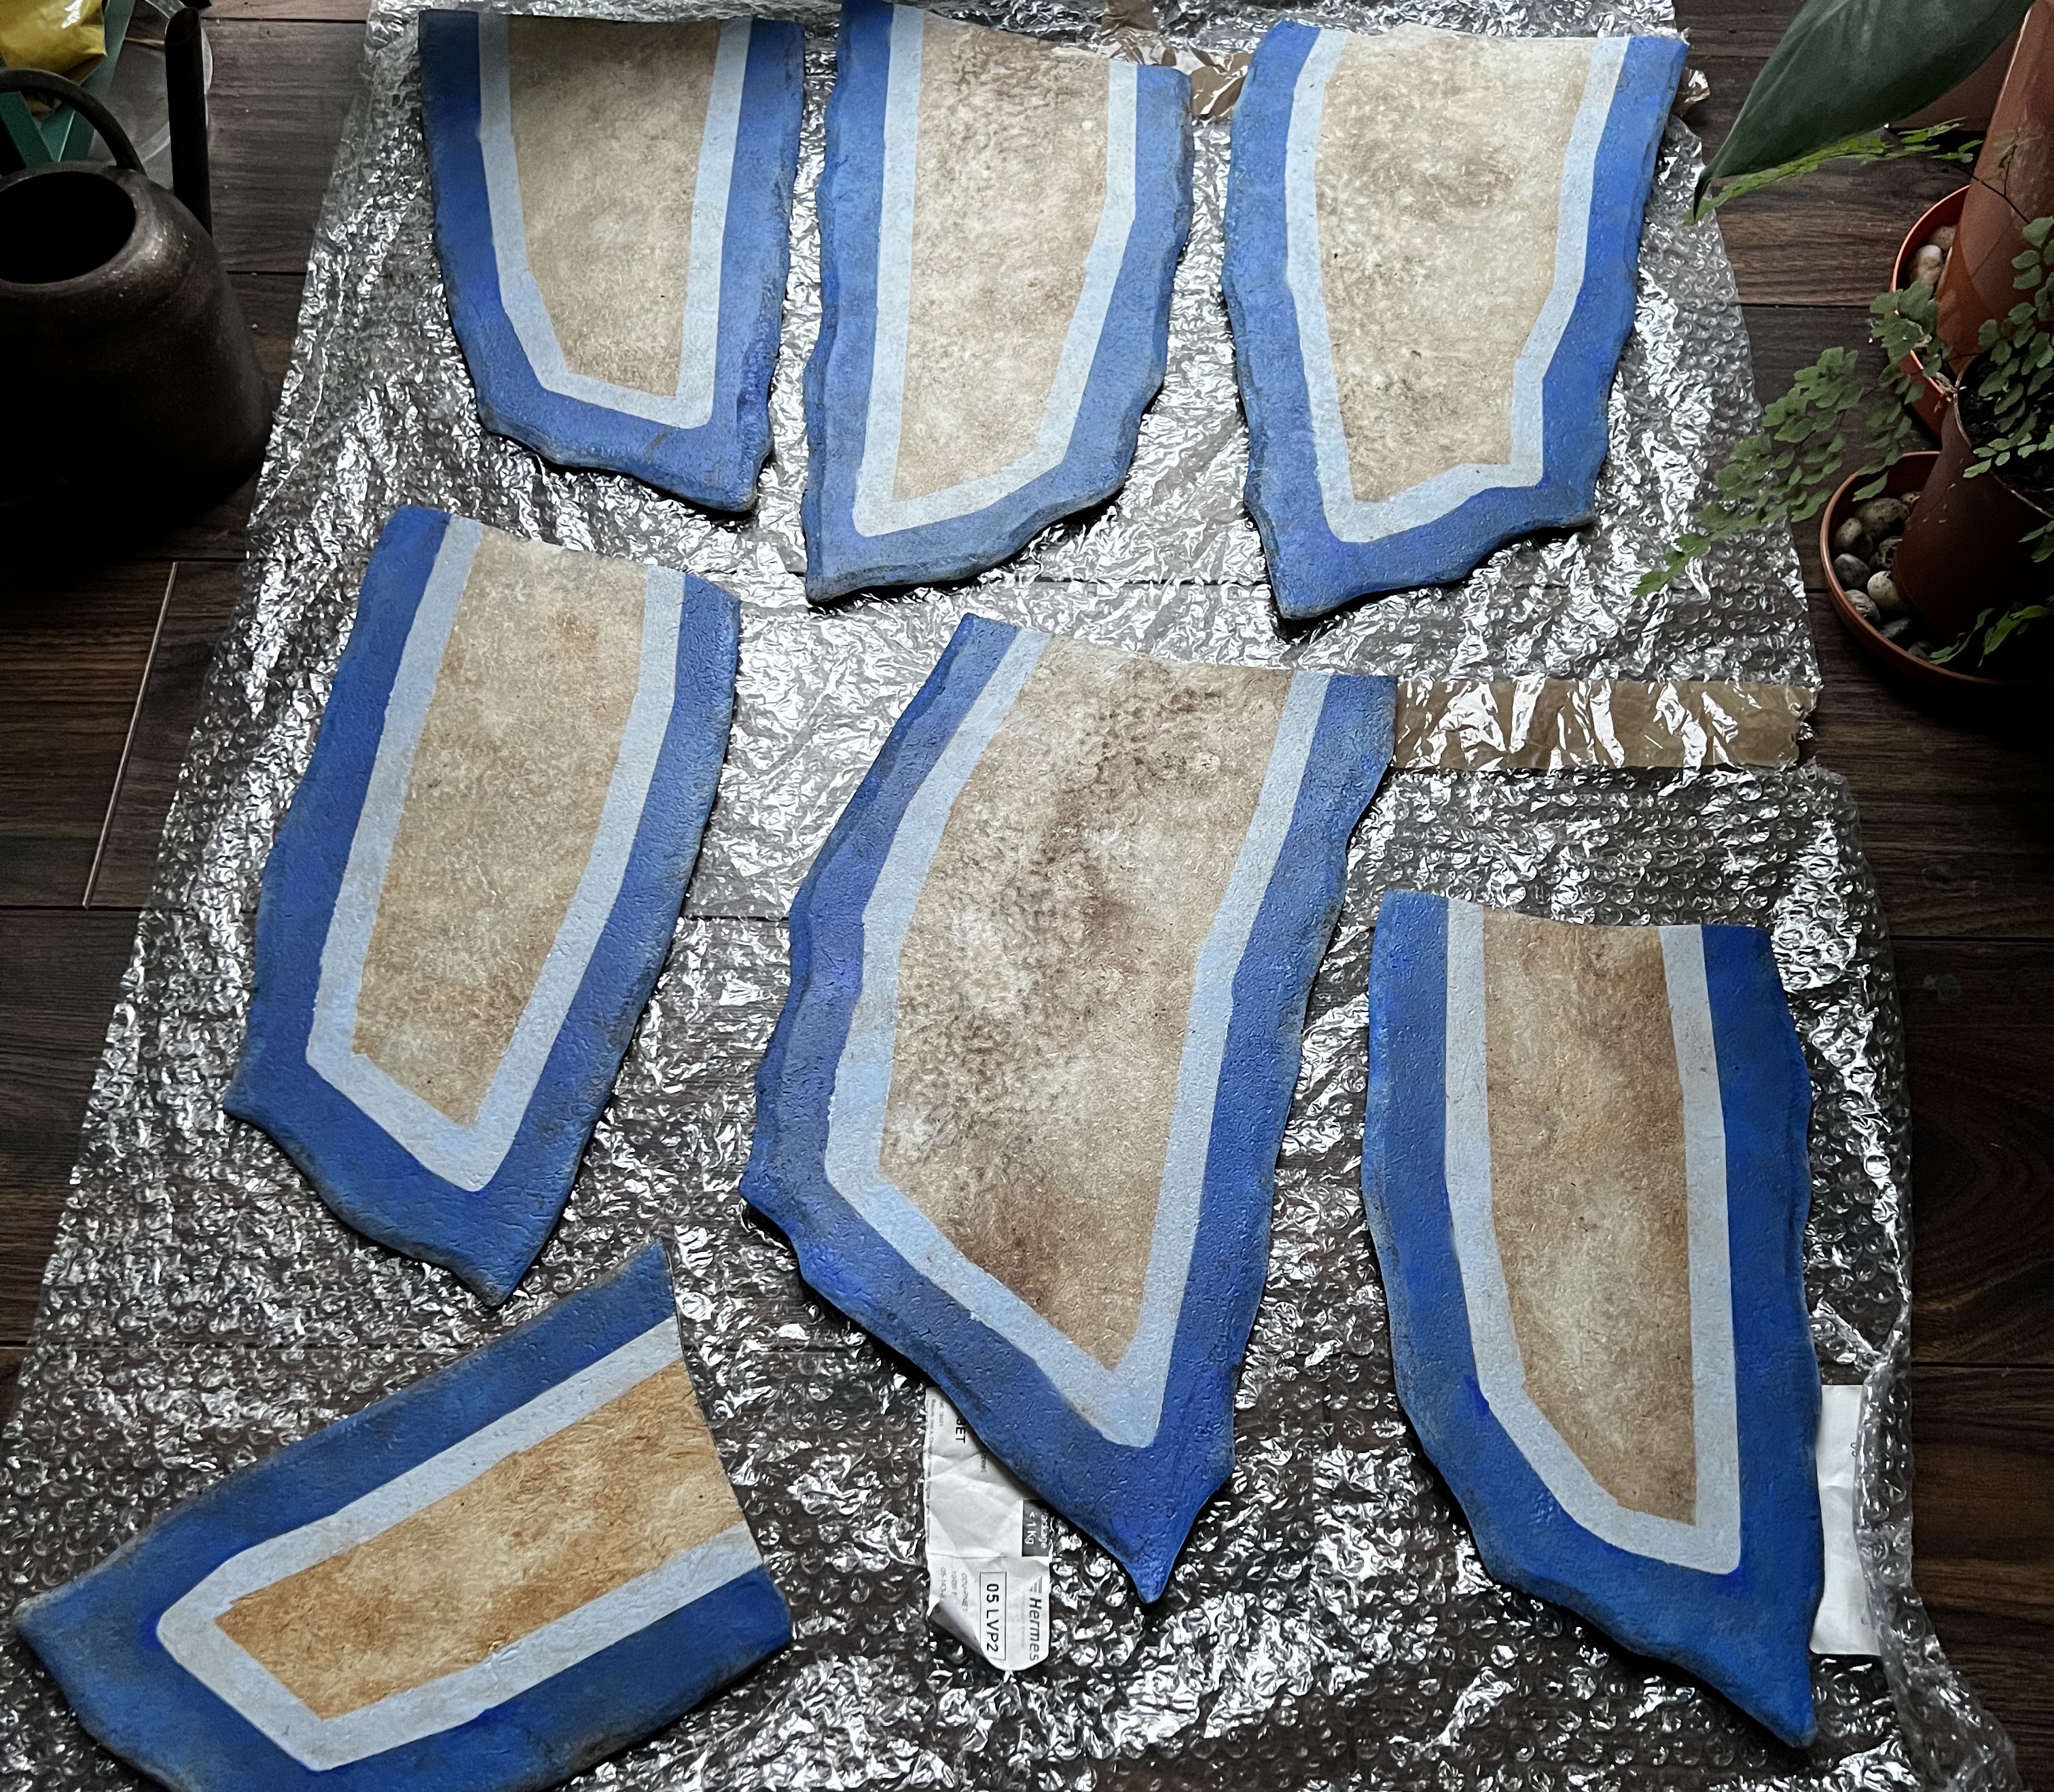
The old blue on the left, the new on the right
I was looking for something to use as a mixer when I discovered a bottle of Aqamarine Blue I’d bought for well…something. A bit of experimentation later and mixed with white it came close enough for me.
For the lighter blue stripe I masked off again, even more time consuming this time as I had to cover the centre and the outer blue. I checked my colours this time before I painted, opting to adding the aquamarine blue to white to get the right colour.
All that was left to do was to add some dark brown again to weather it, and then spray it with varnish. Now I’d like to say something about spray varnish: It is the most noxious thing I’ve dealt with in recent times. I mistakenly thought it’d be fine in my spray booth, but the vapour fills an entire room in the most obnoxious manner. I had to take a break in my bedroom until it’d dispersed a bit and I’ve made a note to only varnish outside.
Colour matching my nemesis
Once the flaps where completed I started painting the armour. Me, feeling confident, mixed up a batch of light grey paint and happily started spraying. It was too light. So add a bit more black and off spraying again. Feeling pleased about how quickly I’d got it done I went back to check on my reference image and… The colour was of course wrong!
I’d mixed up a basic grey (just white + black) but looking at the armour the base is actually more an off white. After some thought I realised I had the answer already - mix white with titan buff (the off white used for the flaps) to create a light, off white colour that, thankfully, seems to come close to what I need.
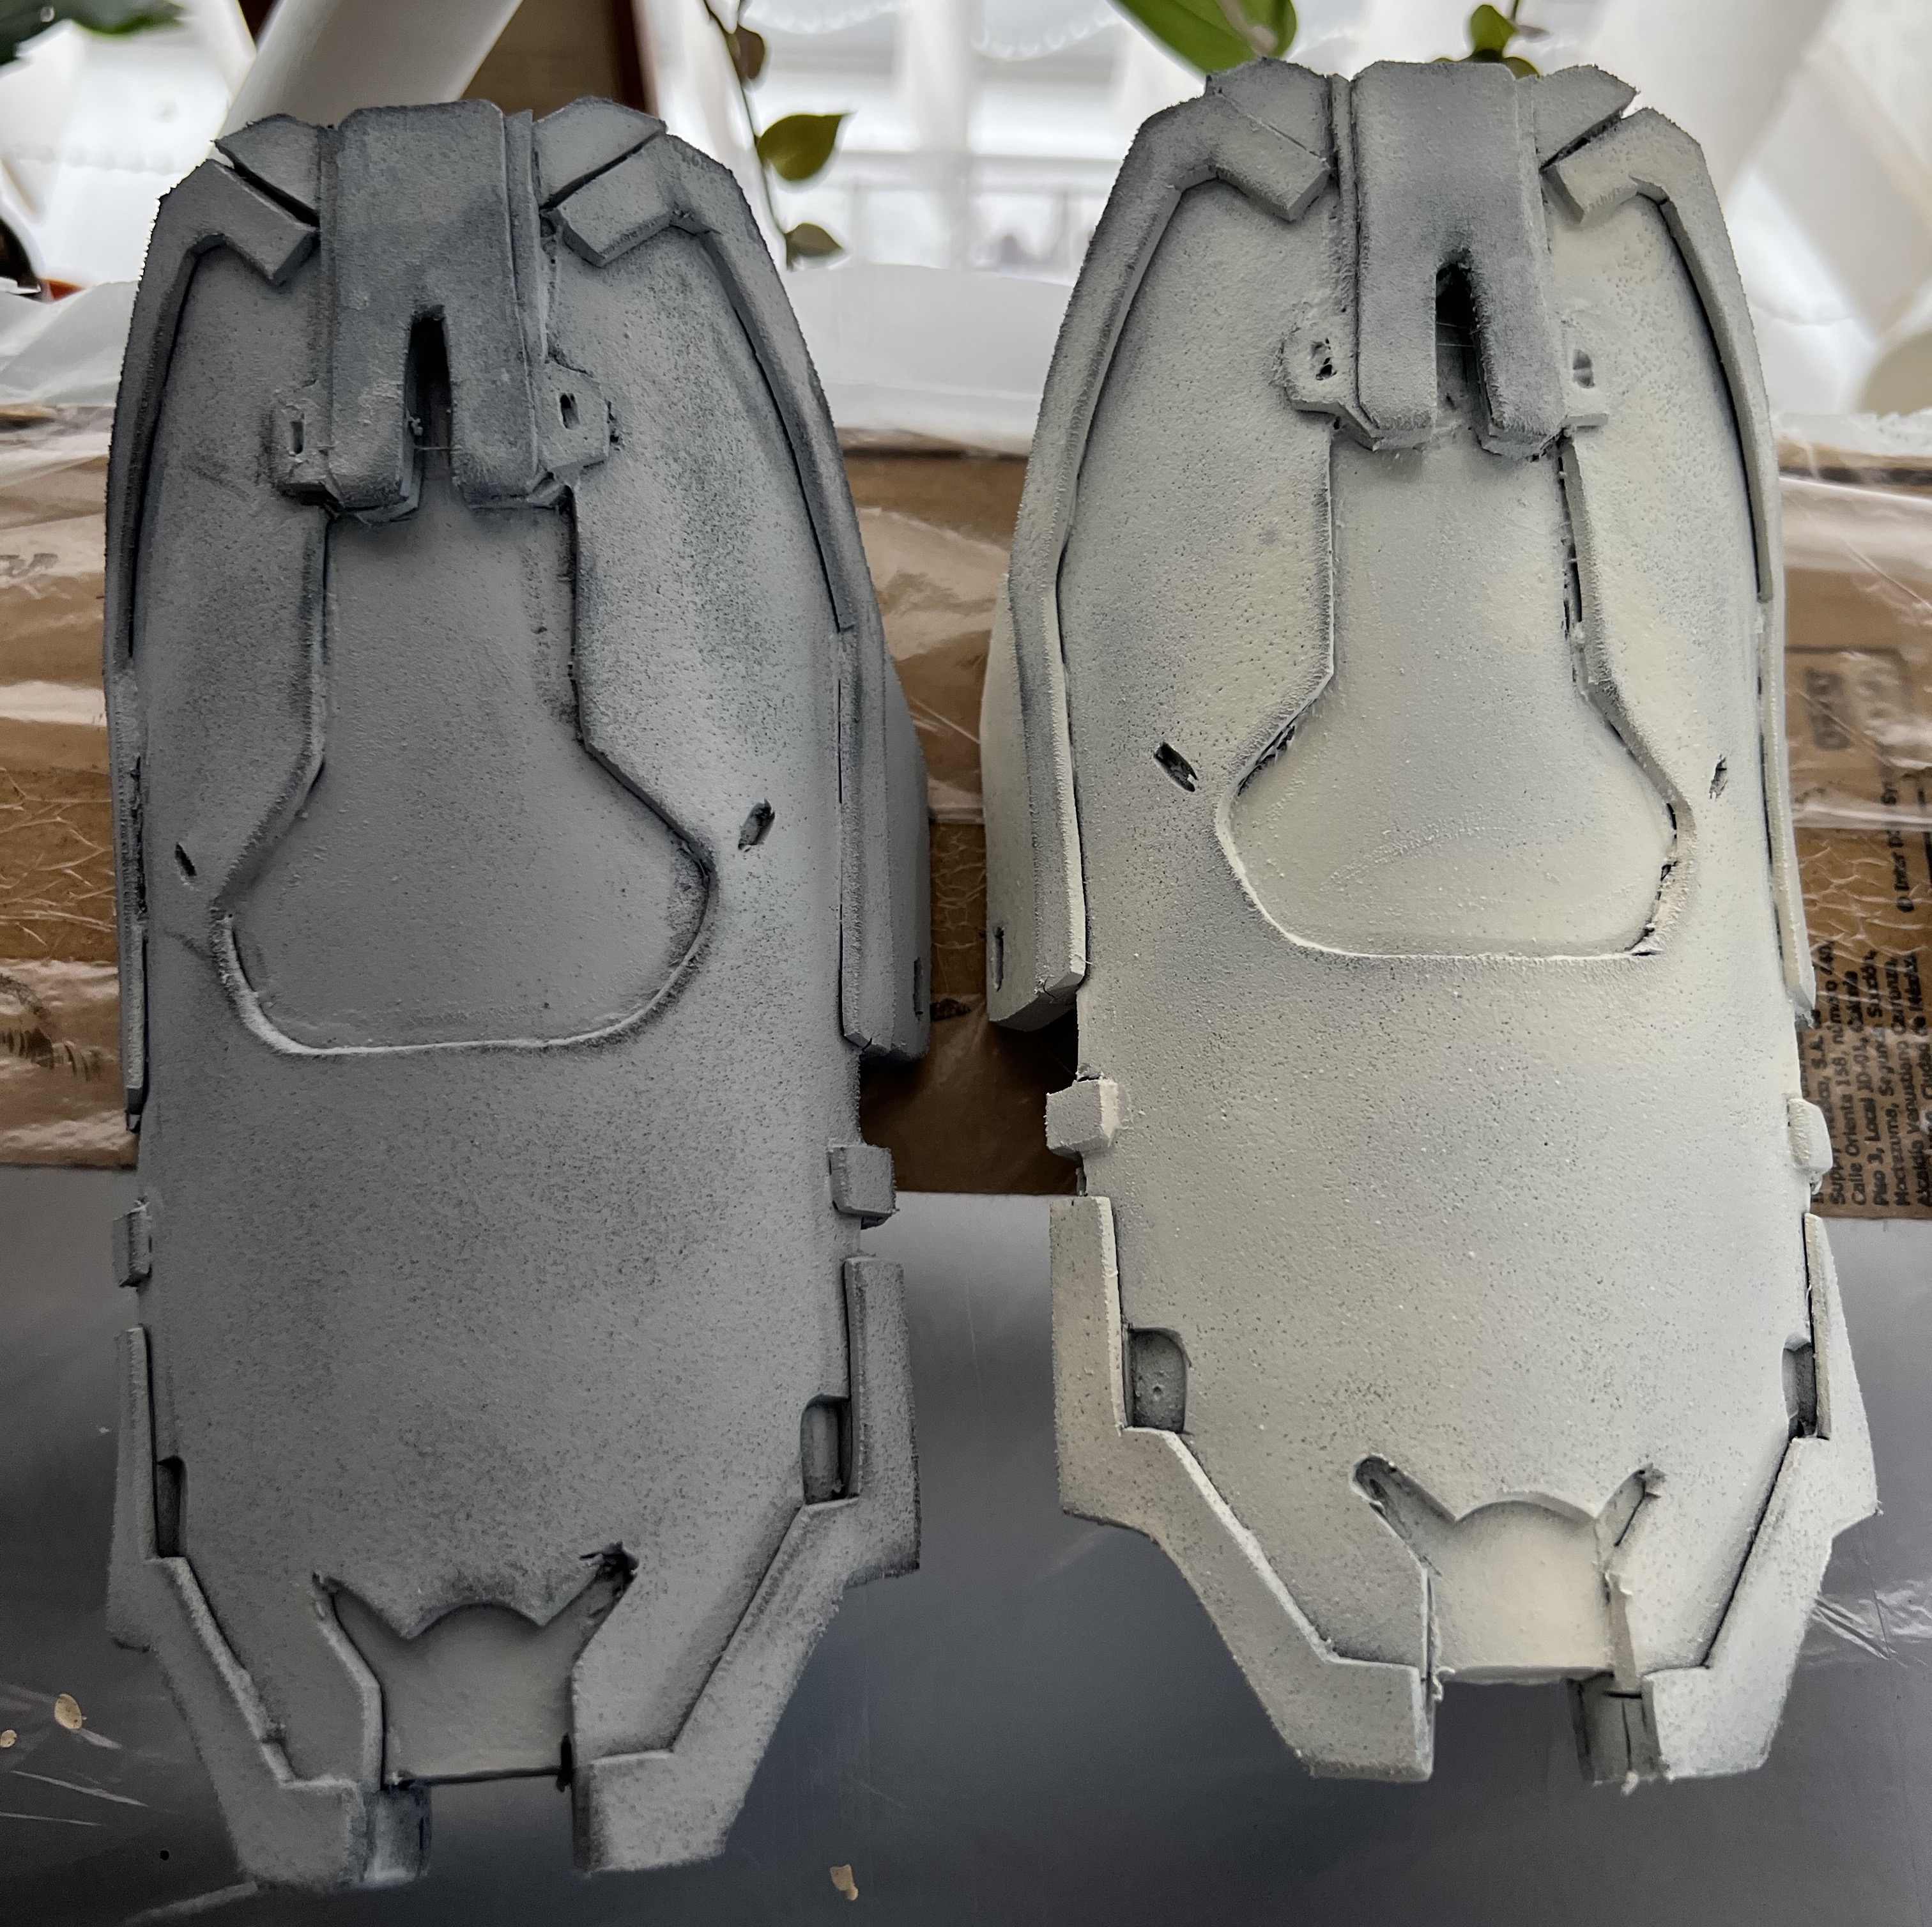
Old, grey paint on the left, newer and more accurate off white on the right
All the work wasn’t wasted though as the grey works as a great base for the new colour to go on. After a couple of days work (I get nervous at how hot the compressor gets for the airbrush) I’ve got all the pieces with three coats done and ready for masking off for other colours (mostly blacks, silvers and greys).
I’ve also put the first coat of paint on the black tubing for the torso, once that’s done I can move into figuring out just how I’m going to attach them!
The art of looking like an old coal miner
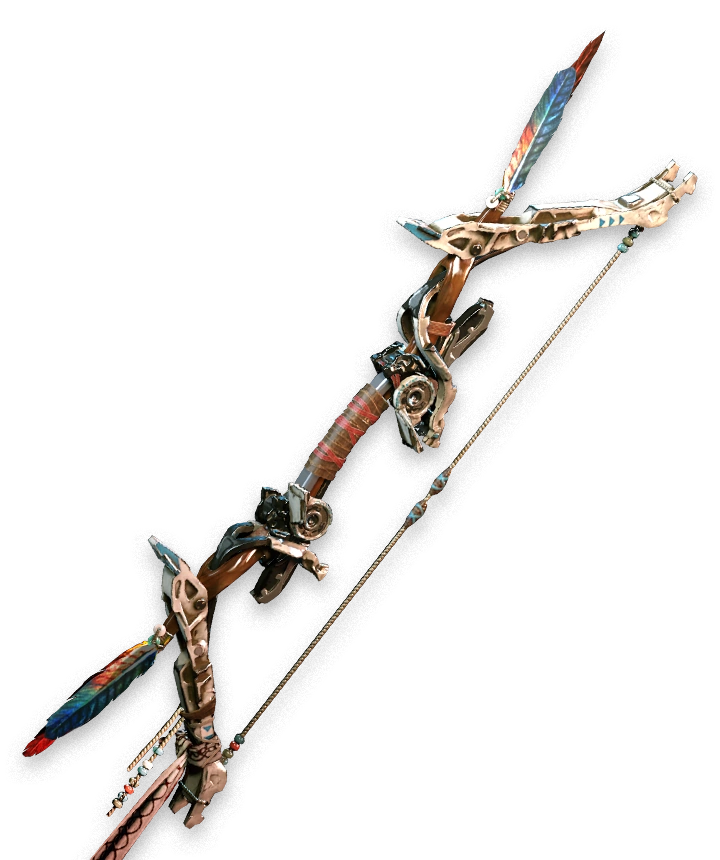
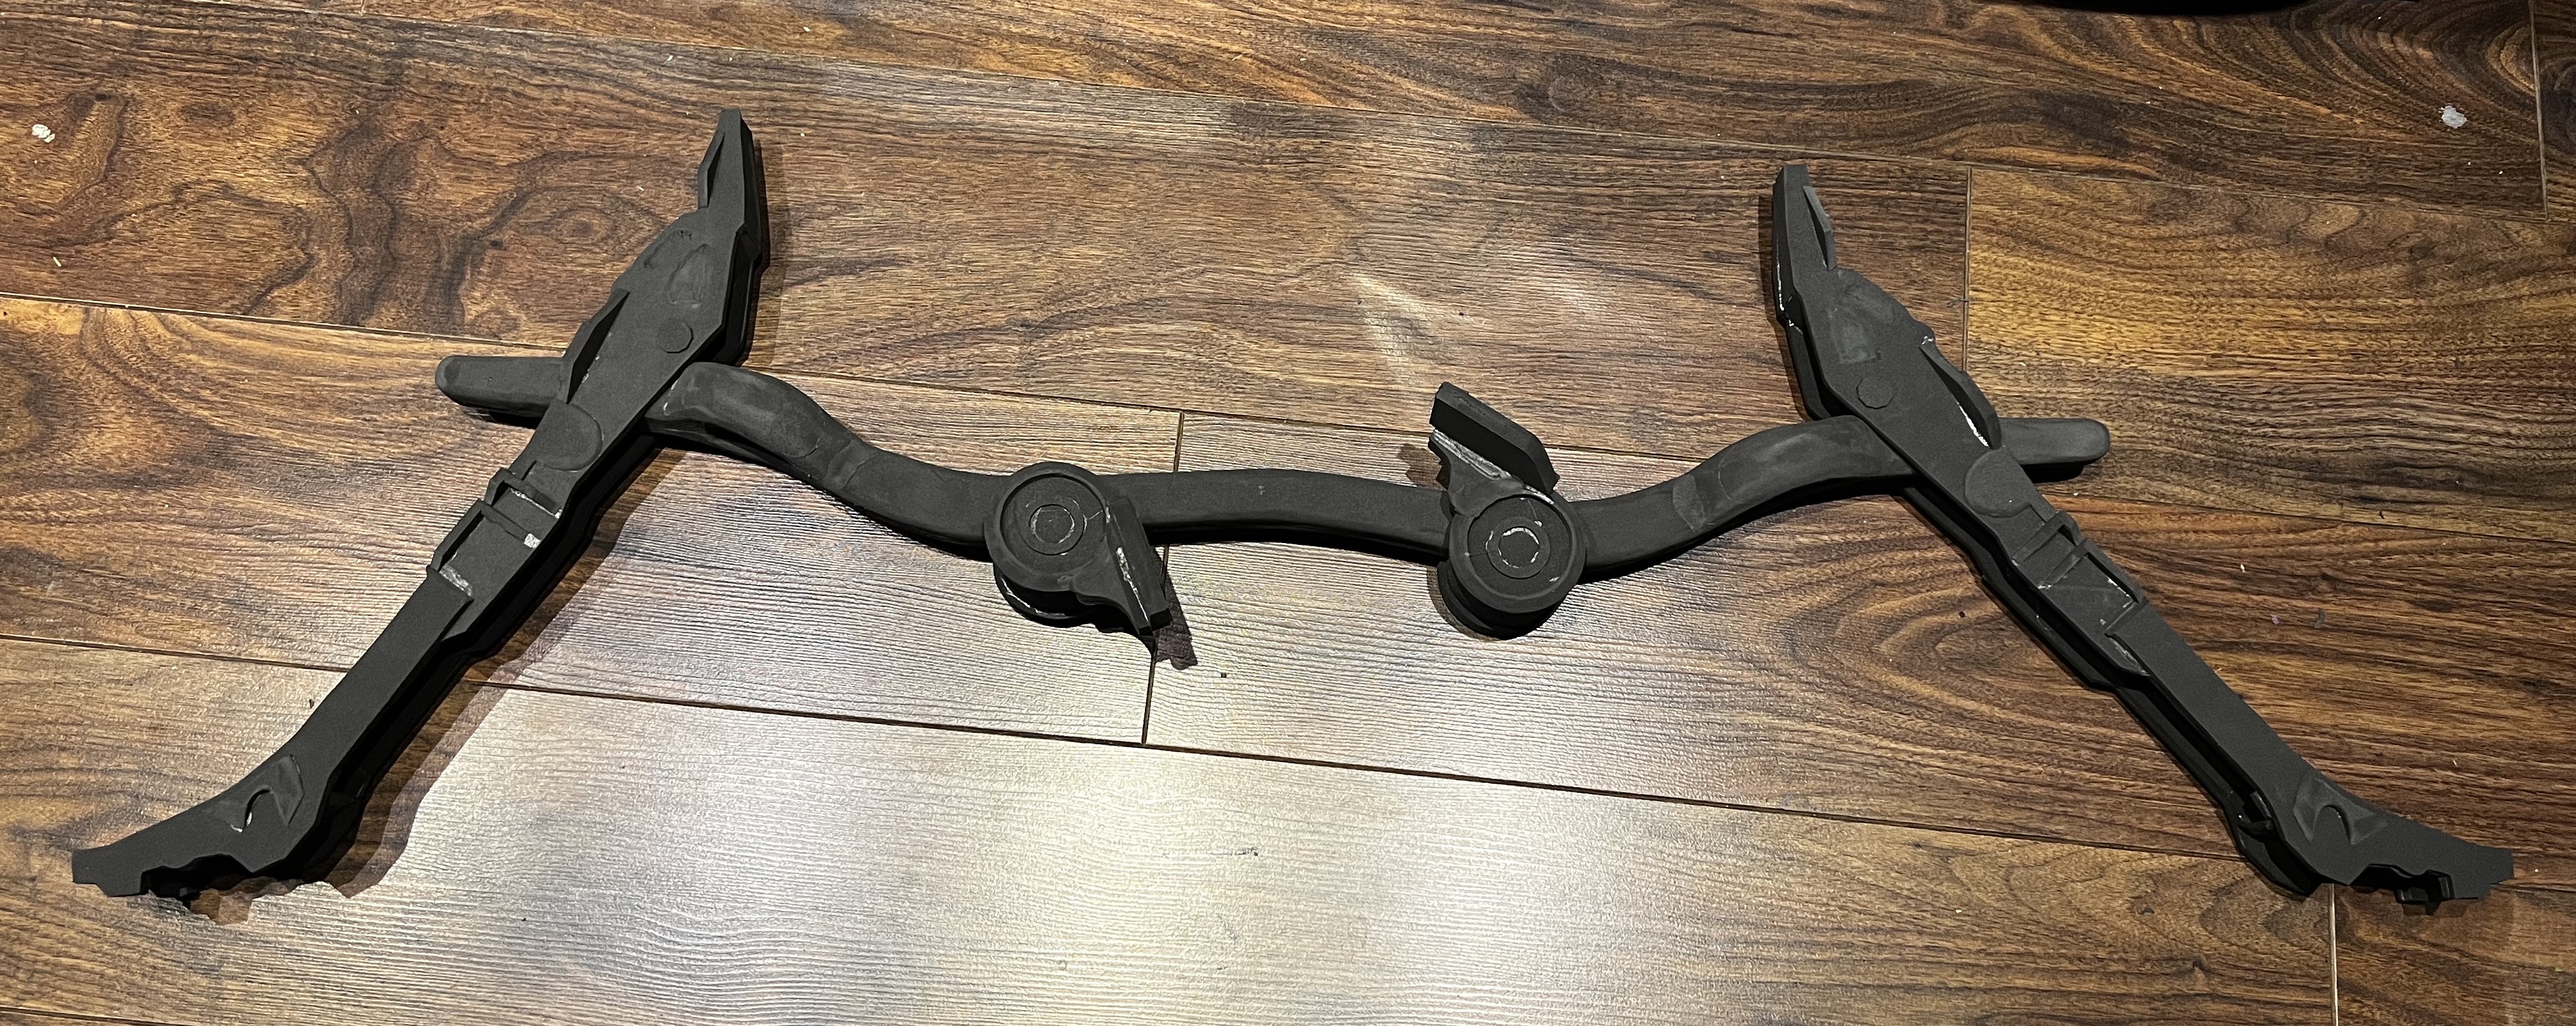
Part of what distracted me from making posts was getting consumed making the bow! I’d cut out most of the pieces in various bits of spare time during the week leading up to a bonus bank holiday weekend.
The war bow is a bit of an annoying shape with two holes in the handle. I wanted to reinforce the foam with wire, but the hole prevents me just running it straight through. I had to drill holes in my foam, threading the wire through and allowing it reinforce the loops. I did this on both sides as two bits of wire are going to be better than one.
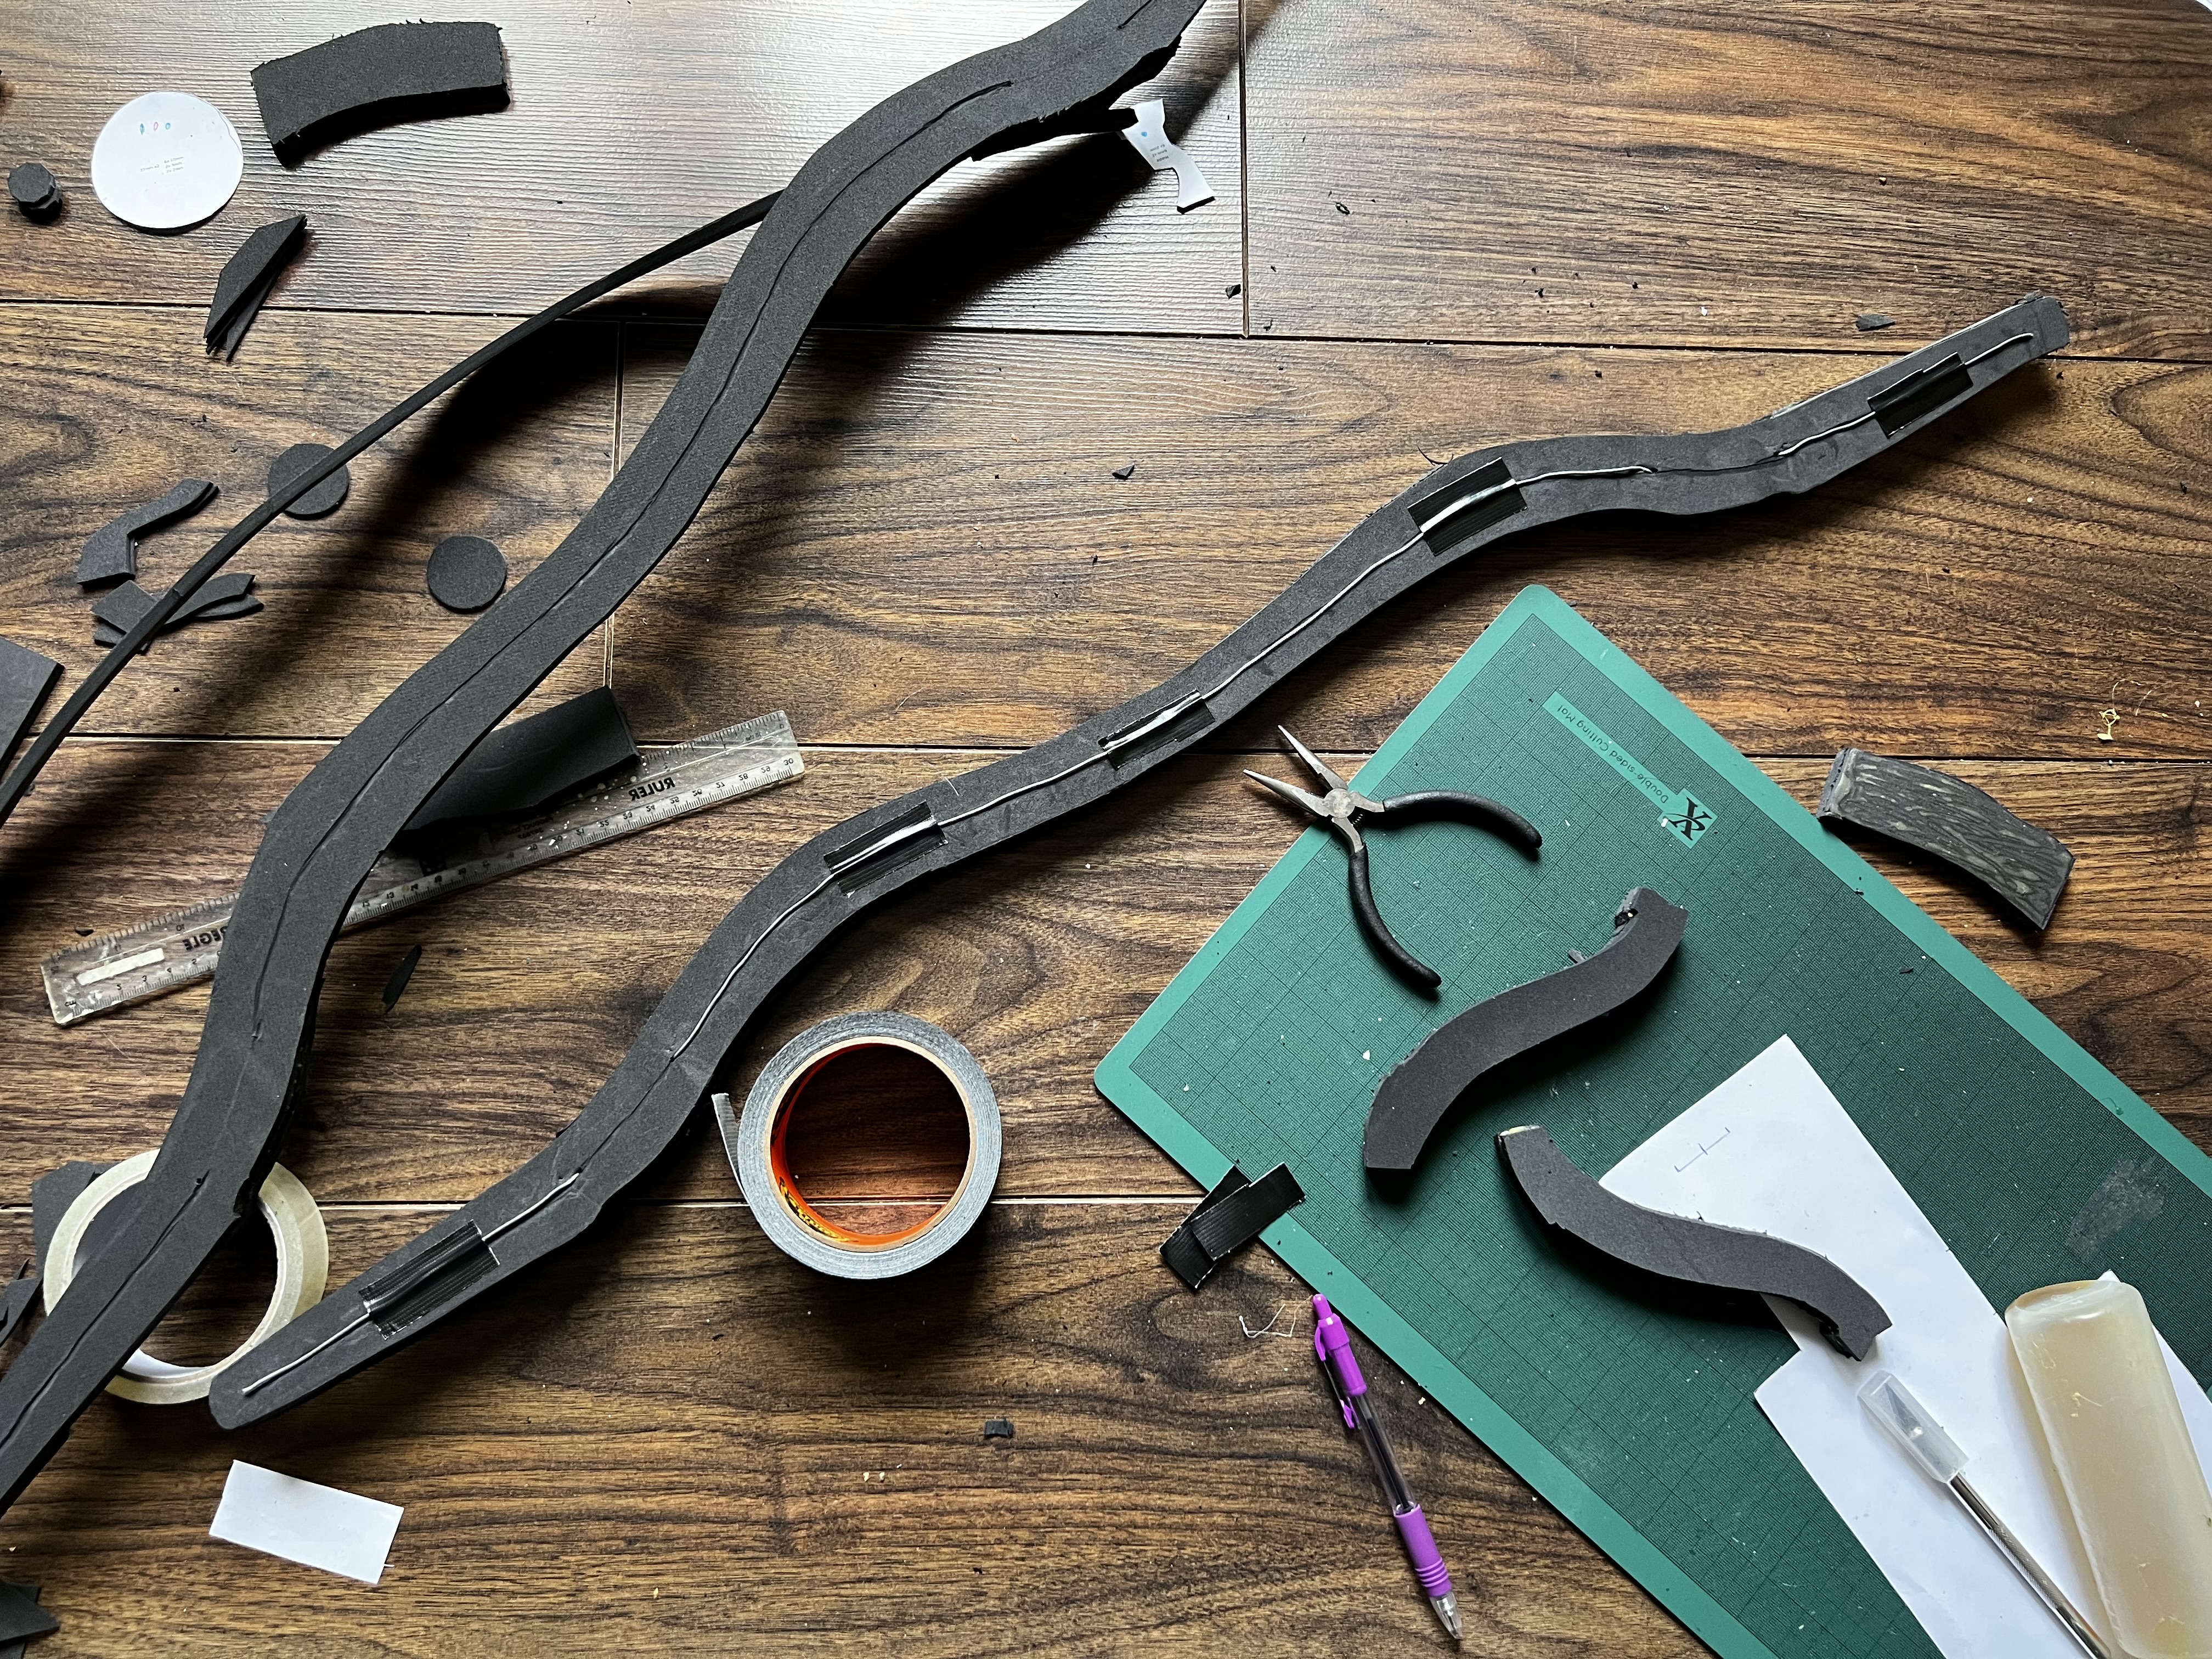
Once I had the basic layered structure I was able to start carving it from a block into something more like wood. I used my craft knife to cut it into the rough shape then used a lot of dremmling and sandpapering to smooth it down. By the end of it I was coated face and arms in black dust and was very grateful of my respirator!
The arms of the bow are mostly built as well with just a few last tweaks to be made. I had thought I’d need to reinforce these with wire too but it seems as if the structure is strong enough to hold the shape. Once everything is fixed in place I can reassess and reinforce if necessary.
What’s next?
Next up it’s painting the other colours on the armour (blacks and dark greys and yellows) as well as priming the bow ready for it being painted too.
I’m also going to get the fabric side of things finished, I’ve been holding off because I’ve been concentrating on getting the painting done, but with time pressing on I think getting it done sooner rather than later makes sense. There’s only 4 weekends left for me to finish this!
If you have an questions or ideas for posts you’d like to see, send me a tweet @tjomas
-
 Instagram:
@smojcosplay
Instagram:
@smojcosplay
-
 Tumblr:
smojcosplay
Tumblr:
smojcosplay