Retrospective: Planning Aloy
Reference images
When it comes to costume planning my first step is to go online and try to find as many reference images as possible. For Aloy that was especially easy as it didn’t take long to find that various designers had posted a treasure trove of images of the various outfits on their Artstation accounts1,2 and from there discover that someone on Deviantart had extracted out and rendered the exact outfit I wanted to make3. The biggest bonus here was that the artists who had created the render it had posted the files used to create the render!
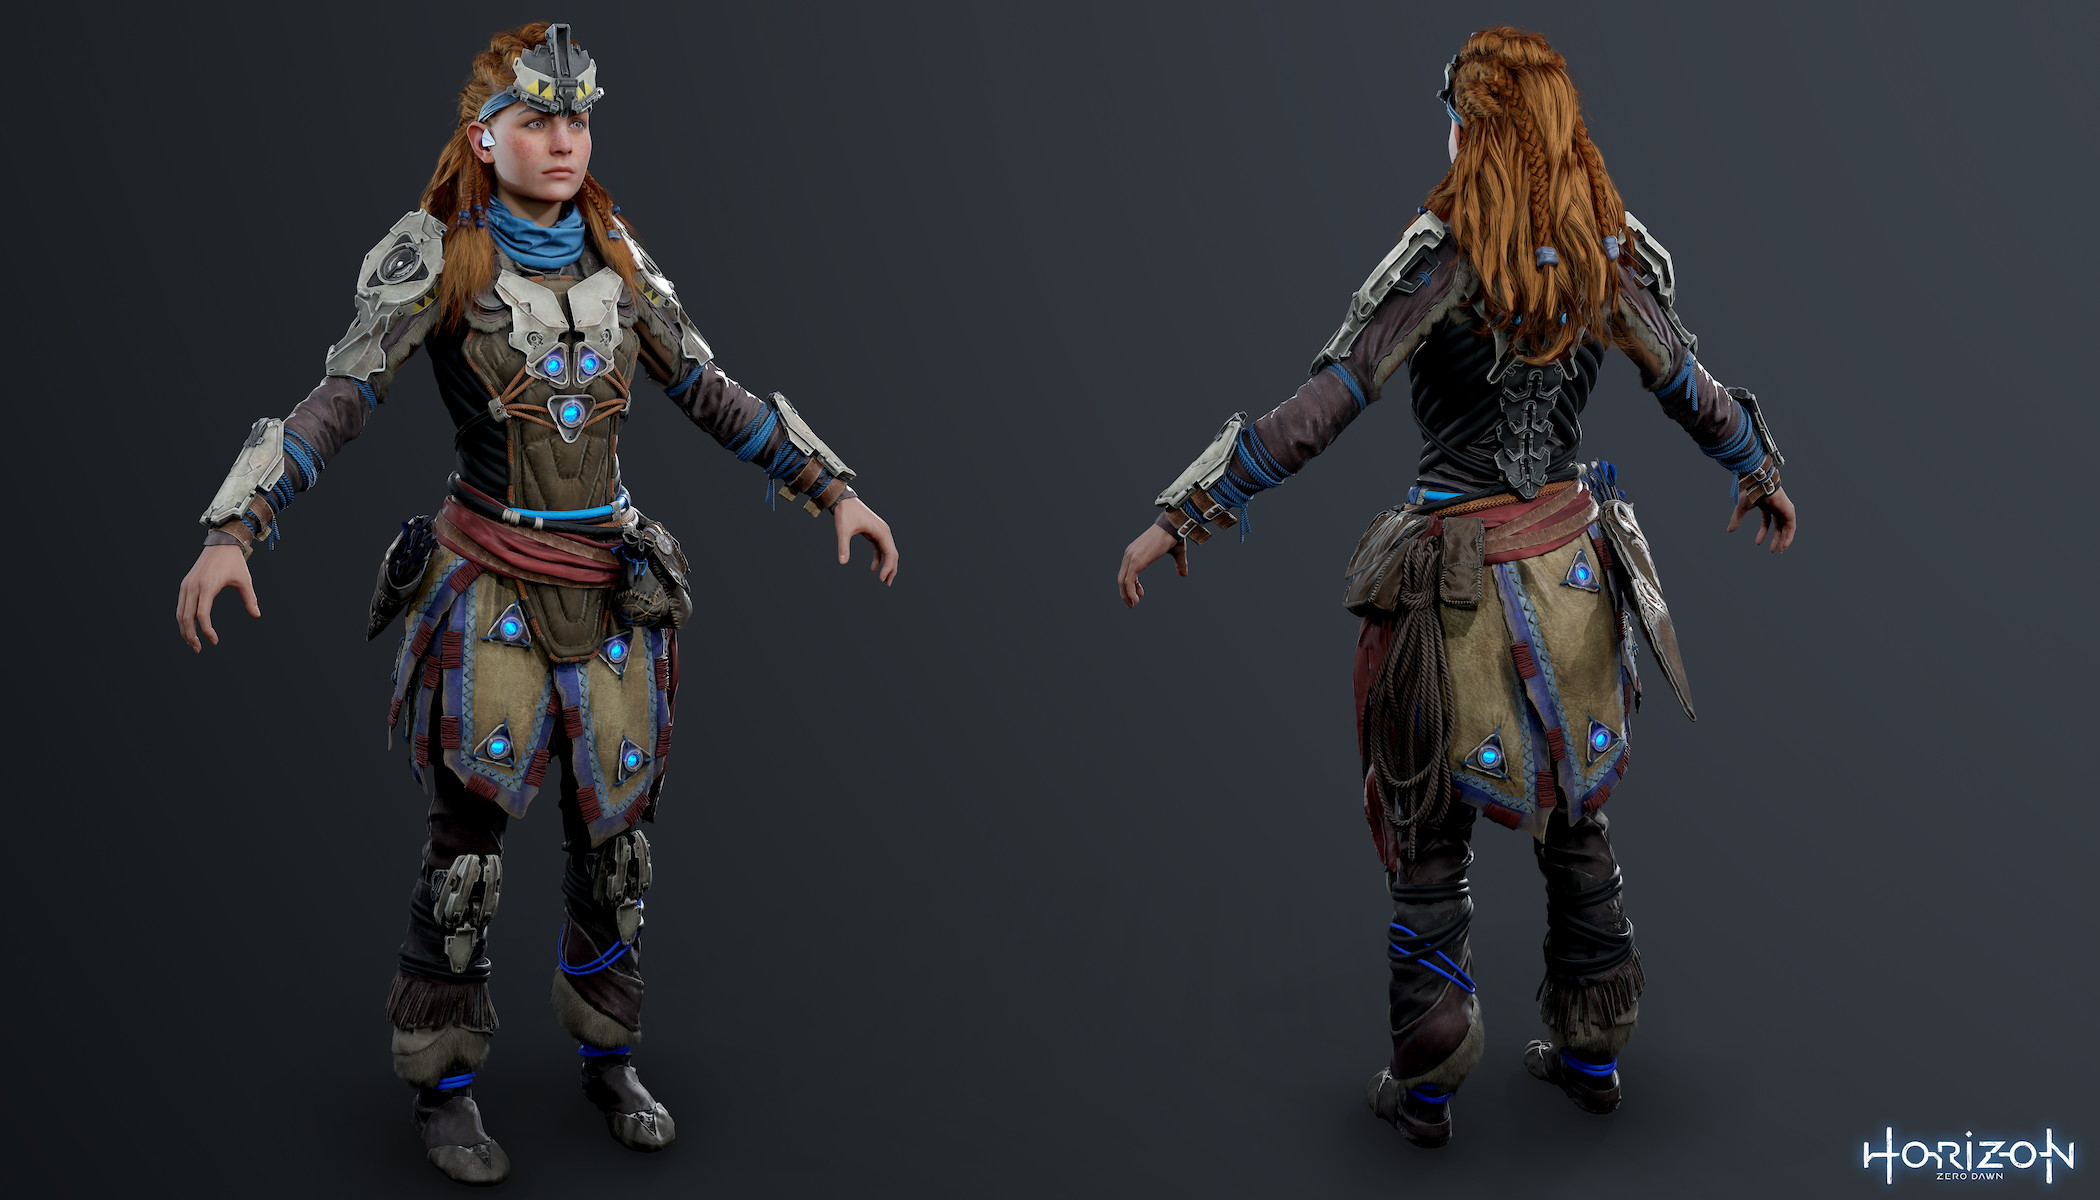
The rendered image of the shield weaver outfit I’ve used as a key source (Source: Crazy31139)
After some messing around to get textures to load I had my very own version of the Shield Weaver outfit loaded into Blender. Now I could check from all angles and zoom in when I wasn’t sure of things. As I’d imported the model to real world dimensions (this took a bit of trial and error) I could also measure things which will come in useful for ensuring the templates I’d make where to the right scale. Luckily Aloy is only very slightly shorter in height than I am so I didn’t need to re-scale anything.
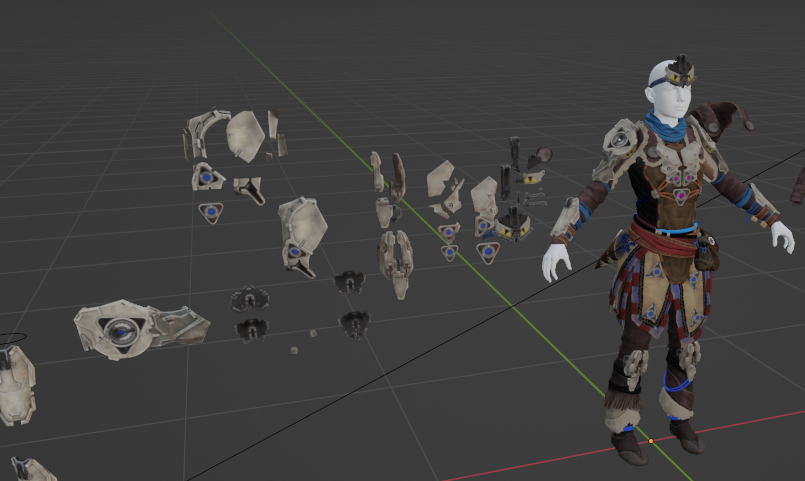
With the model imported I could start tearing it apart, extracting individual elements and manipulating them so they where flat on a plane. I started breaking components down even further, reducing them to shapes I could more easily make by layering foam. Having dimensions here was incredibly helpful as it allowed me to figure out what thicknesses of foam I’d need.
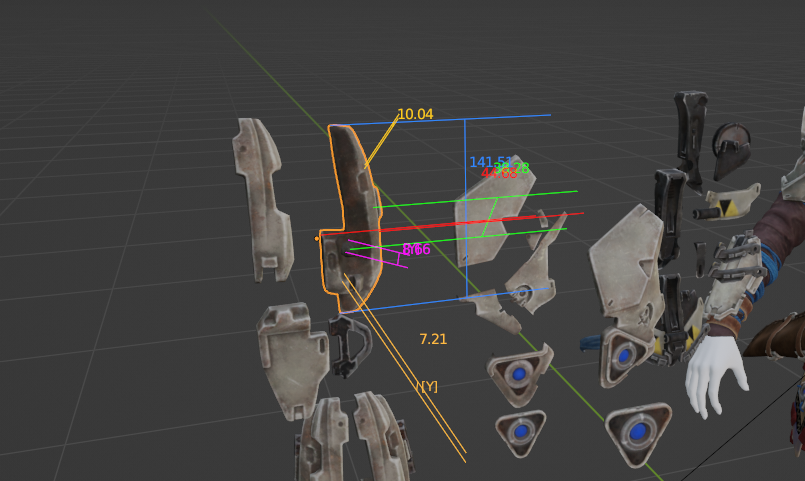
I settled on 5mm and 2mm foam with the view that no one is going to notice the tiny millimetre differences caused by rounding up or down. 3D printing would be more precise, but I don’t have a 3D printer and commercial prices are still much more than it costs for a couple of rolls of foam (especially if you have vouchers for Poly-Props).
Making templates for fabric
For the various pieces of clothing for the outfit I relied on the measurements from the model to give me a rough idea, and then iterated through templates to get the right sizing.
For the trousers I took apart a pair of old jeans, since I knew they fit well, and used them as the base. Using the reference images I had, I drew on the template where I’d need to cut it into sections to make the stitched together look. On all the templates I added 1.5cm extra allowance for sewing (though in some cases I did this as I was tracing onto fabric. Don’t do this, it’s far more work!).
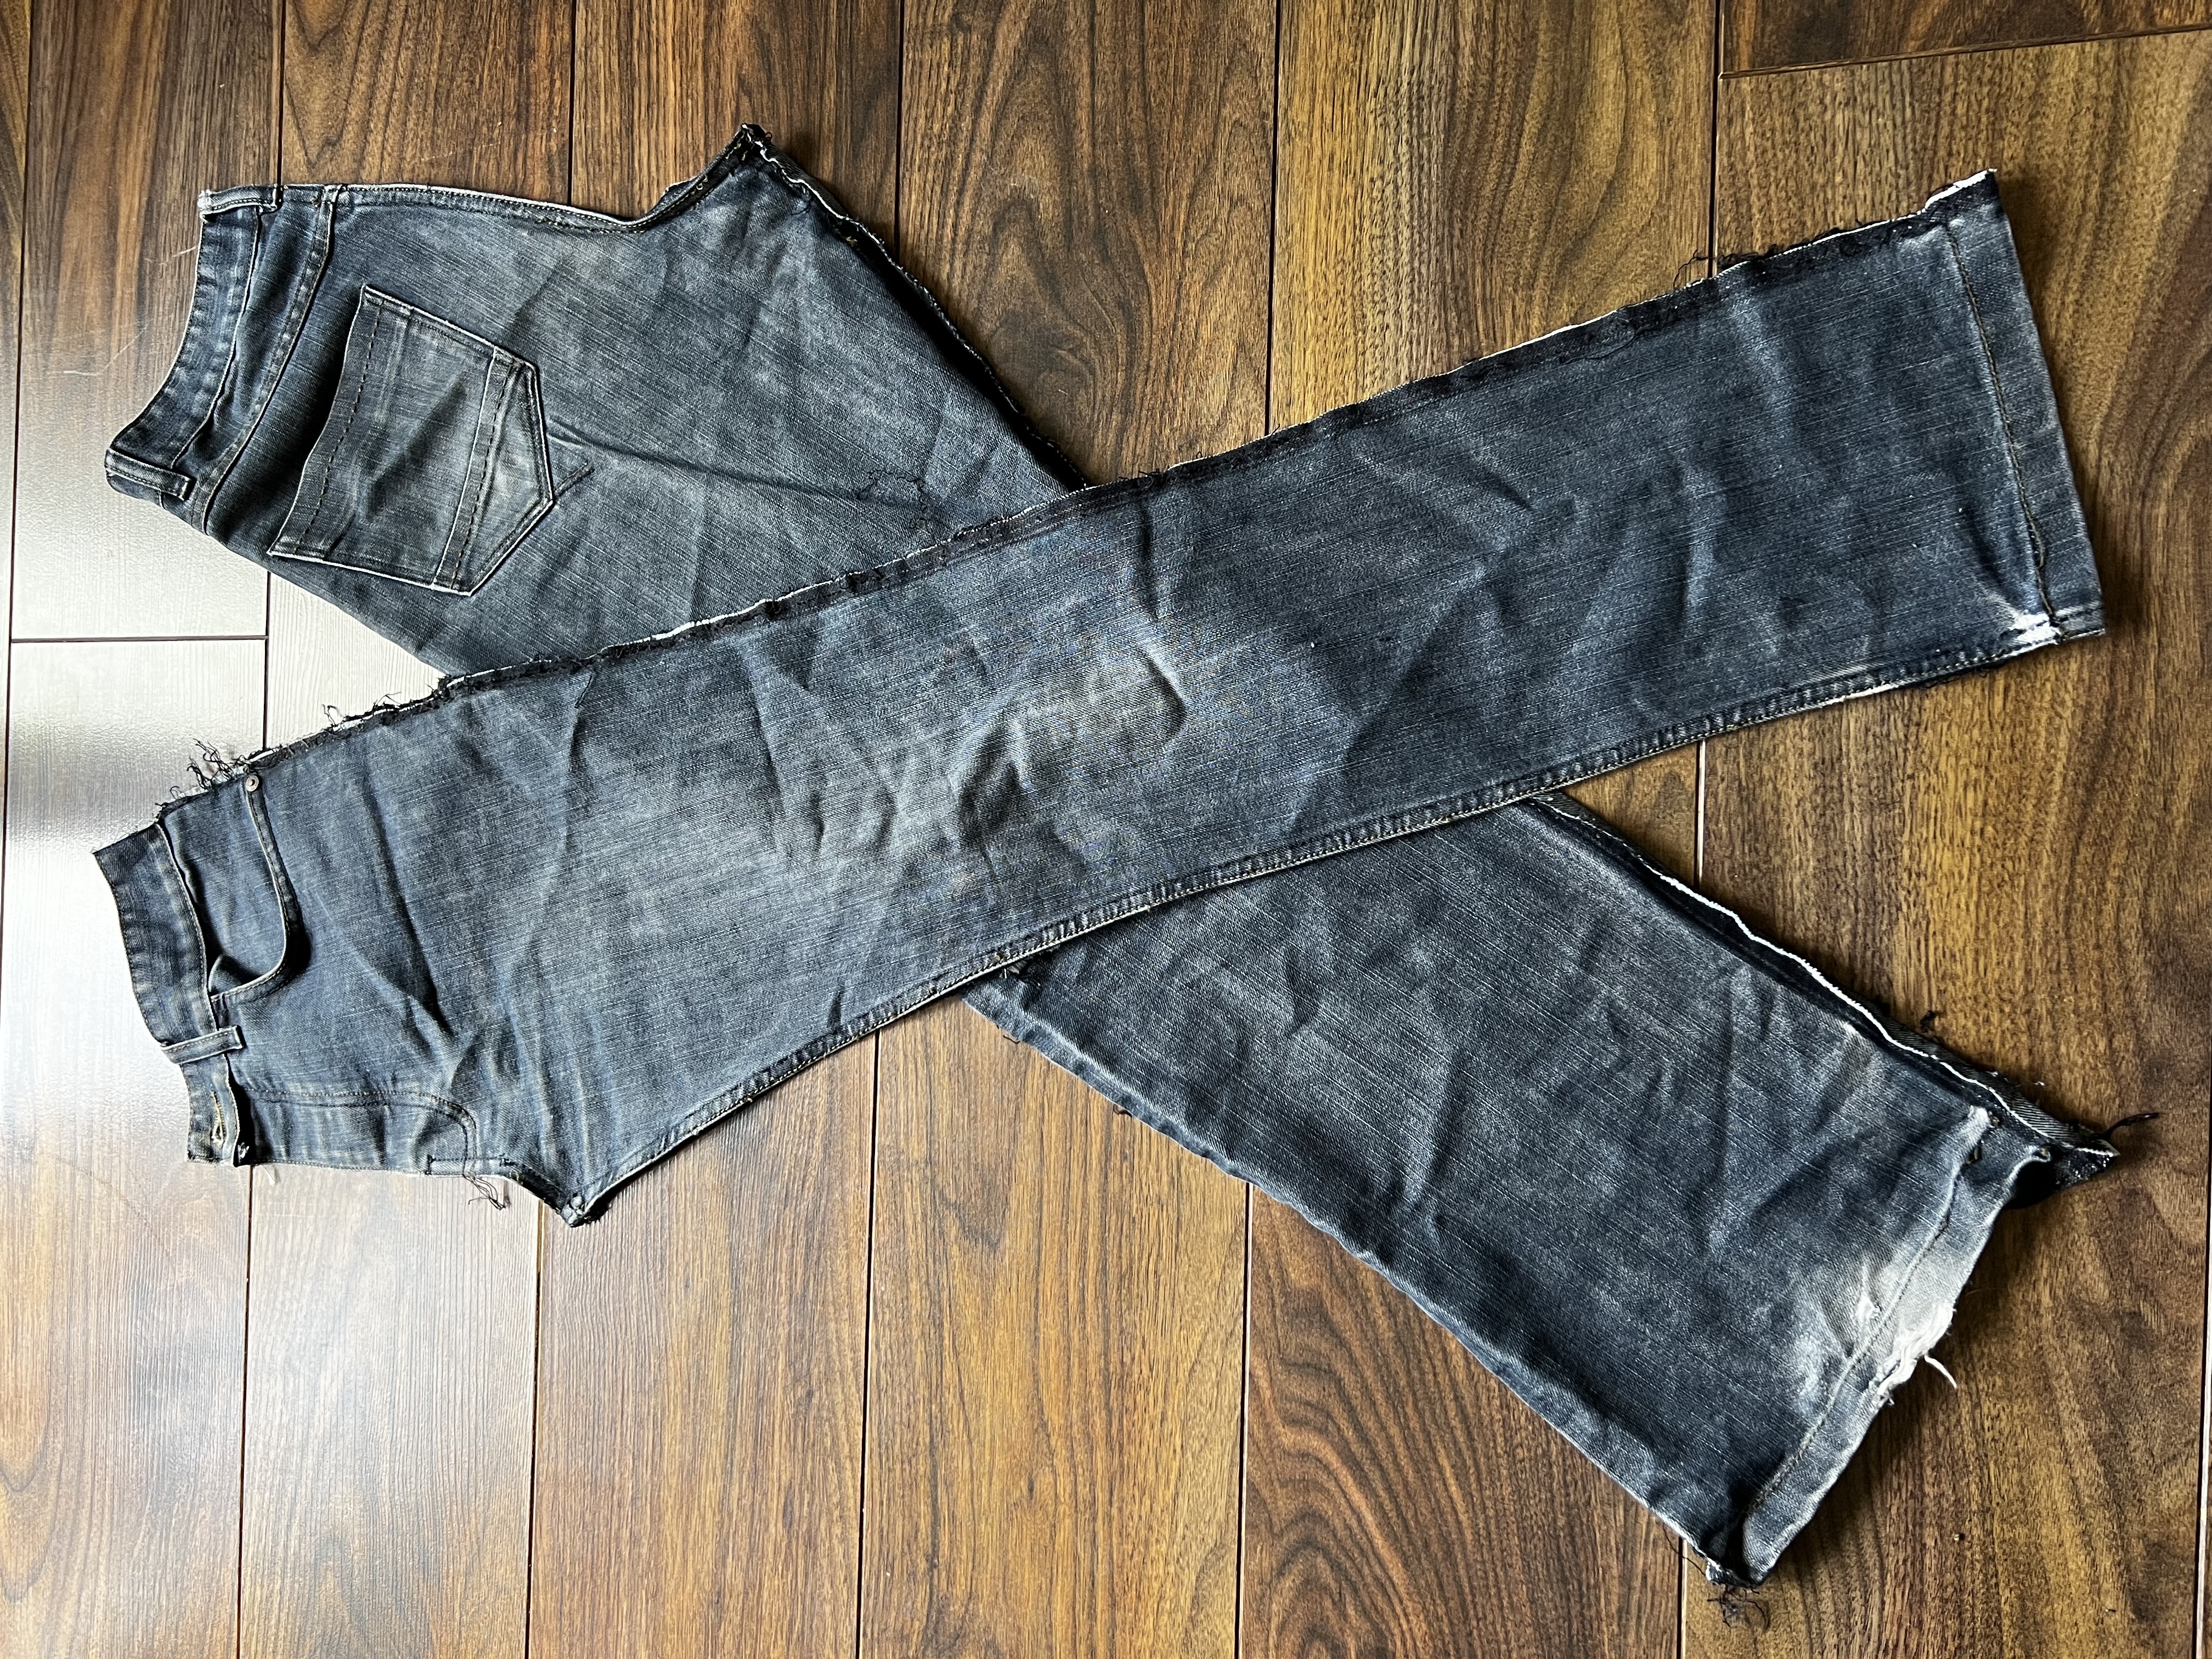
I seam ripped the jeans and used them to create paper templates, which I then drew lines on to separate into pieces.
For the arm covers I took the extra step of making a mockup as I wasn’t convinced that the measurements I had would work. I was correct, the dimensions where too small, so with that in mind I was able to go back and alter them so that they fit better.
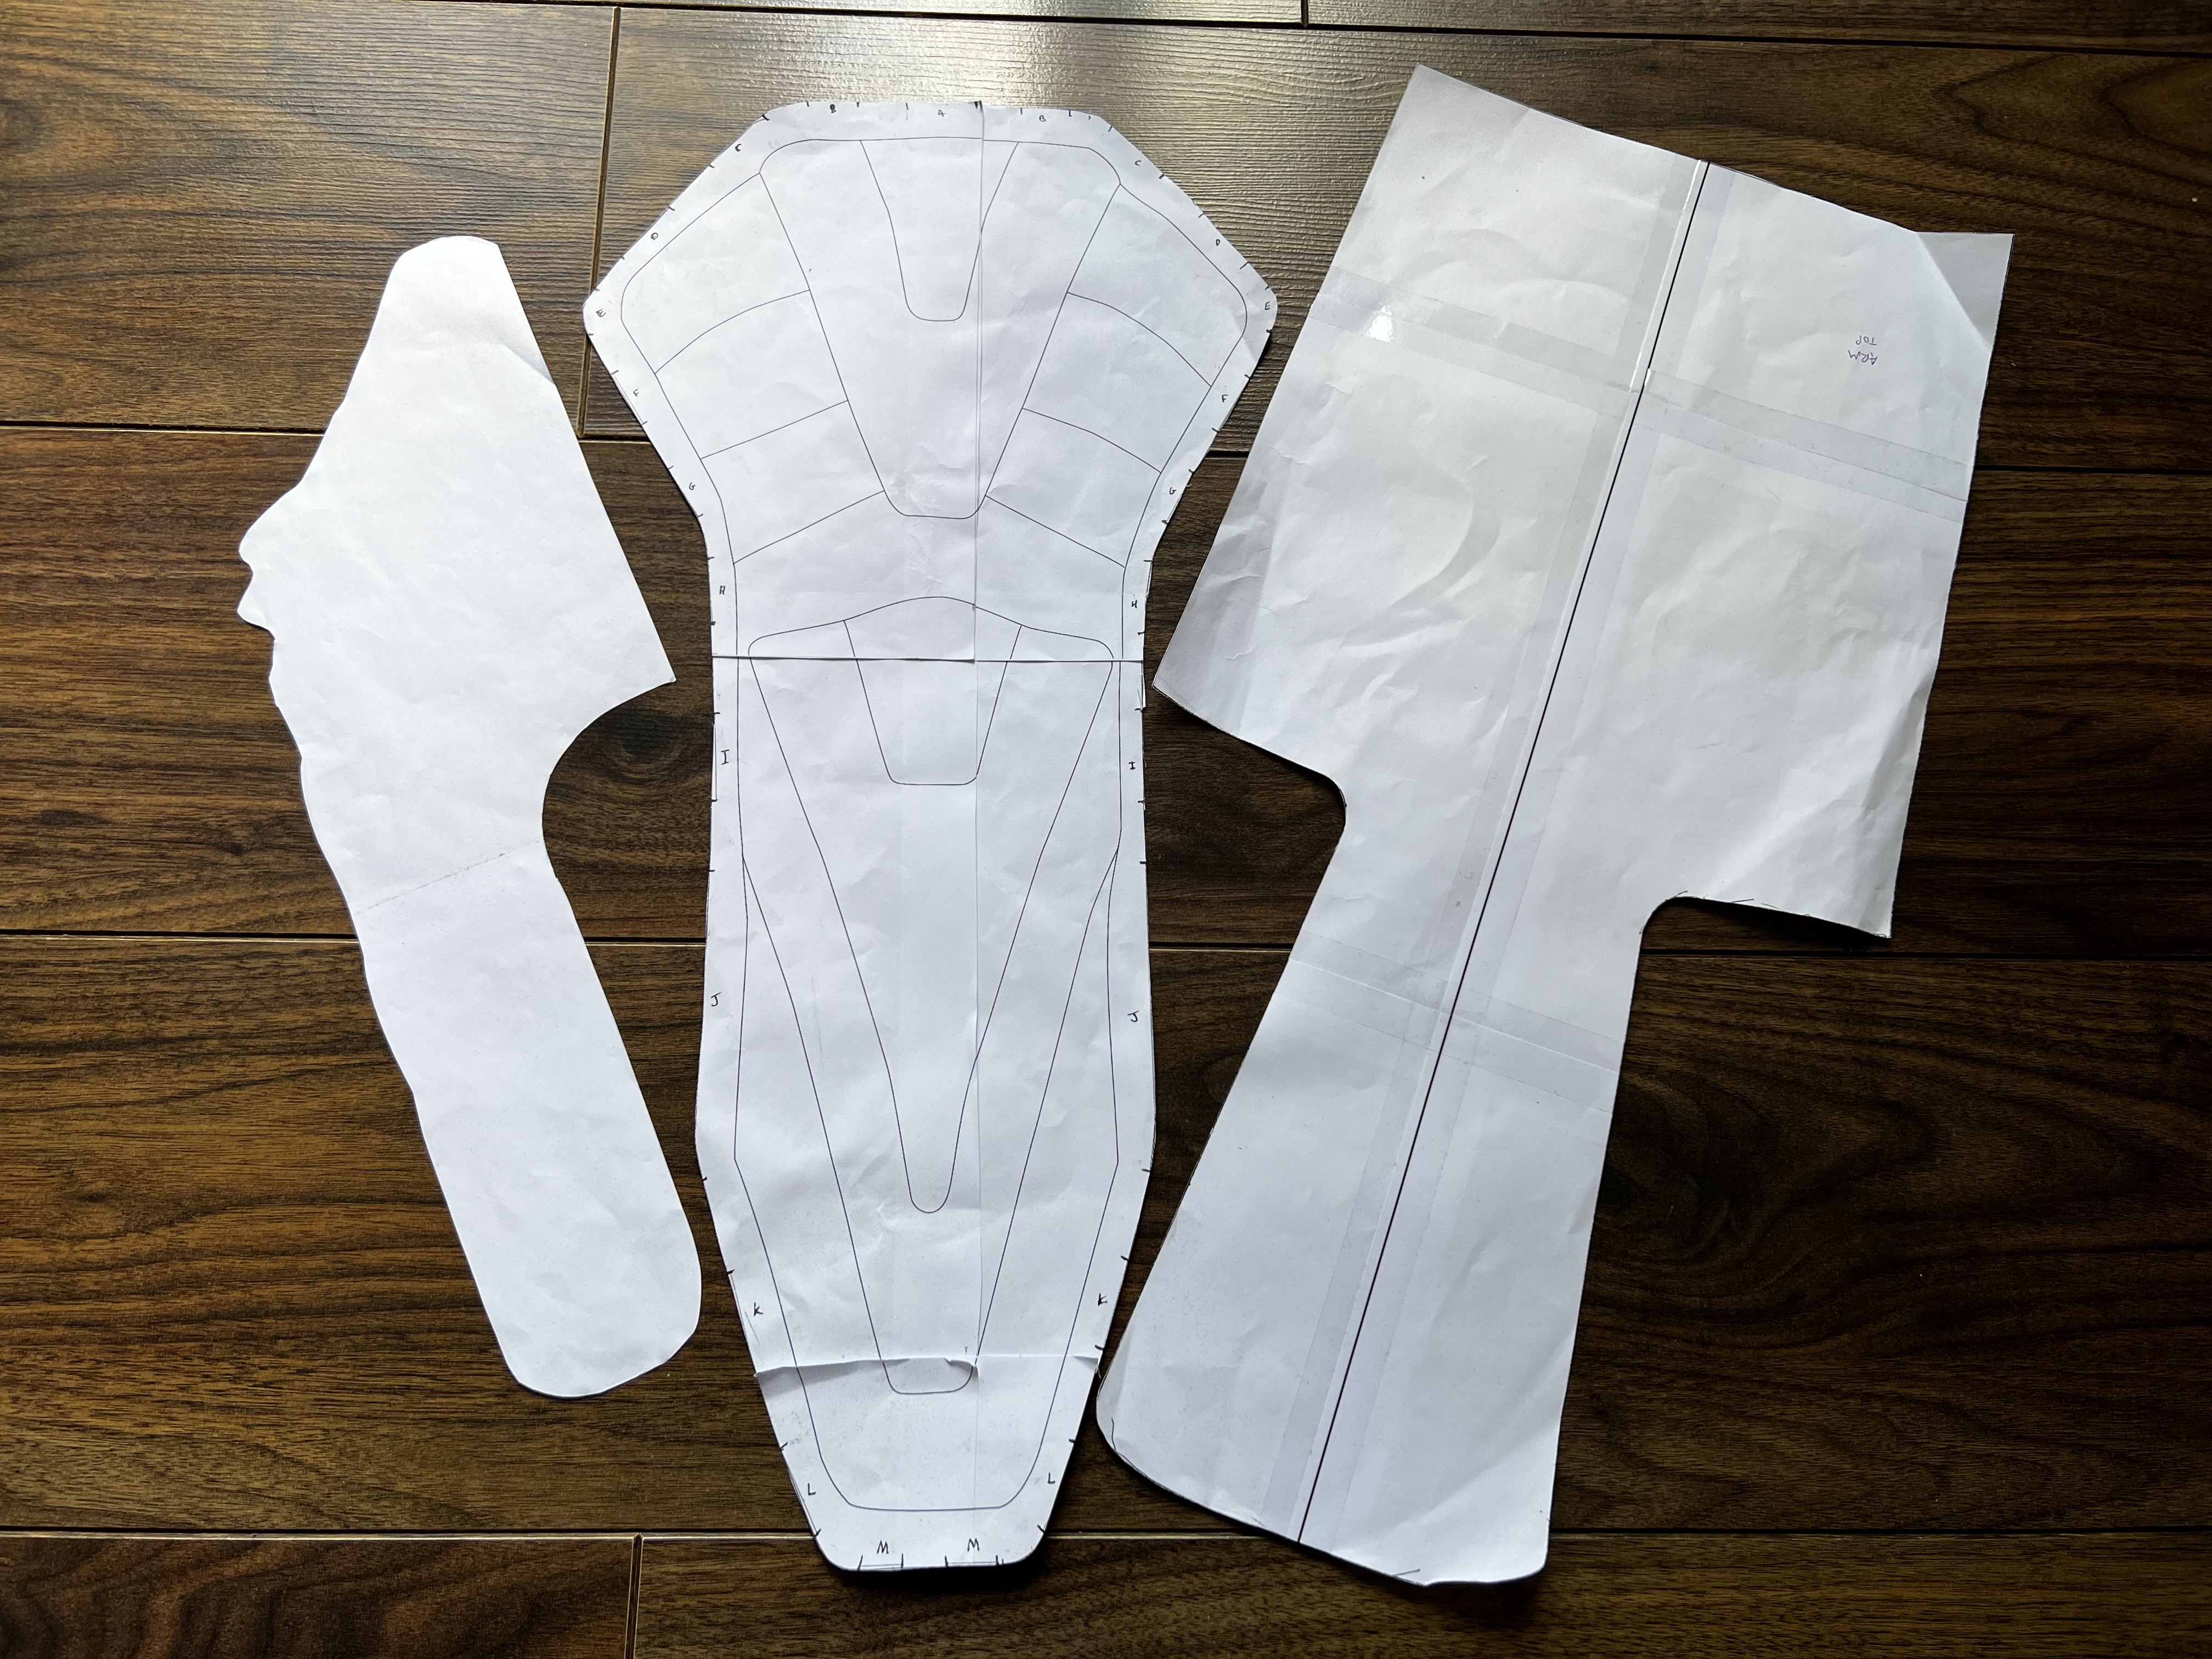
These are the templates (from left to right) for the furred neck piece, front padded bit and arm covers.
Making templates for armour
I took screenshots of the front, top and left or right (which ever had more detail) in blender from an orthographic view and imported them into Inkscape.
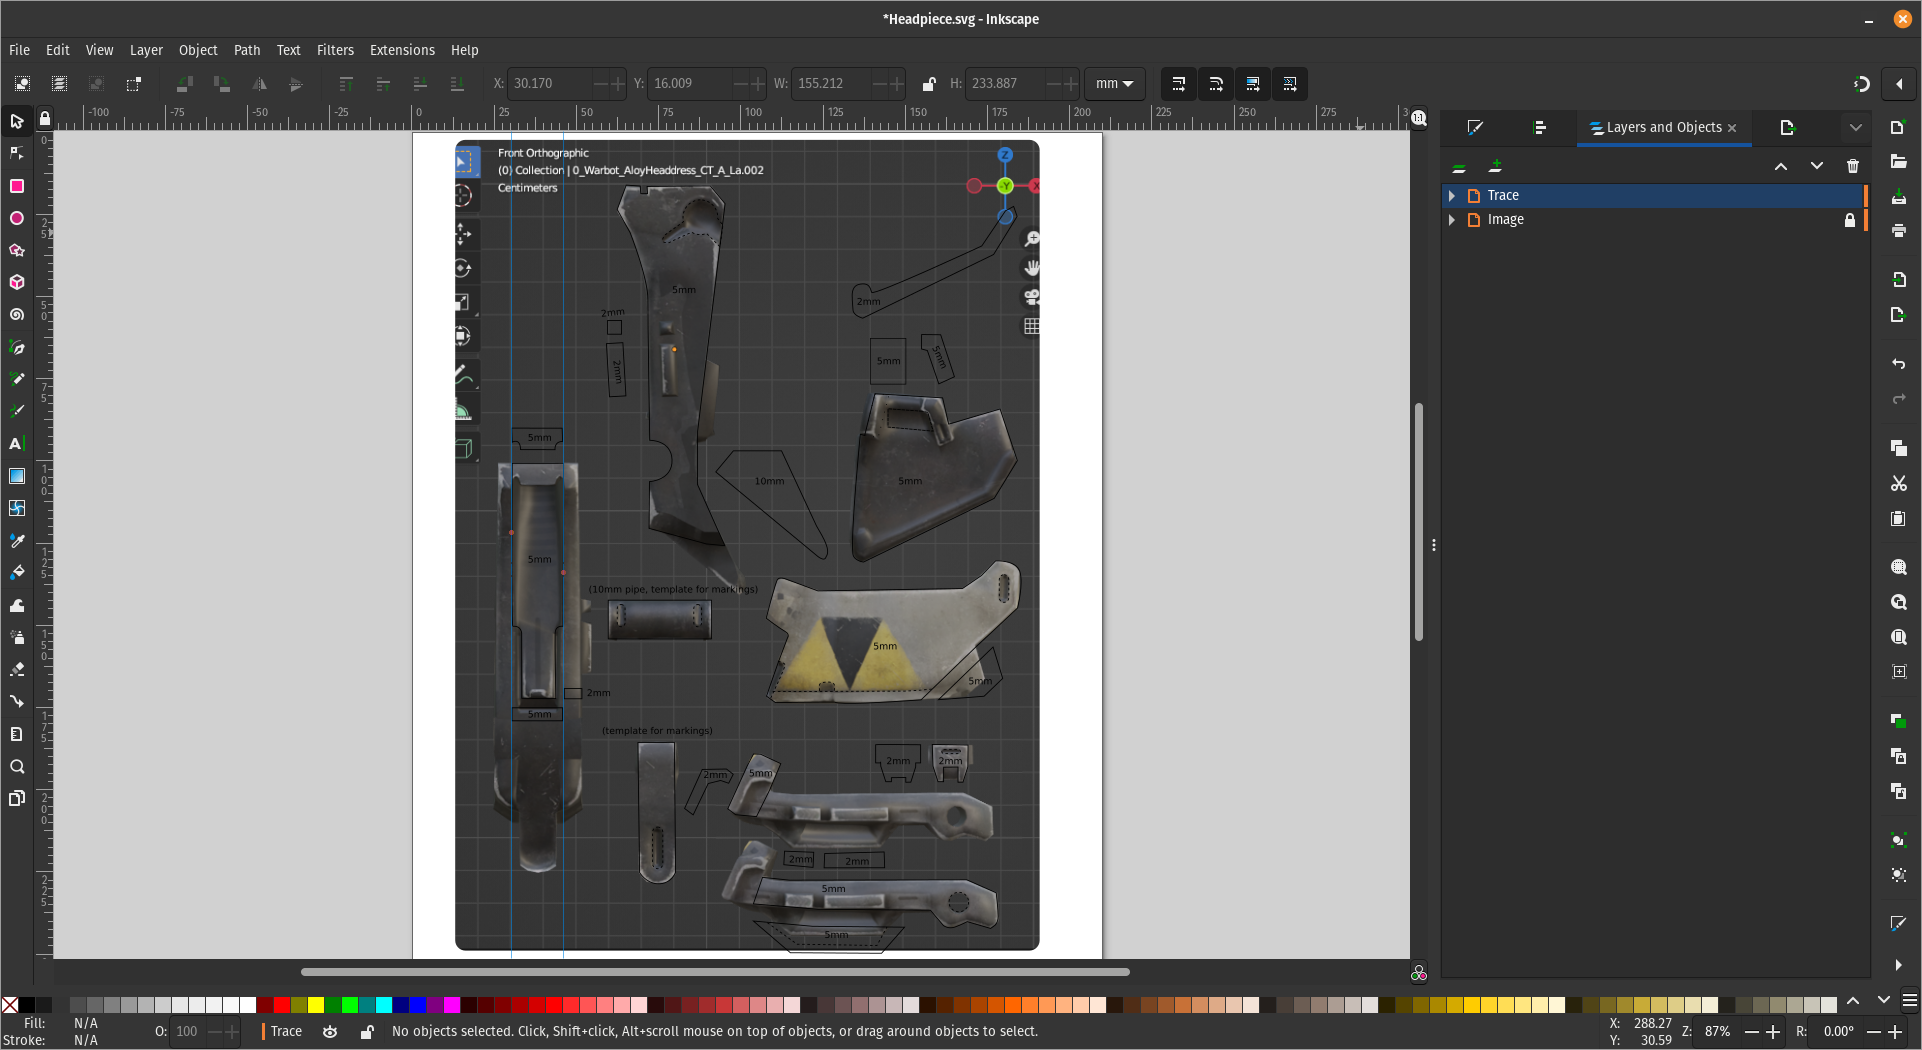
This is the headpiece in Inkscape with the images shown. I simply traced over it, marking indents and cut outs with dotted lines, then separating the parts to cut them out easily.
Then came the tedious tracing and tweaking of lines to make up a template. I learnt from my early template versions that separating the pieces made it much easier to cut out, though next time I’m going to keep an outline in light grey with a number to make assembling later much easier!
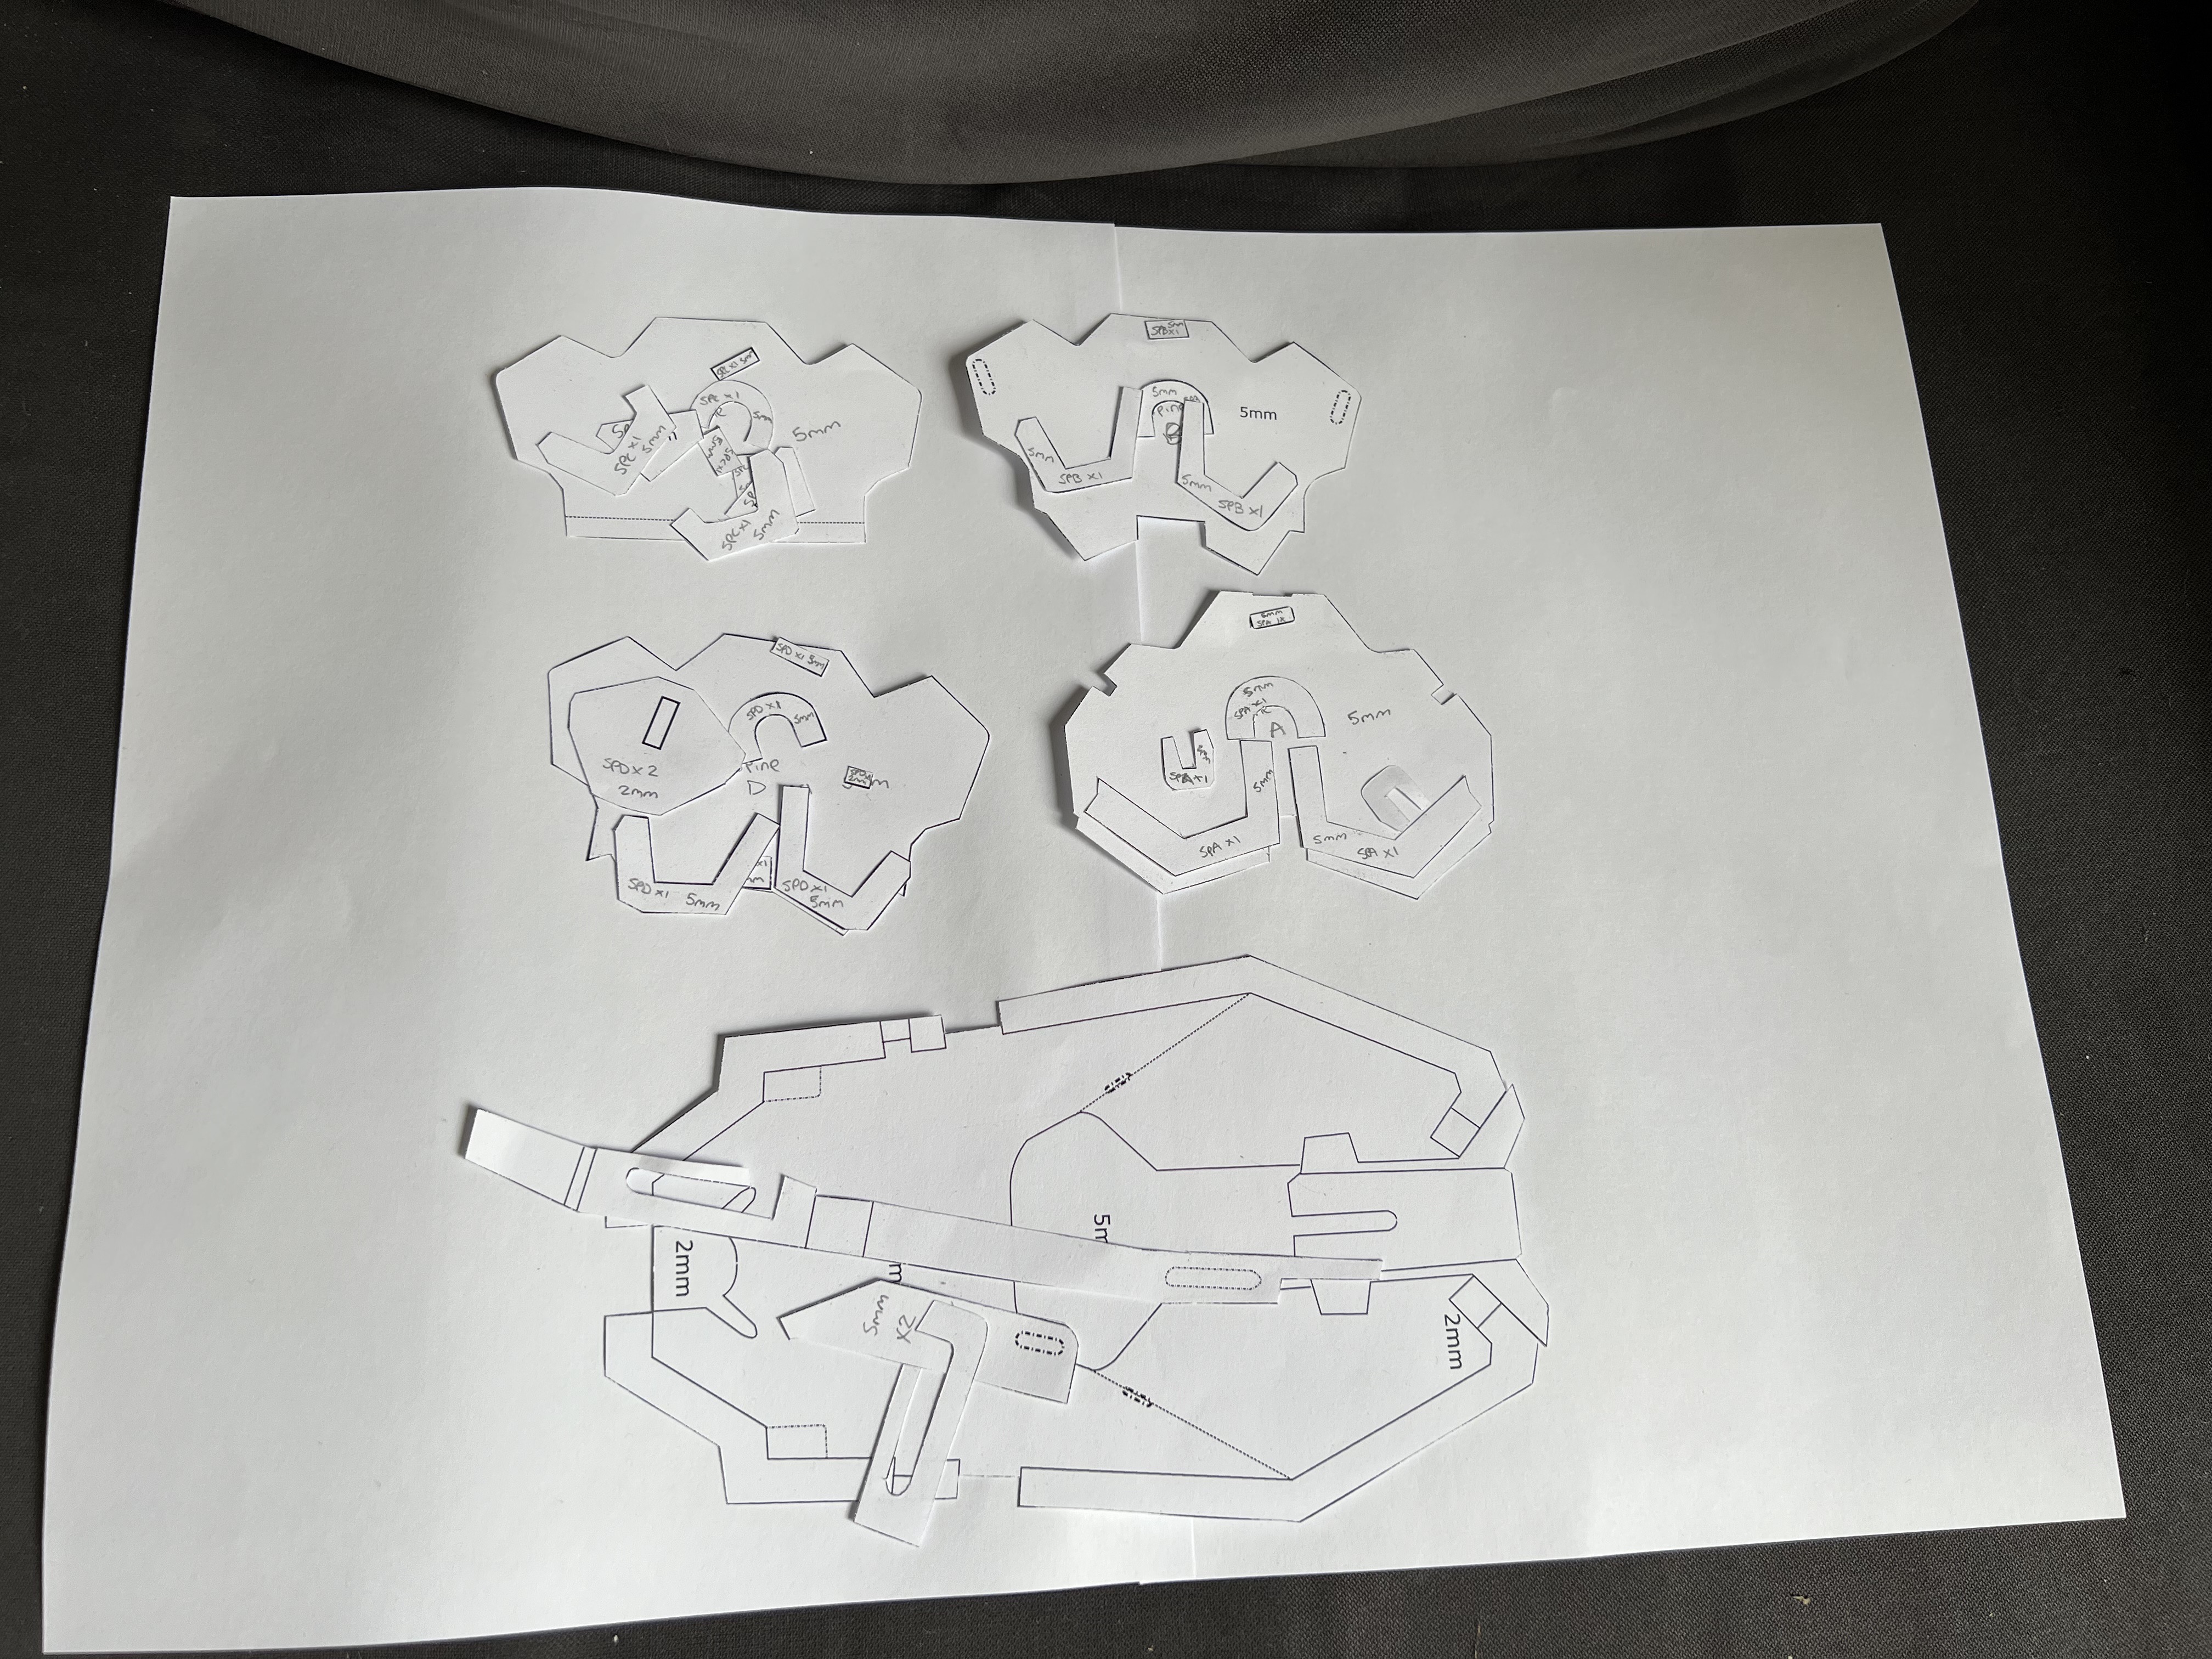
These are the armour templates for the gauntlets (first attempt - I redesigned it to better separate the pieces) and the spine plates.
A few of the templates were much bigger than an A4 piece of paper, so these needed to be printed across multiple sheets and assembled. This is much more of a pain than you’d think, with little support in most applications. Luckily a program called PosteRazor4 exists that can take an image and split it into multiple overlapping pages. You can then print the resulting PDF and assemble using tape and a lot of patience!
I recommend labelling your template pieces with the foam thickness, name of piece and how many you need as it will save so much time later.
Next steps
I actually started making some aspects as soon as I had the templates for them, rather than waiting to completely them all. This approach allows me to actually be doing something productive if I get stuck on a step, rather than going “oh well, guess I won’t do anything”. I’ve had that on cosplay’s before and it really slows down the process.
The next retrospective is going to cover the creation of the trousers and other fabric based items, then I’ll move onto the initial armour!
Time until Comic Con: 11 weeks 4 days!
-
https://www.deviantart.com/crazy31139/art/Horizon-Zero-Dawn-Aloy-Shield-Weaver-857963820 ↩︎
-
https://posterazor.sourceforge.io/, or install via package manager if you’re on Linux. I had to update various libraries and code then recompile myself to get it to work on the latest version of MacOS. I should my version online at some point! ↩︎
-
 Instagram:
@smojcosplay
Instagram:
@smojcosplay
-
 Tumblr:
smojcosplay
Tumblr:
smojcosplay